Craft is a flexible, user-friendly CMS, which allows you to be creative without having to worry about the technicalities. It’s also a content management system that’s immensely flexible and that offers you various solutions for getting your website up and running.
This CMS is intended for blogs, magazines, agency websites, news sites, or any other digital product. Craft has been designed in an open source way, so it can be utilized easily by developers who want to customize the existing design of their website and by designers who want to make use of its built-in graphics options.
Craft supports a wide variety of PHP-based languages such as PHP, HTML, or even Perl. Craft is also very simple to use, which means that you will be able to install and deploy your website right away. In addition, Craft features a drag-and-drop interface with over 1000 pre-built templates you can use to create professional websites.
Craft has more than 300 user modules available for download from the official Craft website. These modules allow you to customize the look and feel of your website in many different ways.
Craft was created by two Norwegian developers, who produced a web magazine for blind children, and wanted to create a better way of managing their website. They began developing the first version of Craft in 2007. The first public release, version 0.1, was in December 2008.
Your website is suffering from an identity crisis. It’s not a website anymore; it’s a disorganized collection of files and folders. You need something that makes it easy to edit any page, post, or any site-wide configuration. Something that tells you at a glance what’s been changed since the last time you looked at the site. Something with a user-friendly interface and drag and drop functionality. Something with SEO built right in. Something…
…And most importantly, you need a damn good content management system. One that lets you make site-wide changes with just a couple of clicks. And gives you the ability to crank out unique, outstanding content at the speed of light.
Craft is the CMS that fits the bill. It was designed from the ground up to be as easy to use as possible. It looks great, it feels great, and it runs as fast as lightning. Best of all, it’s 100% free!
In this guide, you will learn how to install Craft CMS on your Ubuntu 20.04 server. You will learn how to install the LAMP stack and how to configure Apache and MariaDB, so you can install the Craft CMS.
Prerequisites
In order to continue with the next step, you need to have:
- A Ubuntu Linux server with at least 4 GB of RAM.
- A domain name pointing to your server.
- An internet connection.
- A non-root user with sudo privileges
Updating your Ubuntu server
First, if you have not updated your Ubuntu server in a while you need to run the following command to update your server. This command will update all base packages, package dependencies, and repositories for your server.
sudo apt update -y
Installing Apache
The first thing you need to do is install Apache. The Apache HTTP Server is a powerful, modular, and secure web server and is highly regarded in the industry. The package that we will be installing is Apache2, which has the ability to run multiple virtual hosts simultaneously and supports a large number of languages.
Run the following command to install Apache on your server. The apache2-utils package is installed along with apache2. It contains several helpful utilities that are used to set up and check your Apache configuration.
sudo apt install apache2 apache2-utils -y
Once the installation is complete, you can start the Apache service.
sudo systemctl start apache2
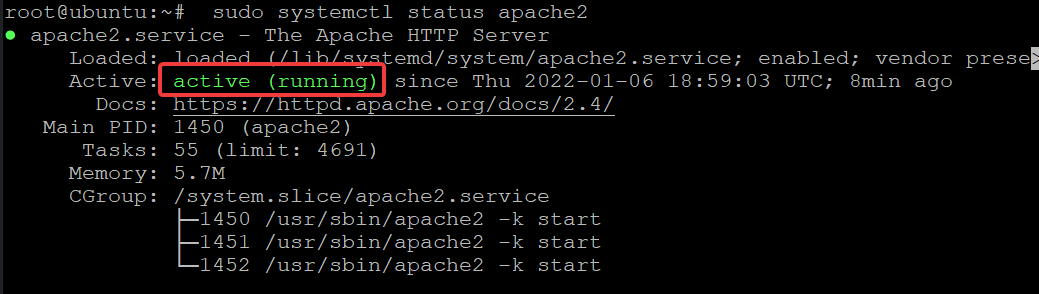
To check it is running, run the following command.
sudo systemctl status apache2
You will get the following output.
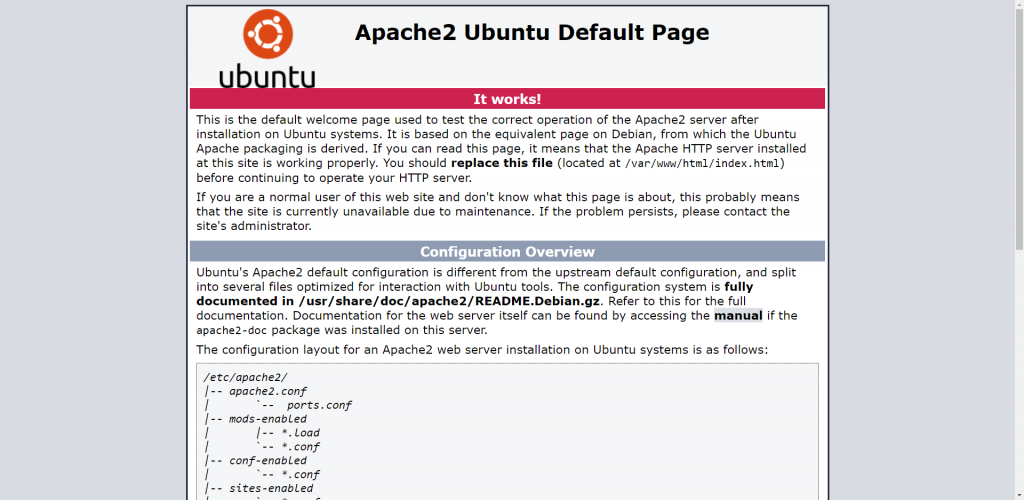
You can really check the health of your Apache installation by requesting the apache default page. Get the IP address of your server using whatever method you prefer.
ip -a
Now, open your favorite browser and type the IP address of your server. This will lead to the default Apache page.
URL: http:// <your_server_ip>
You should see the following page. If you see a page with a black or blank page, that means Apache is not running. You should re-check your Apache installation now that the installation of Apache is completed, let’s move on to installing the MariaDB database server.
Installing MariaDB
After you install the Apache server, you need to install the MariaDB database server. It is a high-performance and secure replacement for MySQL and is used by millions of websites worldwide. It has a lot of features like automatic crash recovery, replication, and other advanced features to make MariaDB easy to use for developers.
The recommended package that we will be installing is mariadb-server, mariadb-client and mariadb-server. mariadb-server is the main MariaDB package, which installs MariaDB server along with other items needed for its proper functioning. mariadb-client provides the mysql command-line tool, which is a widely used database management tool.
Run the following command to install MariaDB on your server.
sudo apt install mariadb-server mariadb-client -y
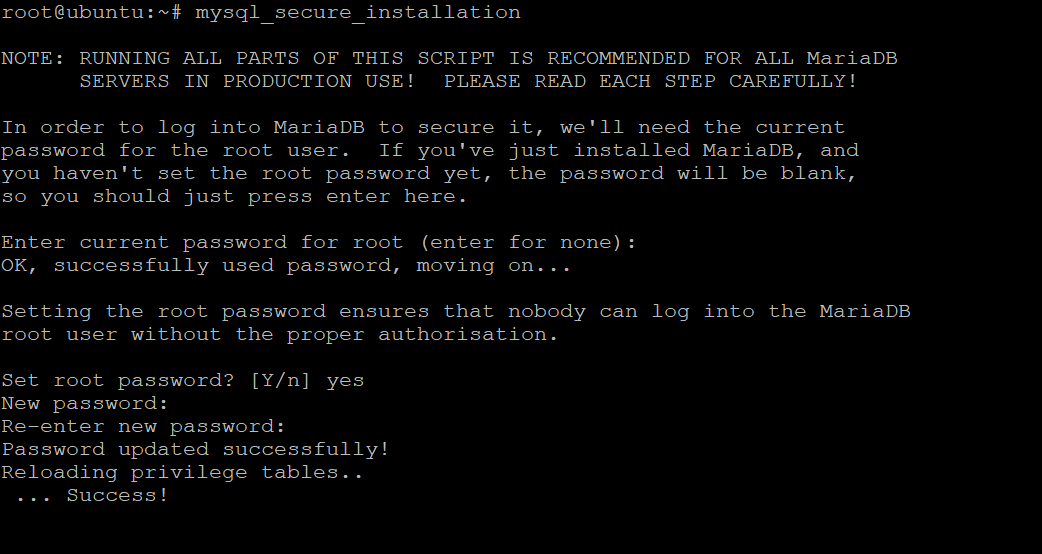
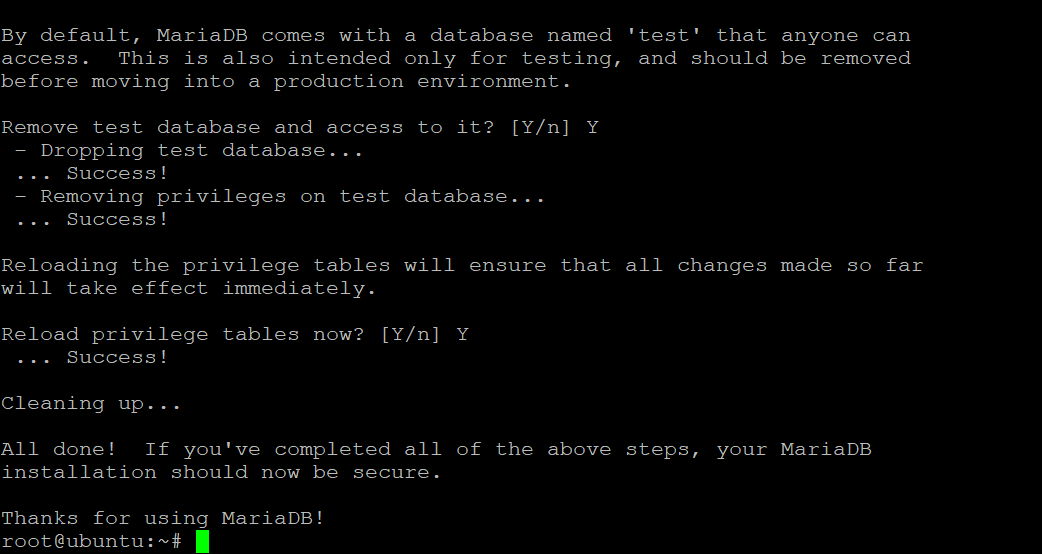
Once the installation is complete, run the mysql_secure_installation script to secure your MariaDB instance. mysql_secure_installation is a script that checks if all the databases are secure. It will also update your root password and remove the tests table if it exists in your database.
mysql_secure_installation
You will be asked to enter the current password for the root user. Just press Enter to continue.
Now, this will prompt you for a new password for the root user, just enter a strong password here and press enter.
For the rest of the questions, just enter Yes and press Enter.
Run the command below to start your MariaDB server.
sudo systemctl start mariadb
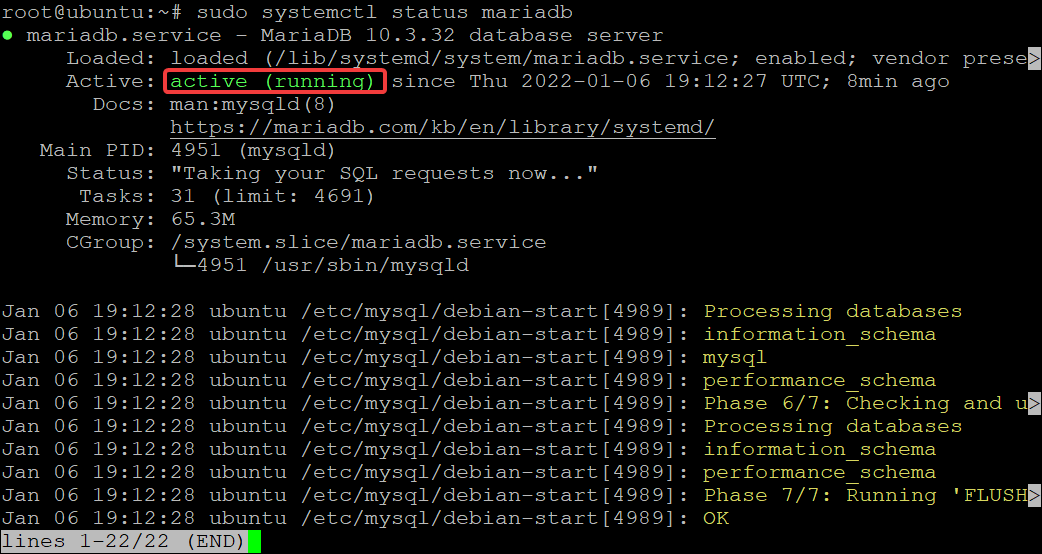
You can check the status of your MariaDB server with the following command.
sudo systemctl status mariadb
You will get the following output.
Installing PHP
The next thing you need to install is PHP. PHP is a language and the most widely used server-side scripting language on the Web. It is used for many tasks such as content management, e-commerce, and creating complete websites.
In order to use Craft CMS you will need to have PHP 5.6+ installed on your server. Run the following command to install PHP 7.4 and its modules on your server.
sudo apt install php7.4 libapache2-mod-php7.4 php7.4-json php7.4-common -y
sudo apt install php7.4-gmp php7.4-curl php7.4-mysql php7.4-opcache php7.4-intl -y
sudo apt install php7.4-fpm php7.4-xmlrpc php7.4-bcmath php7.4-zip -y
sudo apt install php7.4-imagick php7.4-mbstring php7.4-gd -y
sudo apt install php7.4-cli php7.4-xml php7.4-zip wget unzip curl -y
Once the installation is complete, run the following command to check if PHP 7.4 is installed correctly.
php -v
You will get the following output.

Now before you can continue to install Craft CMS, you need to set some variables in the PHP configuration file.
Run the command below to open the PHP configuration file.
sudo nano /etc/php/7.4/apache2/php.ini
Find the following lines and replace values accordingly. Save and exit the file when you are done.
Before


After


We need to restart the PHP service so that changes can be applied.
sudo systemctl restart apache2
Creating a Database for Craft CMS
Now the next thing we need to do is create a database for Craft CMS to use. This database will store all of your content and information.
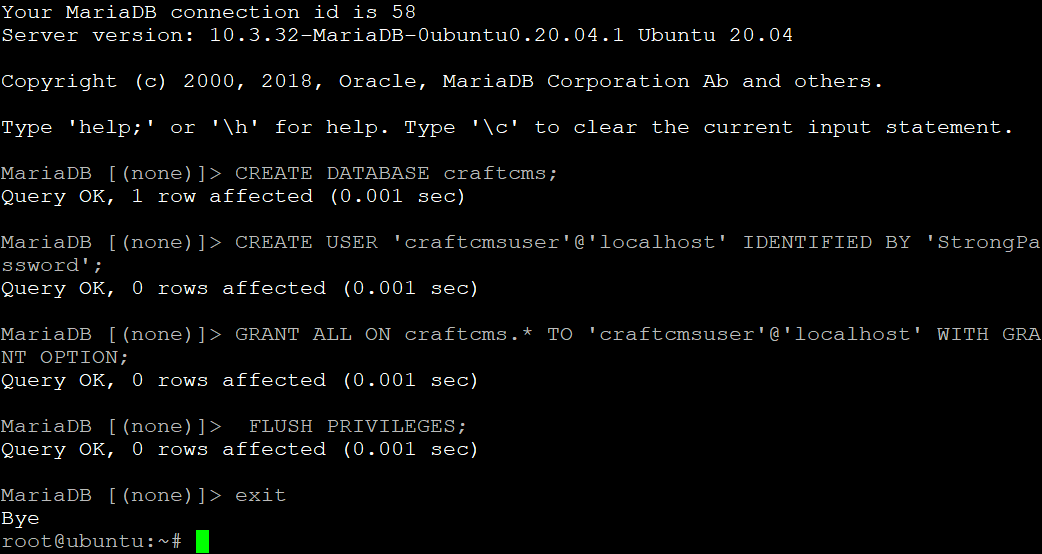
Run the command below to log in to the MariaDB shell. This command will prompt you for the MariaDB root user password, enter it, and hit Enter.
sudo mysql -u root -p
Run the command below to create a database named craftcms. You can choose another name if you like, but you should choose a name that you can easily remember. Remember to always put the ; at the end of each statement. MariaDB won’t execute a statement unless it ends with a semicolon.
CREATE DATABASE craftcms;
Run the command below to create a user for Craft CMS to use and assign permissions. This user will be used by Craft CMS when accessing the database. Note that the password is specific to your server, so make sure you choose a strong and secure password.
CREATE USER 'craftcmsuser'@'localhost' IDENTIFIED BY 'StrongPassword';
Now that the user has been created we need to assign permissions. This allows a user to access the database and perform various actions, like inserting or retrieving data.
GRANT ALL ON craftcms.* TO 'craftcmsuser'@'localhost' WITH GRANT OPTION;
Run the command below to flush the current privileges to the database. Craft CMS will have access to the database and be able to use it.
FLUSH PRIVILEGES;
Type exit and press Enter to exit the shell.
exit
Installing Craft CMS
Now that the LAMP stack is installed, you can install Craft CMS. There are a few different ways to do this, but we will use the PHP composer to perform the installation. This is a simple and easy way to download and install Craft CMS.
Composer is a dependency manager for PHP. It allows you to declare the libraries your project needs and it will manage (install/update/remove) them for you.
This allows you to easily manage your project dependencies without conflicting libraries and also makes managing them much easier.
Run the command below to download Composer to your server.
curl -sS https://getcomposer.org/installer -o composer-setup.php
Run the command below to install Composer on your server.
sudo php composer-setup.php --install-dir=/usr/local/bin --filename=composer
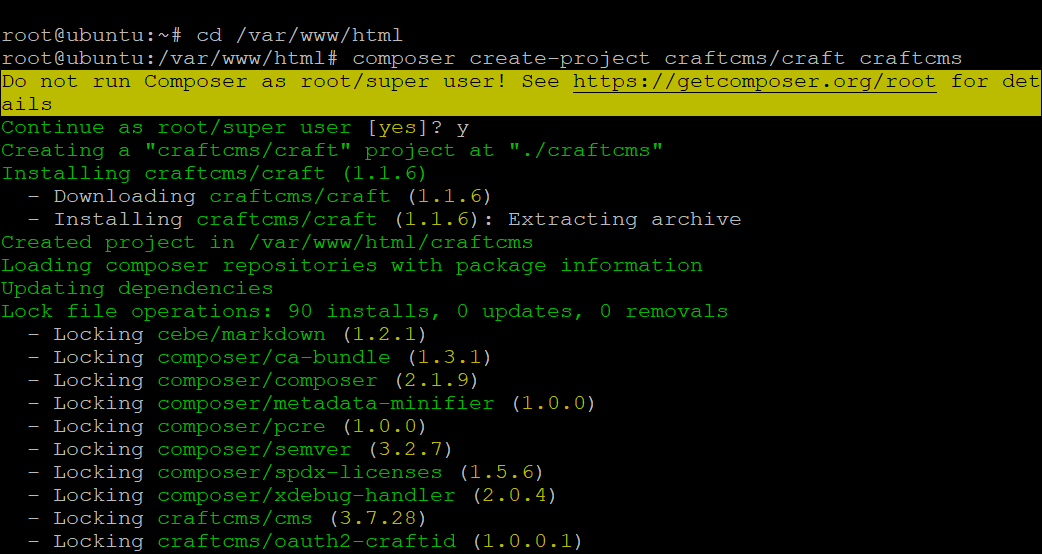
Now, navigate to your webroot directory and run the following command to create a Craft installation script. Enter your database details when prompted.
cd /var/www/html && composer create-project craftcms/craft craftcms
Once the script has been generated, run the commands below to generate a security key. Craft CMS will use this key to encrypt your sensitive data and keep it secure.
cd craftcms && php craft setup/security-key

Run the following commands to set the proper ownership for your files.
sudo chown -R www-data:www-data /var/www/html/craftcms && sudo chmod -R 755 /var/www/html/craftcms
Creating Apache Virtual Host
We will need to create a virtual host file for our website so that it knows where to direct requests to.
Run the command below to create a virtual host file for your website named craftcms.conf.
sudo nano /etc/apache2/sites-available/craftcms.conf
Populate the craftcms.conf file with the following lines.
<VirtualHost *:80>
  ServerAdmin admin@example.com
  DocumentRoot /var/www/html/craftcms/web
  ServerName example.com
  ServerAlias www.example.com

<Directory /var/www/html/craftcms/web/>
  Options FollowSymlinks
  AllowOverride All
  Require all granted
</Directory>

ErrorLog ${APACHE_LOG_DIR}/error.log
CustomLog ${APACHE_LOG_DIR}/access.log combined

<Directory /var/www/html/craftcms/web/>
  RewriteEngine on
  RewriteBase /
  RewriteCond %{REQUEST_FILENAME} !-f
  RewriteRule ^(.*) index.php [PT,L]
</Directory>

</VirtualHost>
Replace ServerAdmin, ServerName, and ServerAlias with your own information.The DocumentRoot tells Apache where to find your website files. You can put it anywhere you want but it’s recommended to put it under the web directory. The Directory line tells Apache what permissions should be set for files and directories in the specified directory.
Now that the virtual host file has been created, we need to enable it. This allows Apache to read from it and use it whenever Apache starts.
Run the following commands to disable the default virtual host and enable the newly created virtual host.
sudo a2dissite 000-default.conf && sudo a2ensite craftcms.conf
Now that the virtual host has been enabled, we can enable the rewrite rules. rewrite module is a collection of rules that redirects a request to another location, like an internal one. Craft CMS will use it to rewrite your requests and serve the content back to you.
Run the command below to enable the rewrite rules for your website.
sudo a2enmod rewrite
Finally, we need to restart Apache. This will make the new rules active for your website.
sudo systemctl restart apache2
Accessing Craft CMS
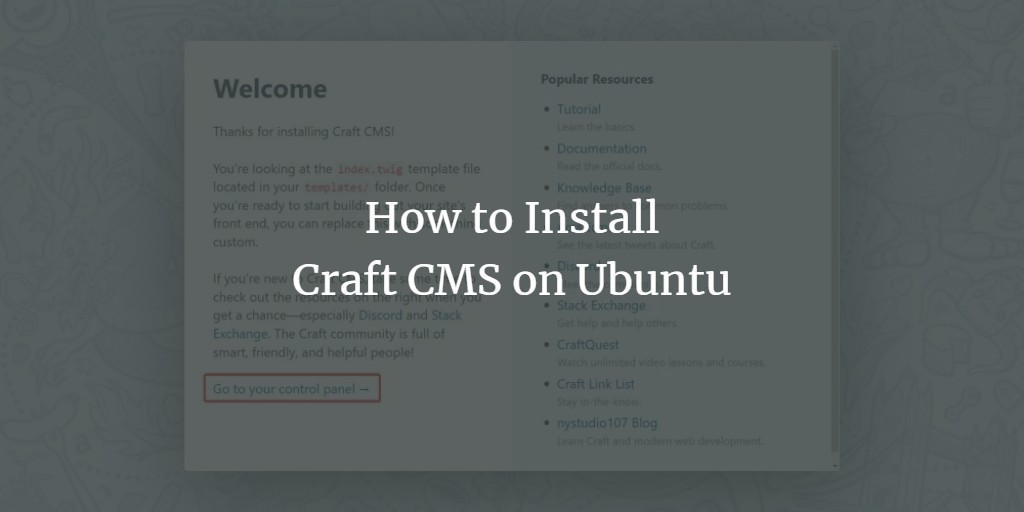
Now that everything is set up and running, you can visit your website. Open your browser and visit http://example.com or http://server-ip to view your Craft CMS website.
You will see the Craft CMS welcome page. Click on Go to your control panel.

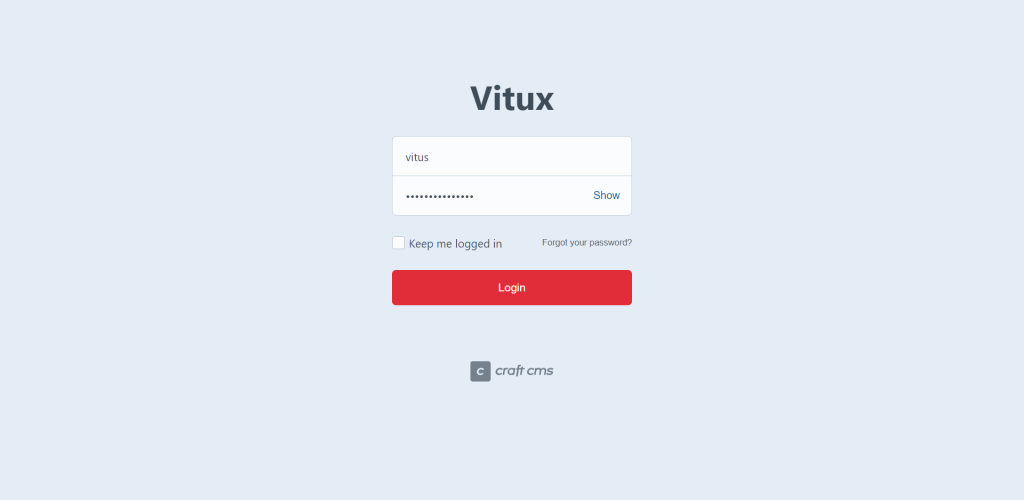
You will see the Craft CMS login page. Log in using the username and password you chose during setup.
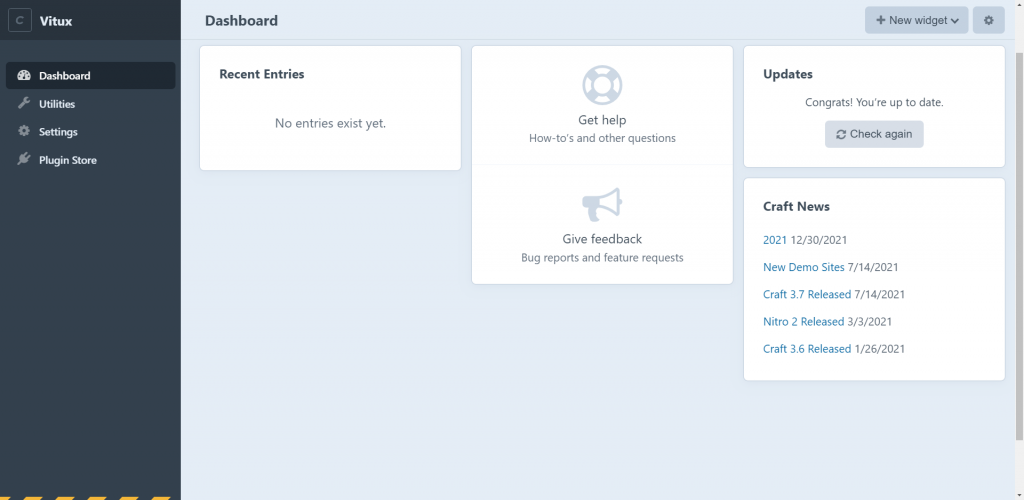
Once you’ve logged in, you will see a list of pages and space for writing content. This is where you can build your website, blog, or whatever content you may want to create. Your Craft CMS installation is now complete.
Conclusion
In this tutorial, we have learned how to install and configure a LAMP stack on a Ubuntu server. We went through the process of installing, configuring, and managing software in a simple manner. If you want to host your website on a VPS then we hope this guide helped you. If you have any questions or thoughts, let us know in the comments section below.