
Jitsi Meet is a WebRTC-based video conferencing software that allows you to communicate with others. A Jitsi Meet server allows you to join multi-person video conference rooms that function similarly to a Zoom or Skype meeting. The advantage of a Jitsi conference is that all of your data travels only through your server, and end-to-end TLS is used to secure the connection.
Some features of Jitsi Meet that we think are worth highlighting:
- Ability to join a conference by providing the URL of a publicly available video feed (streamed over HTTP). Users don’t need to have their own servers. This feature can be used in conjunction with third-party services such as getstream.io.
- End-to-end encryption of audio and video.
- The client is based on the Jitsi Video bridge open source project. Users can install their own instances of this client to have a local multi-person video conferencing system. Therefore, it is possible to create a self-hosted solution for multi-party video conferencing. The Jitsi Meet client uses libnice to inter-operate with other WebRTC endpoints.
- Automatic configuration based on SRV records, which allows users to join meetings using a domain name rather than having to remember IP addresses or set up port forwarding on their router.
Jitsi Meet works on Windows, Mac OS X and Linux. There is also an Android phone app (works on Jitsi Meet server v2.7.1 or higher). This guide will help you get started with Jitsi Meet on a Ubuntu 20.04 server.
Prerequisites
- A machine running Ubuntu with at least 2GB of RAM (4 GB recommended). The CPU should support hardware virtualization. A fresh install of Ubuntu Server 20.04.
- A non-root user with sudo privileges is configured on the server.
- Fully Qualified Domain Name (FQDN) of the machine, e.g. jitsi.example.com. One or more subdomains will be used to create SRV records for Jitsi Meet, and port forwarding is configured on your router at home to forward calls to this domain name.
Updating the System
The operating system can be updated with the following command:
sudo apt-get update && sudo apt-get upgrade -y
Reboot the server if kernel updates were installed
sudo reboot now
Log back in once the server has been rebooted using the same non-root user and proceed to the next step.
Installing Java
Jitsi requires Java to work. Java 8 is recommended and the following procedure installs OpenJDK 8:
sudo apt install -y openjdk-8-jre-headless
Verify that Java is installed correctly by checking the version:
java -version
If you get a message similar to this, then it has been successfully installed.

Setting the System Hostname
In this step, you will change the system hostname and IP address to match your Jitsi Meet domain name and localhost, respectively. These two parameters are used by Jitsi Meet when it installs and creates its configuration files.
Set the system’s hostname to your desired domain name by running set-hostname commands. The command will change current hosts and modify /etc/hosts, storing all DNS configurations on every machine.
sudo hostnamectl set-hostname jitsi.your_domain.com
- hostnamectl is a command-line utility that allows you to set the hostname and other system properties that are usually set during a login procedure.
- set-hostname jitsi.your_domain.com sets your server’s hostname to jitsi.your_domain.com
Next, you will set your computer’s address to the loopback IP address of 127.0.0.1. Open up a text editor like nano /etc/hosts file and populate the file with the line below.
sudo nano /etc/hosts
127.0.0.1 jitsi.your_domain.com
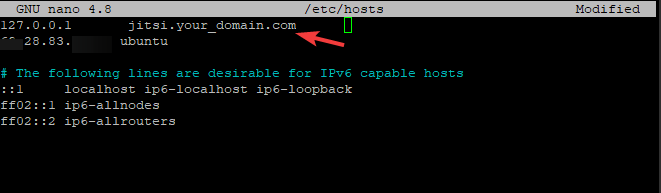
This local mapping is important when your Jitsi Meet server can’t use the internet. It needs to talk to other servers on your computer who are also on the same network. The other servers are always waiting for messages from your server, but they can’t get messages unless you map it to 127.0.0.1 first. If you don’t, then it won’t be able to talk or send messages and nobody will know that it’s there.
Installing Jitsi Meet
Now that the server has Java installed and the hostname and localhost IP address has been set, you can download and install Jitsi Meet.
First using the wget utility to Jitsi GPG key to your system.
wget https://download.jitsi.org/jitsi-key.gpg.key
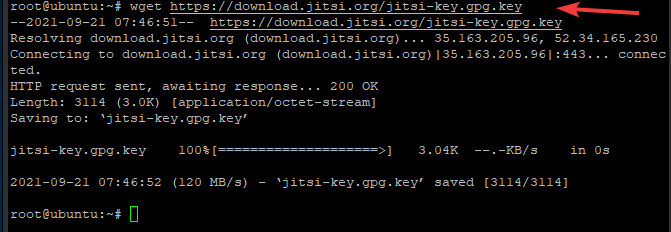
The apt will use this key to check the repository for authenticity before downloading the Jitsi Meet package.
Next, add the key to the apt using the apt-key command.
sudo apt-key add jitsi-key.gpg.key
You should get an OK output like the one below.

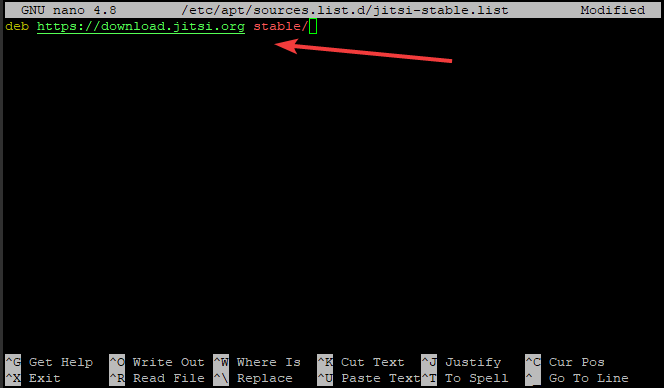
To add the Jitsi repository to your server, you’ll need to create a new sources file that includes Jitsi repository. Create and save a new file named jitsi-stable.list in nano text editor with the following contents:
sudo nano /etc/apt/sources.list.d/jitsi-stable.list
deb https://download.jitsi.org stable/
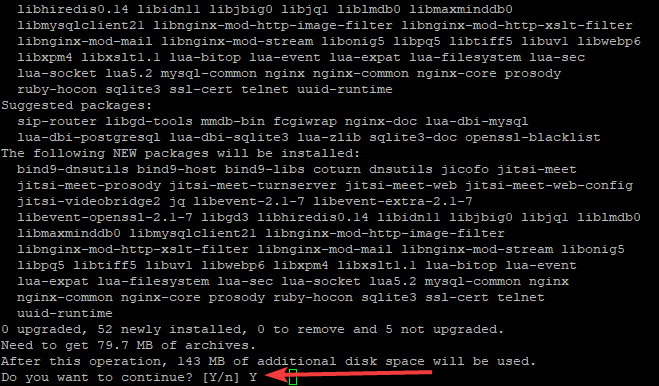
Now, update your local package index and install Jitsi Meet by running the following command.
sudo apt-get update
sudo apt install jitsi-meet
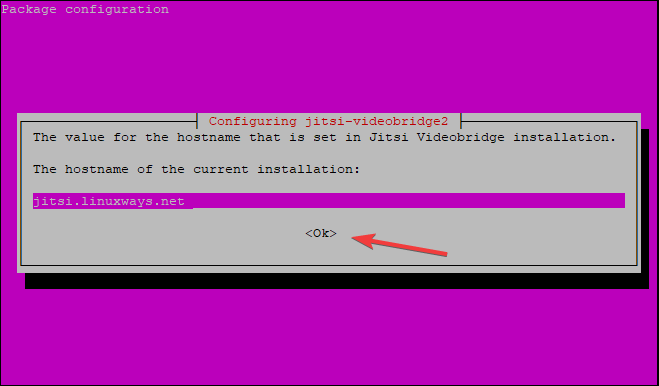
You will be asked to enter your domain name for Jitsi instances, which you configured in the steps above. Enter your domain and hit Enter to submit the hostname and continue the installation.
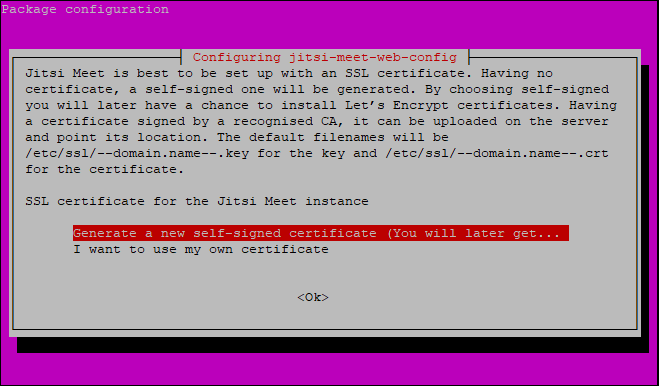
You’ll be presented with a new dialog box asking whether you want Jitsi to produce and utilize a self-signed TLS certificate or if you want to create one yourself. When using a self-signed certificate, the communication between Jitsi servers will be encrypted, but it may not be trusted in your browser. If you wish to generate a new certificate yourself, do not continue using the default option and instead using I want to use my own certificate option.
The installation process will configure some parameters that are saved in the file /etc/sysctl.d/20-jvb-udp-buffers.conf, which sets the maximum number of UDP packets that can be queued for each socket, and also configures how many UDP messages can be sent or received within a certain period of time. In this example, we will you the default settings.
sudo nano /etc/sysctl.d/20-jvb-udp-buffers.conf

Once the installation is complete , you can start Jitsi Meet by running the command below to continue.
sudo systemctl restart prosody.service
sudo systemctl restart jitsi-videobridge2.service
sudo systemctl restart jicofo.service
You can check the Jitsi Meet service status with the following command.
sudo systemctl status jitsi-videobridge2
You should get an output like this:
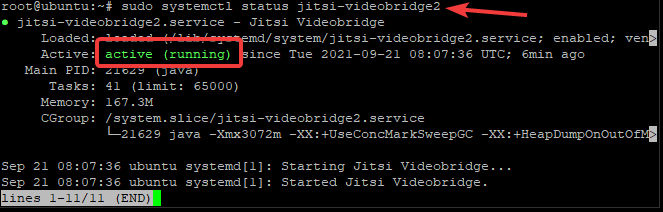
This output confirms that the Jitsi Meet service status is up and running.
Accessing Jitsi Meet Web UI
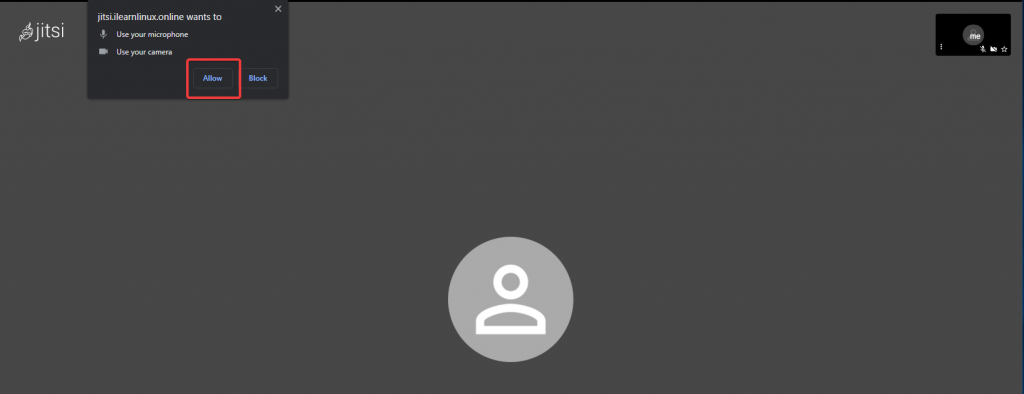
To access your new server from a web browser, type in the domain name of your server in a web browser’s address bar to load a page. For example, if your server is jitsi.your_domain.com then type this into the address bar of your browser to access it directly. https://jitsi.your_domain.com
To transfer audio, you need to let the web browser use your microphone. And to transfer video, you need to let the web browser use your camera.
Conclusion
Congratulations! You have successfully set up your own Jitsi Meet server on Ubuntu 20.04. Now, you can create a room in your server and add users to them.
For more information about using Jitsi, please visit their documentation at https://jitsi.github.io/handbook/docs/intro.
If you found this article helpful, please share it with others so that they can also have their own Jitsi Meet server. If you need help, leave a comment below.