Django is a free, open-source Python-based web framework for building complex and scalable applications. Django is maintained by an independent organization called Django software foundation. It is designed in mid for speed and scalability. Allows developers to create applications faster and accelerate the development process of applications, especially for large projects or applications.
Django follows the DRY or Don’t Repeat Yourself rule, which allows developers to use the same code for a different project, making the development process faster. Also, it’s KISS compliant or Keep It Short and Simple, representing Django features, simple and easy-to-understand codes.
Django is the web framework that follows model-view-template (MVT) architecture. It’s also built with security in mind, built-in CSRF (), and SQL-Injection protection. Some example of big companies that used Django as their main business is Disqus, Instagram, BitBucket, and many more.
This tutorial will show you how to install the Python Django web framework on Ubuntu 22.04. I will cover three different ways of installing Django and how to create the first Django project.
Prerequisites
- An Ubuntu 22.04 machine
- A non-root user with the root privileges
Installing Python Django Web Framework
There are multiple ways to install the Django framework on the Ubuntu system, and each way has its own advantages and depends on how you want to set up the environment for your Deployment.
There are three methods for installing Django, which include the following:
- Global installing from APT Ubuntu repository: The newer ubuntu repository now provides a package for the Django framework that you can install simply using the apt command.
- Isolated environment using Pip and Python Venv: This is the most recommended method for the development environment. The Python venv allows you to create a virtual environment that is isolated from your system. the environment created with venv is capable of running Python applications, including the Django web framework.
- Installing the Django Development version using Git: If you need the most and latest version of the Django web framework, you can use the Development of it, which can be installed manually by downloading the Django repository to your system and install it manually.
Now let’s dive into each of these Django framework’s installation methods.
Installing Django from APT Ubuntu Repository
The default Ubuntu 22.04 repository provides the Django framework package. this is the easiest way for installing the Django web framework to the Ubuntu system, but you may not get the latest version of the Django framework.
Installing the Django framework from the APT repository means that you are installing the Django systemd-wide. And also allows users on your system to create Django projects.
Now run the apt command below to refresh and update your Ubuntu repository.
sudo apt update
Now run the below command to check the python3-django package.
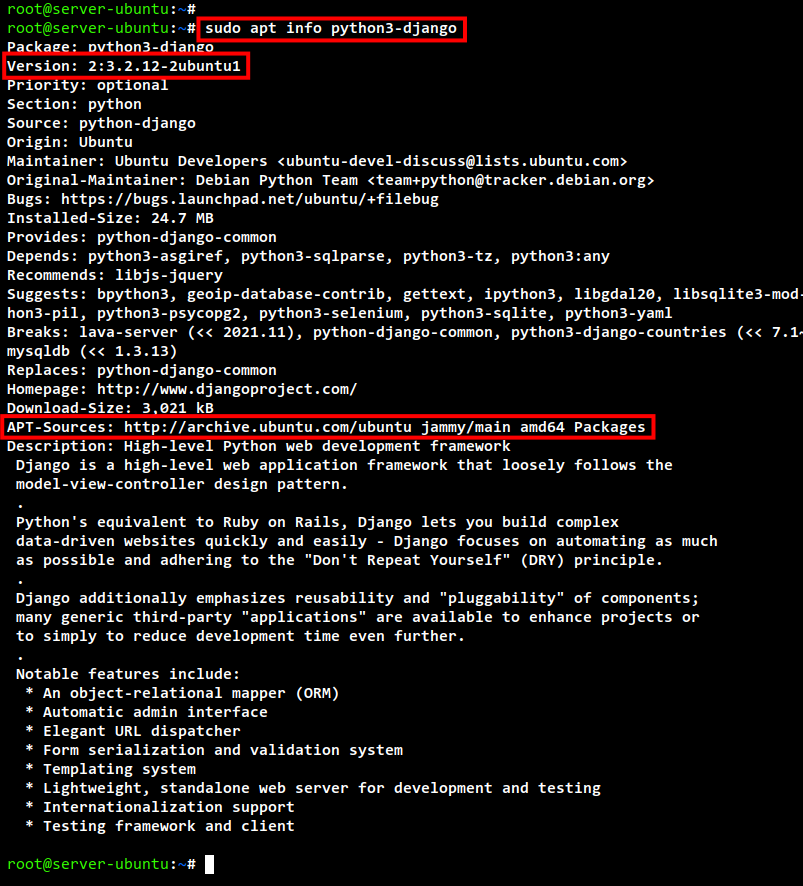
sudo apt info python3-django
Below you can see the Ubuntu 22.04 repository provides the Django web framework version 3.2.
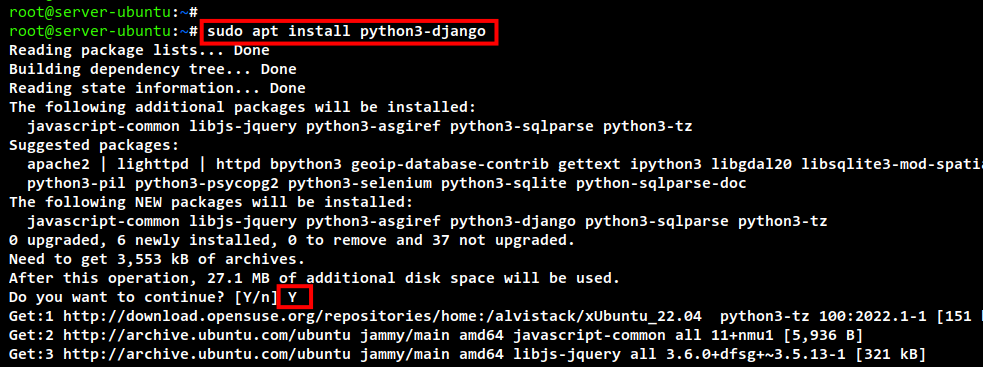
To install the Django framework from the APT repository, you can run the following command.
sudo apt install python3-django
Input y to confirm the installation and press ENTER to continue. Now the installation will begin.
After installation is completed. check the Django version installed on your system using the following command.
django-admin version
You will see version 3.2.12 of Django installed on the Ubuntu 22.04 system.
Installing Django in an Isolated Environment using Pip and Venv
Installing Django in an isolated environment, allows you to create multiple Django projects in different environments. You can also create each environment for each project. This is good because this will keeps your system clean, whenever you want to delete or remove a project, you can just delete the isolated environment without any changes to your Ubuntu system.
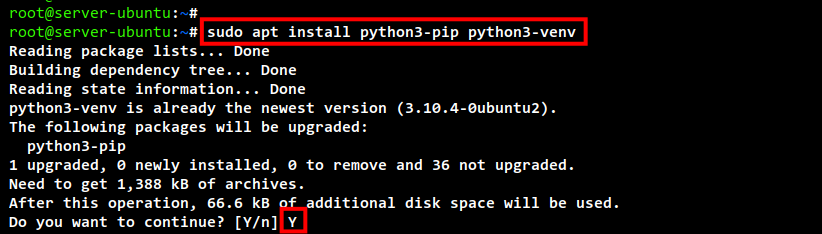
To set up an isolated environment for the Django framework, you will need to install the Python3-pip and Python3-venv package on your system. You can run the below command to install both packages.
sudo apt install python3-pip python3-venv
Input Y to confirm the installation and press ENTER to continue.
After installation is completed, log in to your user using the below command.
su - username
Now create a new directory named myproject and change the working directory into it.
mkdir -p ~/myproject; cd myproject/
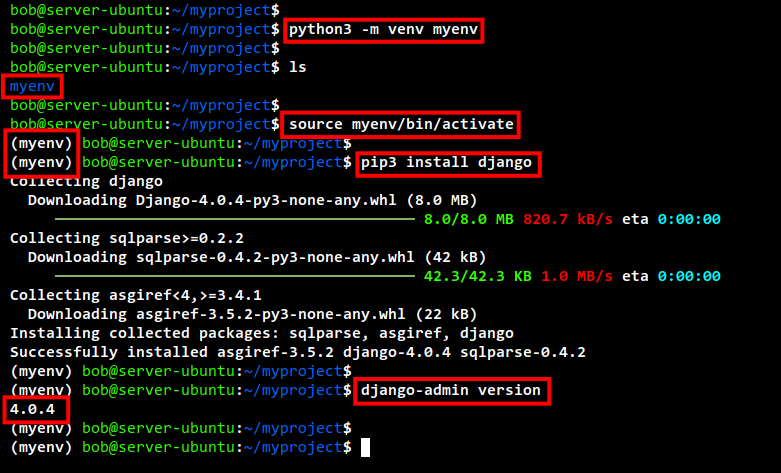
Create a new virtual environment myenv using the following command.
python3 -m venv myenv
Now you will get a new directory named myenv. which contains all files and configurations for your virtual environment.
Run the below command to activate the virtual environment.
source myenv/bin/activate
You will see your shell prompt is changed, at the beginning you will see the indicator such as “(myenv)“. This means that you are in the virtual environment.
Next, you can install the latest version of Django from the Python Pip repository. This will install Django only on your virtual environment, not the system-wide.
pip3 install django
Below is the screenshot of the Django installation from the Python Pip repository.
After installation is completed, run the below command to check and verify the Django framework version.
django-admin version
Below you can see the Django v4.0.2 installed on the virtual and isolated environment myenv.
Lastly, if you want to exit from the Python virtual environment, you can just run the below command.
deactivate
And you will be back to the normal shell on your system.
Installing Development Version of Django using Git
If you need to install the most latest version of the Django web framework, you can install it manually by downloading the source from the Github repository and installing it manually using the Python3-pip command.
This is only when you are needed for the most latest version of Django.
Before you start the installation, install the git package to your system using the below command.
sudo apt install git -y
Now log in to your user using the following command.
su - username
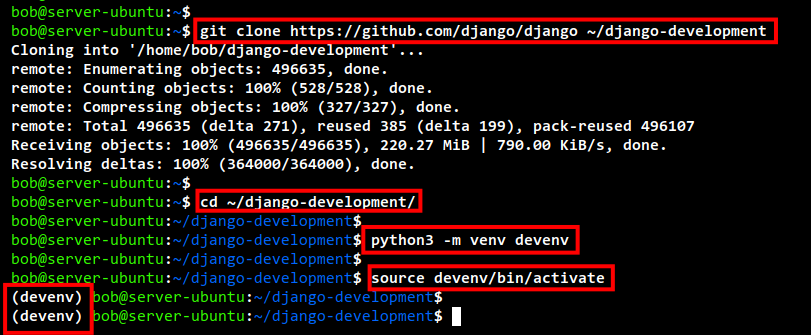
Download the Django source code to your system using the git command below. This will clone the Django source code to the new directory named django-development.
git clone https://github.com/django/django ~/django-development
Change your working directory to django-development.
cd ~/django-development/
Create a new virtual environment devenv using the below command.
python3 -m venv devenv
Now activate the devenv virtual environment with the command below.
source devenv/bin/activate
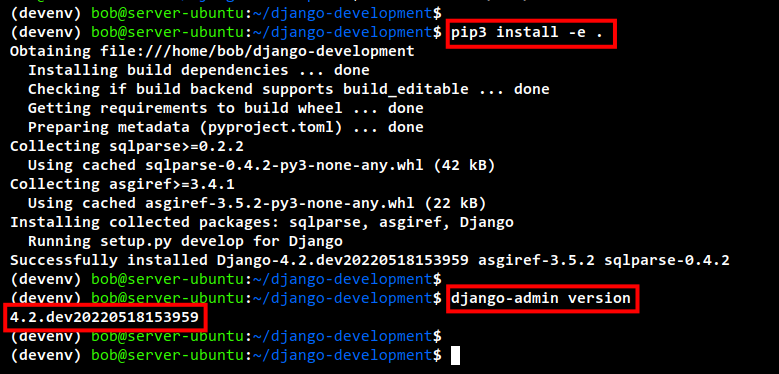
Install the Django development version using the pip command below. As you can see on the command line, the dot at the end of the command means that you are in the Django source directory.
pip3 install -e .
Below you can see the process of the Django development installation.
After installation, run the below command to check and verify the Django version.
django-admin version
Below you can see the Django 4.0 development version is installed on the Ubuntu system, installed on the virtual and isolated environment devenv.
Getting Started with Django: Creating Django Project
At this point, you have learned multiple methods for installing the Django framework. next, you will learn how to start and create a new project using Django.
First, log in to your user and activate the virtual environment that you just created on top. In this example, the virtual environment is myenv.
cd myproject/
source myenv/bin/activate
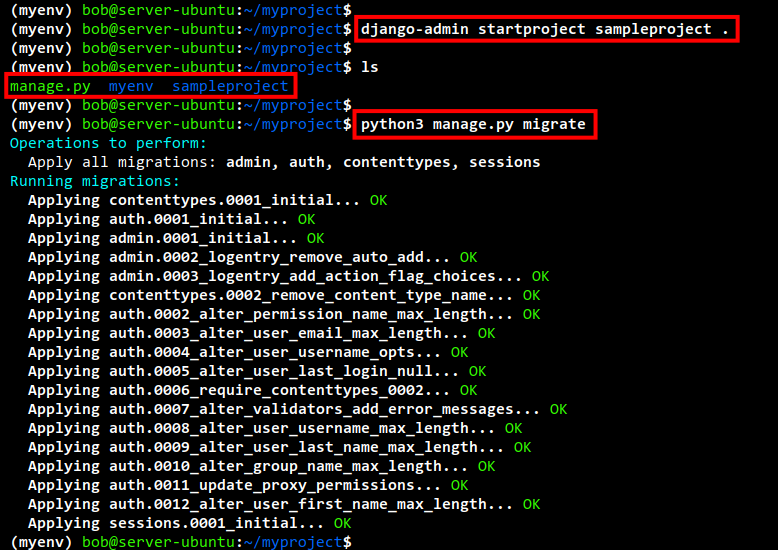
Create a new Django project with the name sampleproject using the below command. The dot here in the command line means that all Django files will be available in the current directory. Also, this will reduce the nested directories of your project.
django-admin startproject sampleproject .
On the current directory, you will see the directory sampleproject and the python script manage.py, which can be used to control and manage your Django project.
Now run the following command to migrate the project using the default database SQLite3. This will generate a new database file SQLit3 for your Django project.
python3 manage.py migrate
Below is the output of the database migration of the Django project. You may check the Django documentation if you want to use another database such as MySQL or PostgreSQL.
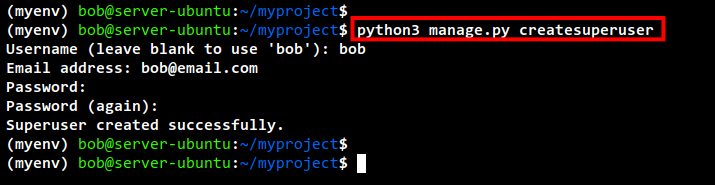
Next, run the below command to create a new admin user for your Django project.
python3 manage.py createsuperuser
You will be asked to input the username, email, and password for your Django project. After the user is created, you will get the output message such as “Superuser created successfully“.
After migrating the database and creating a user for your Django project, now edit the script settings.py inside your project directory sampleproject. In this example, we will edit the script using a nano editor.
nano sampleproject/settings.py
Add your server IP address or domain name to the ALLOWED_HOSTS option. In the below example, the server IP address is 127.0.0.1 for localhost and 192.168.10.15 for the public IP address.
ALLOWED_HOSTS = ['127.0.0.1', '192.168.10.15']
Save and close the file when you are done.
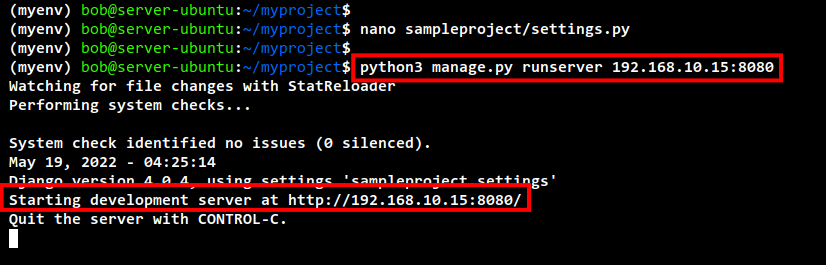
Next, run the below command to start your Django project. Be sure to change the IP address with your server IP address. In this command, you will be running the Django project on the public IP address 192.168.10.15 with port 8080.
python3 manage.py runserver 192.168.10.15:8080
Below you can see the output of the command. You can see the message such as “Starting development server at SERVER-IP:PORT“.
if you have a UFW firewall enabled on your system, run the below command to add the port 8080/tcvp to the whitelist.
sudo ufw allow 8080/tcp
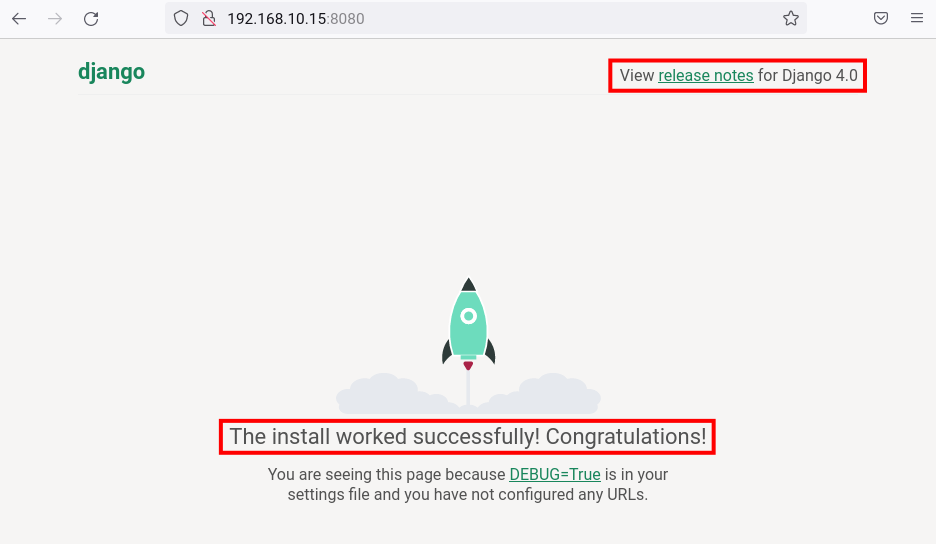
Next, open your web browser and visit the server IP address with port 8080 such as http://192.168.10.15:8080/.
Below you can see the default home page of your Django project. Currently, you are using the Django v4.0.4.
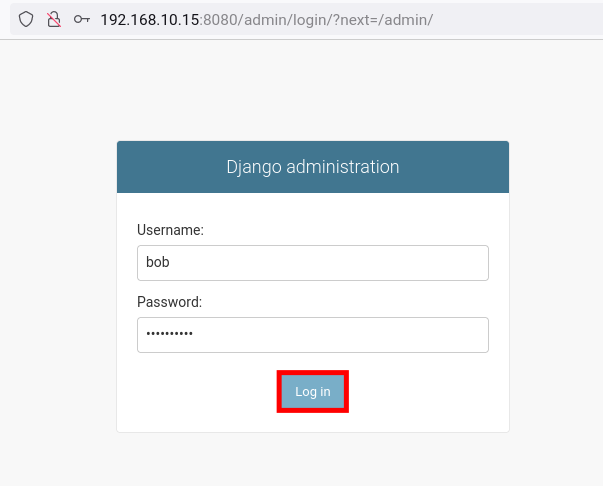
Now edit the current URL and add the /admin path to access the Django administration page.
http://192.168.10.15:8080/admin/
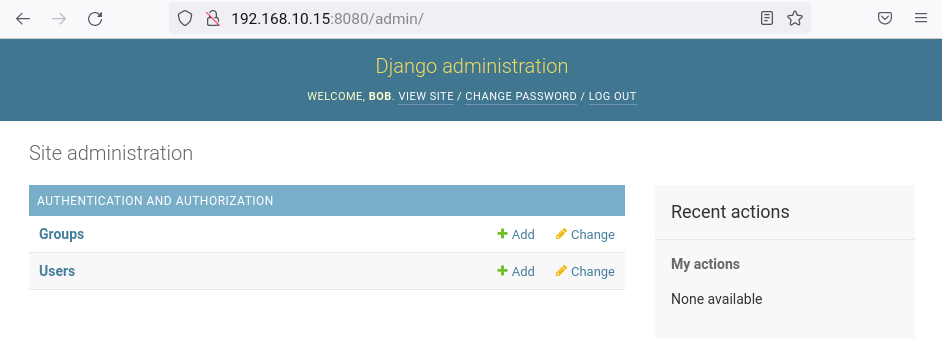
Below you can see the Django admin login page. Input your username and password, then click Log in.
You will see the Django admin dashboard below if your username and password are correct.
Conclusion
Congratulation! You have now learned how to install the Django web framework on Ubuntu 22.04 in multiple methods. You have also learned how to create a python virtual environment, installing packages from the Python pip repository. You have also learned how to start and create a Django project on your system.