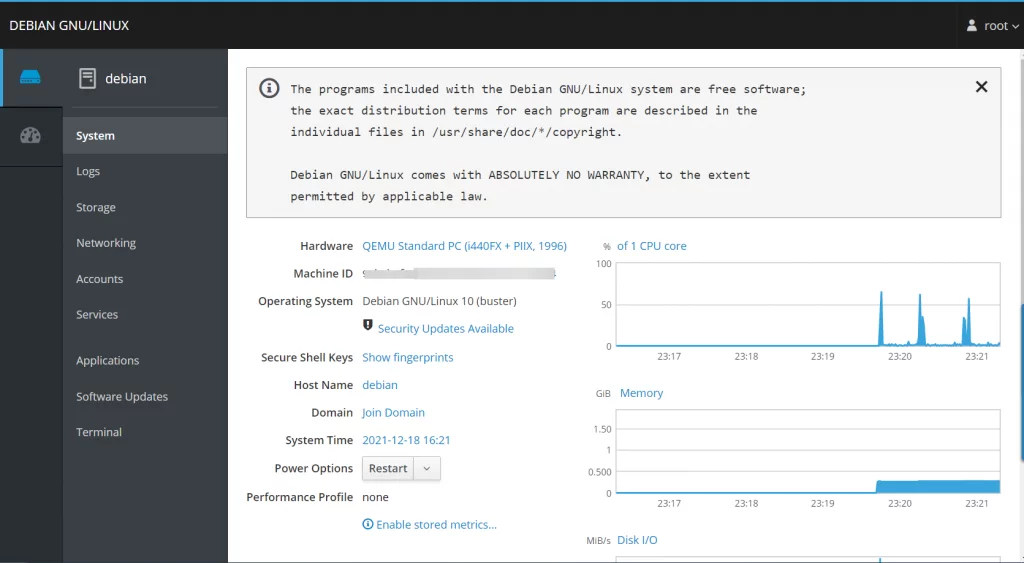
Cockpit on Debian 12 is a powerful, web-based interface designed to simplify managing and monitoring Linux servers. It provides an intuitive and user-friendly dashboard that allows administrators to perform various tasks, such as system updates, network configuration, storage management, and service monitoring, all from a single point of access. Cockpit supports real-time performance metrics, making it easier to monitor system health, and it offers integration with popular tools like Docker and Kubernetes for container management. By default, Cockpit uses HTTPS for secure access, and it can be further secured with SSL certificates, making it a versatile and secure tool for managing Debian 12 servers.
In this tutorial, we’ll cover installing Cockpit on Debian 12 and securing it with a free SSL certificate from Let’s Encrypt.
Prerequisites
- A Debian 12 server.
- A domain name pointing to your server’s IP address.
sudoor root privileges.
Step 1: Update Your System
Start by updating your system’s package lists and upgrading the installed packages.
sudo apt update
sudo apt upgrade -y
Step 2: Install Cockpit
Debian 12 includes Cockpit in its default repositories, so you can install it directly using apt.
sudo apt install cockpit -yStep 3: Enable and Start the Cockpit Service
After the installation, enable the Cockpit service to start automatically on boot and start it immediately.
sudo systemctl enable --now cockpitStep 4: Adjust Firewall Rules (if applicable)
If you have a firewall enabled, you’ll need to allow traffic on Cockpit’s port, which is 9090 by default.
If you’re using ufw:
sudo ufw allow 9090/tcp
sudo ufw reload
Or, if you’re using iptables:
sudo iptables -A INPUT -p tcp --dport 9090 -j ACCEPTStep 5: Install Certbot and Obtain SSL Certificate
Certbot is a tool to obtain SSL certificates from Let’s Encrypt. Install Certbot and the Nginx plugin (even if you’re not using Nginx, the plugin is useful for handling the certificate automatically).
sudo apt install certbot -yNext, obtain an SSL certificate for your domain:
sudo certbot certonly --standalone -d yourdomain.comReplace yourdomain.com with your actual domain name. Follow the prompts to complete the process.
Step 6: Configure Cockpit to Use SSL
Cockpit listens on port 9090 by default and provides its own self-signed SSL certificate. However, we will configure Cockpit to use the Let’s Encrypt SSL certificate instead.
Copy the SSL Certificate Files
Create a directory for Cockpit to store the SSL certificates.
sudo mkdir -p /etc/cockpit/ws-certs.dCreate a Symlink to the SSL Certificates
Symlink the certificate and key obtained by Certbot to the directory Cockpit uses.
sudo ln -s /etc/letsencrypt/live/yourdomain.com/fullchain.pem /etc/cockpit/ws-certs.d/yourdomain.com.cert
sudo ln -s /etc/letsencrypt/live/yourdomain.com/privkey.pem /etc/cockpit/ws-certs.d/yourdomain.com.key
Ensure to replace yourdomain.com with your actual domain name.
Restart Cockpit
Restart the Cockpit service to apply the changes.
sudo systemctl restart cockpitStep 7: Set Up Automatic Certificate Renewal
Let’s Encrypt certificates are valid for 90 days, so setting up automatic renewal is essential.
Test Automatic Renewal
Test the renewal process to ensure everything is set up correctly.
sudo certbot renew --dry-runCreate a Hook to Restart Cockpit
Certbot allows running scripts after renewing a certificate. Create a hook to restart Cockpit after a successful renewal.Edit the renewal-hooks/deploy script:
sudo nano /etc/letsencrypt/renewal-hooks/deploy/restart-cockpit.shAdd the following lines:
#!/bin/bash
systemctl restart cockpit
Save and exit the editor. Make the script executable:
sudo chmod +x /etc/letsencrypt/renewal-hooks/deploy/restart-cockpit.shStep 8: Access Cockpit
You can now access Cockpit via your web browser using https://yourdomain.com:9090.

Conclusion
You’ve successfully installed Cockpit on Debian 12 and secured it with a free SSL certificate from Let’s Encrypt. You can now manage your server securely through the Cockpit web interface. Don’t forget to monitor your SSL certificate’s renewal process to ensure continuous security.
