Anaconda is an open-source package manager and distribution of Python. It is designed for machine learning and data science and comprises several open-source packages. In this tutorial, we will walk you through the steps for the installation of Anaconda on a Rocky Linux 8 or CentOS 8 system.
Installing Anaconda
Step 1: Install Prerequisites
You will have to first install some dependencies if you need to use the GUI package. Below is the command to install those dependencies:
$ sudo yum install libXi libXtst libXrandr libXcursor alsa-lib mesa-libEGL libXcomposite libXScrnSaver libXdamage mesa-libGL
If prompted, provide the sudo password, and then it will install all the dependencies.
Step 2: Download Anaconda Bash Script
Now download the latest version of Anaconda from its official website Downloads page. The installer file is actually a bash script ending with .sh. You can copy the link of the bash script from the website and then use then download it using the wget command.
As of July 2021, the latest version of Anaconda available on the website is Ananconda3-2021.05. So here, we are going to download the Ananconda3-2021.05:
Move inside the /tmp directory:
$ cd /tmp/
Download the Anaconda bash script by typing the wget and then the copied link as follows:
$ wget https://repo.anaconda.com/archive/Anaconda3-2021.05-Linux-x86_64.sh
Step 3: Verify Integrity
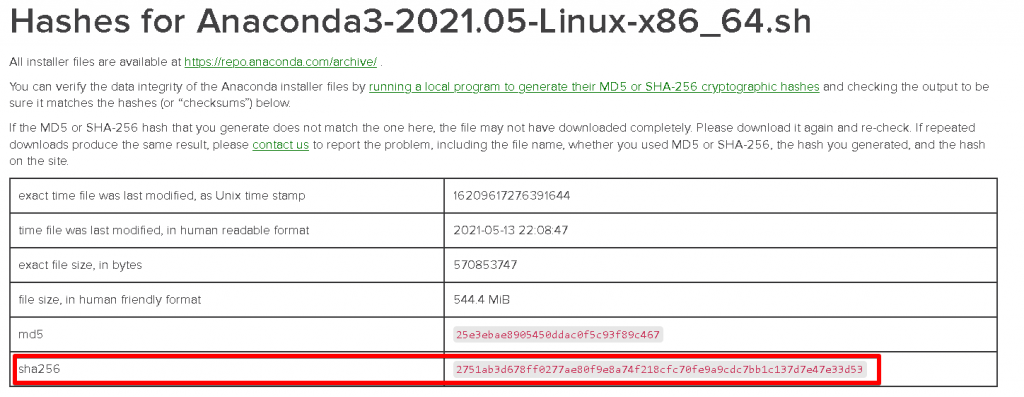
After downloading the bash script installer file from the website, it is recommended to verify its integrity with SHA-256.
To verify the integrity of the installer file, generate its sha256 cryptographic hash using the command below:
$ sha256sum Anaconda3-2021.05-Linux-x86_64.sh

Now check its output to the hashes available at Anaconda installer file hashes for your installer file version. If the output does not match, it means the file was either not downloaded entirely or corrupted. If output matches, move on to the next step.

Step 4: Running the Anaconda Bash Script
Now in order to install Anaconda, run the downloaded bash script file as follows:
$ bash Anaconda3-2021.05-Linux-x86_64.sh
After running the script, it will prompt you to read the license terms if you want to continue the installation. Hit Enter to continue.

Then it prompts you to accept the license terms. Enter yes to access the terms. After accepting the terms, you will be asked to provide the location for the installation of Anaconda or use the default install location. To use the default location (recommended), just press Enter.

If it asks if you want the installer to initialize Anaconda, type yes.
The installation is now completed. Close your Terminal and re-open it to activate the installation.
Step 5: Verify Installation
You can verify the installation of Anaconda using the conda or Anaconda Navigator.
To verify the installation of Anaconda using the conda, type the command below in Terminal:
$ conda list
If Anaconda is installed, you will see a list of packages that are installed and their versions.

To verify the installation of Anaconda using the Anaconda Navigator, type the command below in Terminal:
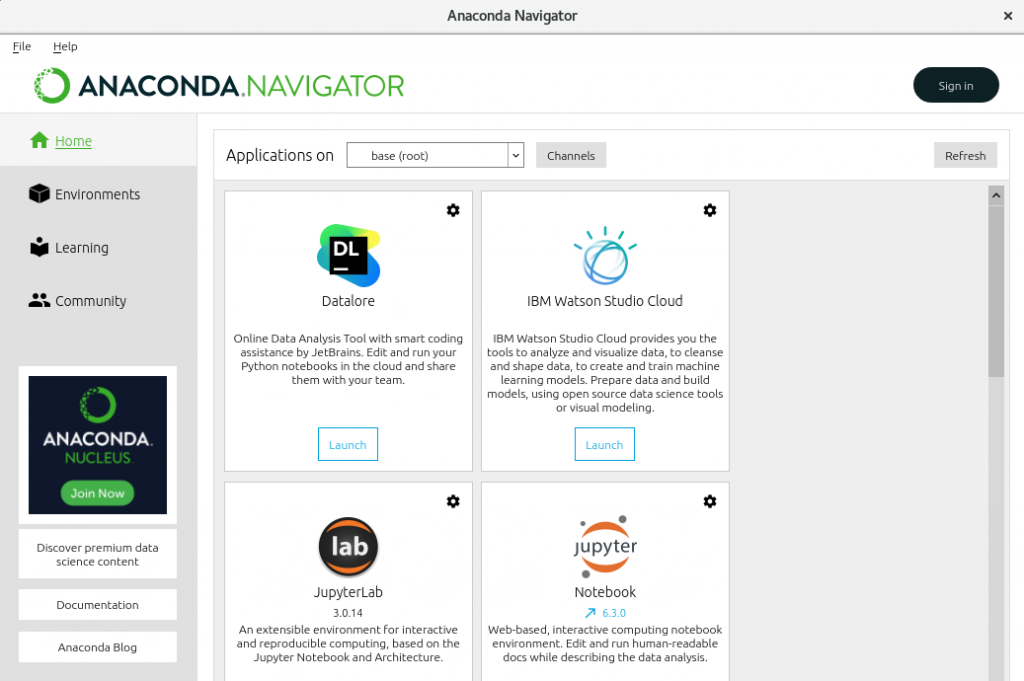
$ anaconda-navigator
If Anaconda is installed, you will see the following Anaconda Navigator window:

To display information about the current conda install, use the command below:

Uninstall Anaconda
In case you no longer need Anaconda, you can remove it using the commands below:
First, install the anaconda-clean package:
$ conda install anaconda-clean
Then use the command below to delete all the files and directories including Anaconda related packages, caches, etc.
$ anaconda-clean –yes
Also remove the anaconda directory from the Home directory:
$ rm -rf ~/anaconda3
Using the step-by-step procedure discussed above, you can easily install Anaconda on your Rocky Linux system. The procedure to uninstall Anaconda is also covered in this post in case you no longer require it on your system. To view more information, visit Anaconda’s official documentation.

