Podman is a free and open-source daemonless container engine that was developed by RedHat. It exists to help developers manage and deploy their applications in a Linux environment. Similar to the Kubernetes platform, Podman works with pods.
Podman seeks to be the alternative to the Docker engine which is also a containerization platform. Podman improves on Docker by decentralizing the components needed for container management. Podman has a few distinguishing differences, the main one being its architecture. It runs on a daemonless architecture.
This article will guide you on how to install and use podman on Rocky Linux 8
Step 1: Install Podman
It’s always important to ensure your system packages are up to date before installing additional packages. To update Rocky Linux 8, run:
$ sudo dnf update
To install podman on Rocky Linux 8, run the command below as a root user.
$ sudo dnf install podman
Let’s verify podman is successfully installed on the machine. Run:
$ podman --version
By the time of writing this guide, the latest version of podman available is 3.2.3

Step 2: Using Podman on RockyLinux 8
Now that we have successfully installed podman on our machine, we can now carry out various operations using podman as demonstrated below
First, let’s search for an image using podman. Use the podman search command and specify the image.
For example, let’s search for the image of ubuntu. Run:
$ podman search ubuntu
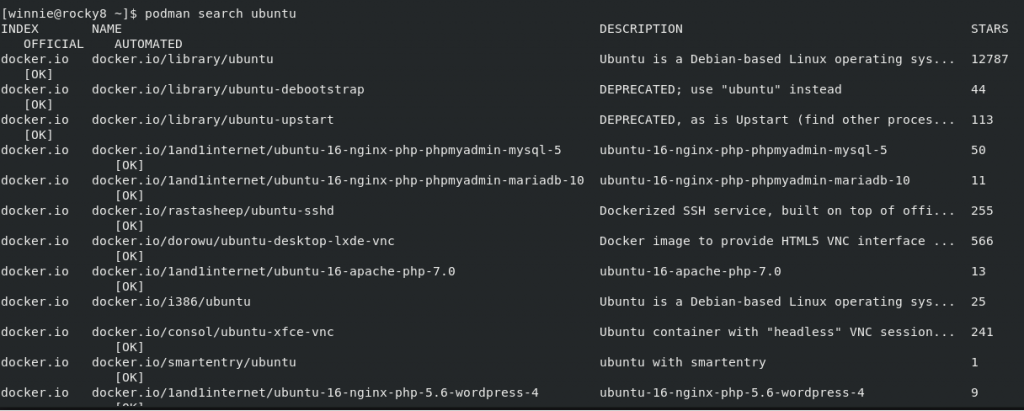
The output includes the registry from which you are searching, the image name as well as the description. The number of stars indicates how popular the image is.
To download or pull an image, run the following podman pull command followed by the name of your preferred image:
$ podman pull ubuntu

Let’s pull another image. Run:
$ podman pull nginx

Now we can view the images that we have downloaded. Execute the following podman command:
$ podman images

The output above indicates the two images that we have downloaded: Ubuntu and Nginx.
To run or create a container from an image, run the command
$ podman run repository name
For example, to create a container from the Nginx image, run the command below. The -d option runs the container in the background.
$ podman run -d docker.io/library/nginx
To display all the containers, regardless of whether they are stopped or running. Run:
$ podman ps -a
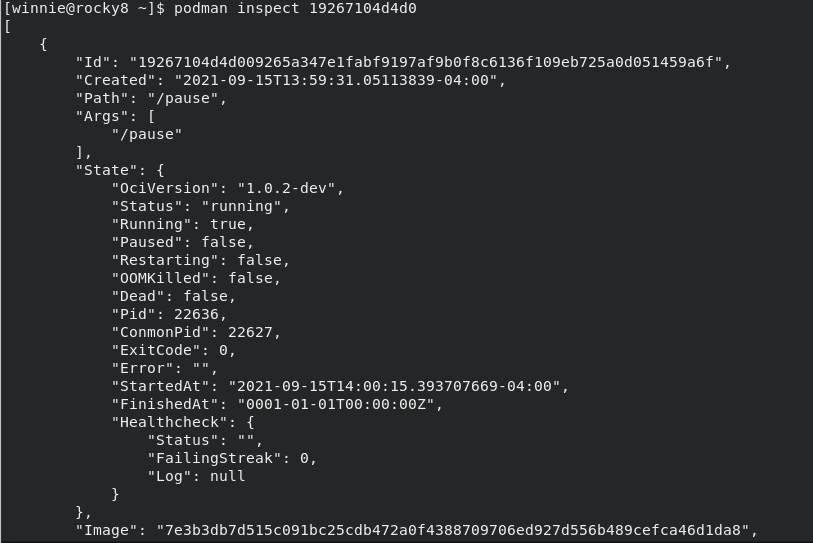
To inspect a container, use the below podman command with the syntax:
$ podman inspect <CONTAINER ID>
Next, we will learn how to manage pods using podman. First, let’s create a pod with the name webserver. To create a pod run the command:
$ podman pod create --name webserver

Next, list the pods with the command:
$ podman pod list

From the output, it’s clear that the webserver pod has been successfully created.
To add a container to a pod, execute the following command:
$ podman run -dt --pod webserver ubuntu

The above command will add ubuntu to the webserver pod.
Now verify whether the container is added to the pod or not. Run:
$ podman ps -a --pod

The ubuntu container is added to the webserver pod .
To remove a single container on podman, use the podman command with the rm option and specify the container-id. For example:
$ podman rm <Container_ID>
In this example, let’s delete the container with ID fe84004576b91. Run:
$ podman rm fe84004576b91
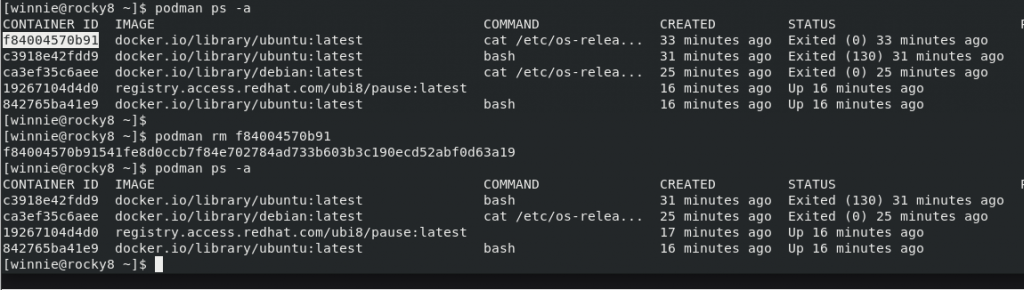
From the output above, it’s clear that the number of containers has reduced by one.
Conclusion
That was an overview of Podman, and the basic commands to help you get started. In this guide, we have demonstrated how you can install podman on Rocky Linux and run basic commands.