MongoDB is one of the most popular implementations of a NoSQL database system. It’s a document-oriented database system that uses the JSON-like scheme named BSON.
Instead of storing data in the columns and rows of the relational database (RDBMS), MongoDB stores data as separate documents inside a database collection.
MongoDB is a cross-platform database and provides high performance, high availability, and automatic scaling of the enterprise database level.
This tutorial will show you how to install MongoDB on Debian. This guide covers an additional guide for securing the MongoDB deployment, the basic usage of mongo command, and the basic MongoDB query.
What we will do?
- Add MongoDB Key and Repository
- Install MongoDB on Debian 11 or Debian 12
- Set Up Admin User
- Enable MongoDB Authentication
- Testing
Step 1 – Add MongoDB Key and Repository
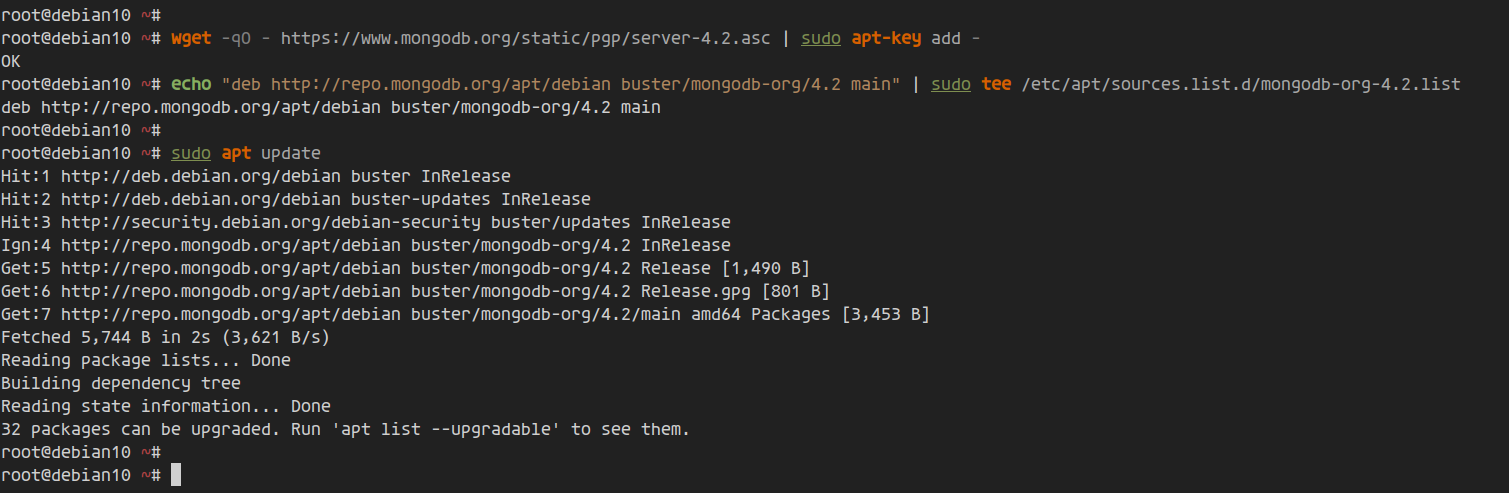
First, we will add the MongoDB GPG key and repository for the Debian operating system.
Install the GnuPG package and add the MongoDB GPG key using the command below.
sudo apt install gnupg -y
wget -qO - https://www.mongodb.org/static/pgp/server-4.2.asc | sudo apt-key add -
And you will get an ‘OK’ response.
Now, add the MongoDB repository for Debian.
echo "deb http://repo.mongodb.org/apt/debian buster/mongodb-org/4.2 main" | sudo tee /etc/apt/sources.list.d/mongodb-org-4.2.list
Then, update the Debian repositories using the apt command below.
sudo apt update
As a result, The MongoDB GPG key and repository has been added to Debian.
Step 2 – Install MongoDB on Debian
In this step, we will install the MongoDB packages from the official MongoDB repository we just added.
Install MongoDB using the apt command below.
sudo apt install -y mongodb-org
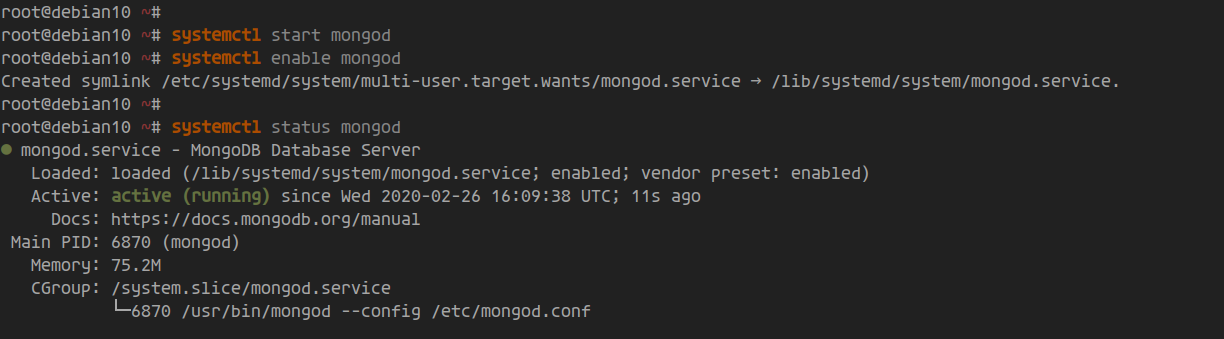
Once the installation is complete, start the MongoDB service and add it to the system boot.
systemctl start mongod
systemctl enable mongod
And the MongoDB service is up and running on default the port ‘27017’, check open ports on the system using the netstat command below.
systemctl status mongod
As a result, The MongoDB service is running as a ‘mongod’ with the default port ‘27017’.
Step 3 – Setup Admin User
After installing the MongoDB, we will add a new admin user for the MongoDB server.
Connect to the MongoDB shell using the ‘mongo’ command below.
mongo
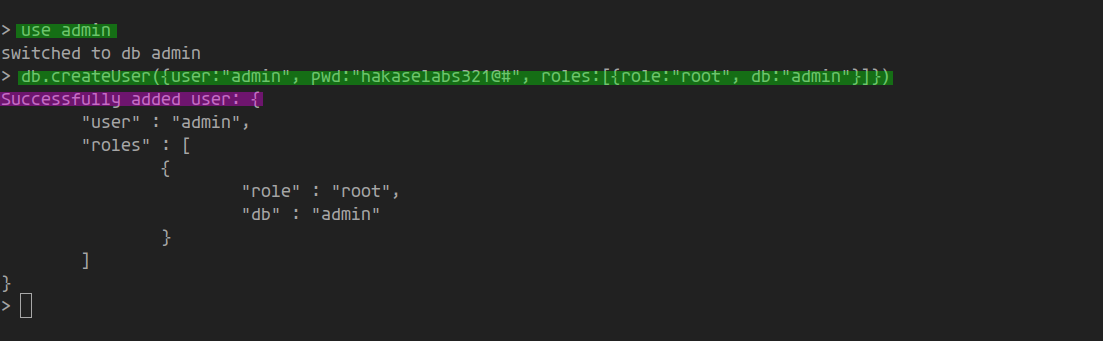
Now switch to the database named ‘admin’.
use admin
Create a new user named ‘admin’ with the password ‘hakaselabs321@#$’ and the role ‘root’ using the MongoDB query below.
db.createUser({user:"admin", pwd:"hakaselabs321@#", roles:[{role:"root", db:"admin"}]})As a result, the MongoDB admin user has been added, type ‘exit’ to log out from the MongoDB shell.
exit
Now you will be logged out from the mongo shell.
Step 4 – Enable MongoDB Authentication
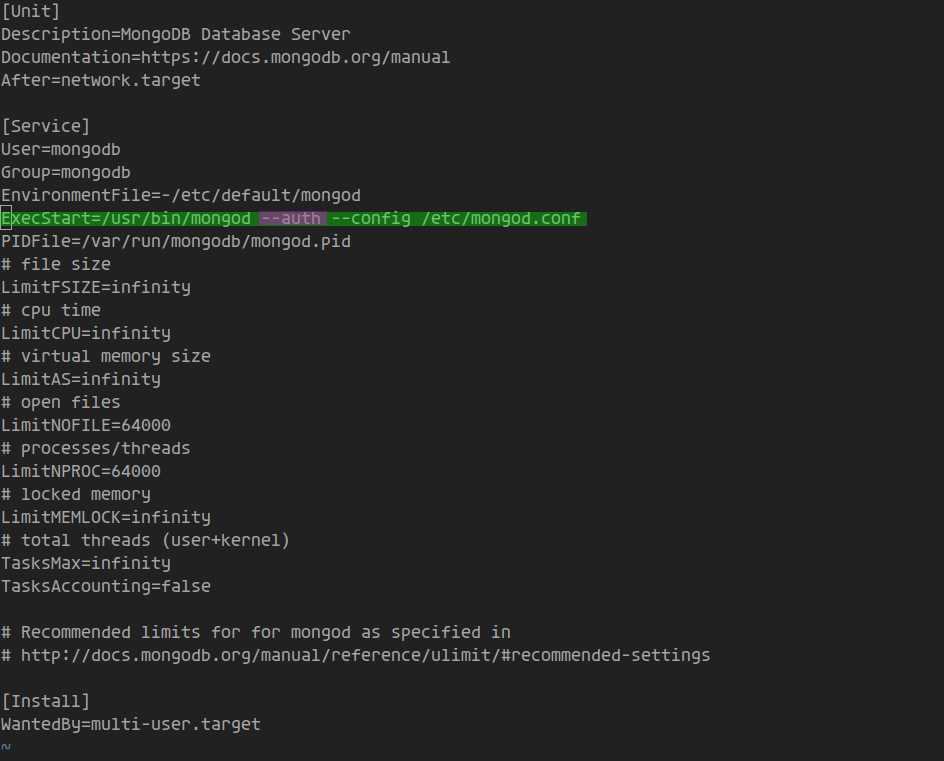
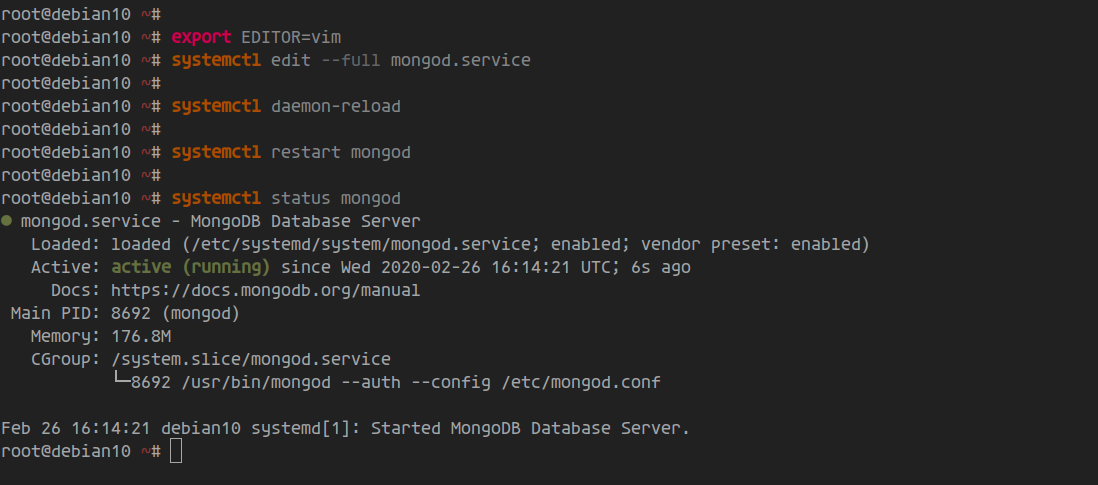
In this step, we will enable the MongoDB authentication by adding the configuration to the MongoDB service file.
Edit the MongoDB service file using the command below.
export EDITOR=vim
systemctl edit --full mongod.service
On the ‘ExecStart’ line, add the ‘–auth‘ option as below.
ExecStart=/usr/bin/mongod --auth --config /etc/mongod.conf
save and close.
Next, reload the systemd manager and restart the MongoDB service using the systemctl command below.
systemctl daemon-reload
systemctl restart mongod
As a result, MongoDB Authentication and Authorization has been enabled.
Step 5 – Testing
To test our MongoDB installation, we will be using the ‘mongo’ command to access the MongoDB shell with the user ‘admin’, creating a new MongoDB database and insert data into it.
Connect using the Admin user
Connect to the MongoDB shell using the user ‘admin’, and to the default database ‘admin’ as below.
mongo -u admin -p --authenticationDatabase admin
Type the password for ‘admin’ user and we’ve logged in to the MongoDB shell.
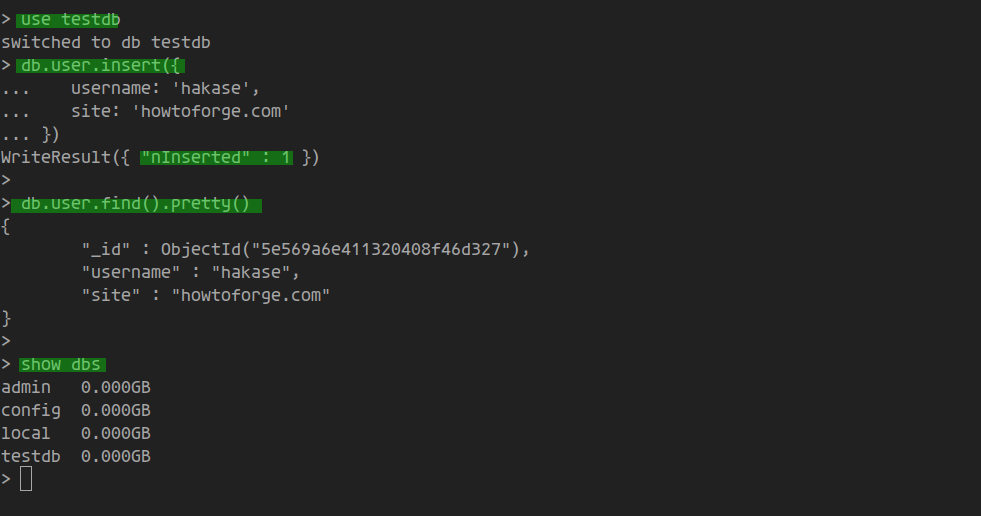
Test Create Database and Insert Data
Now create a new database ‘testdb’ and insert new data into it.
use testdb
db.user.insert({
   username: 'hakase',
   site: 'howtoforge.com'
})
The new database ‘testdb’ has been created, and new data has been inserted.
Next, check the data on the ‘testdb’ database using the following command.
use testdb
show collections
db.user.find()
Now you will get the data from the ‘user’ collection on the ‘testdb’ database.
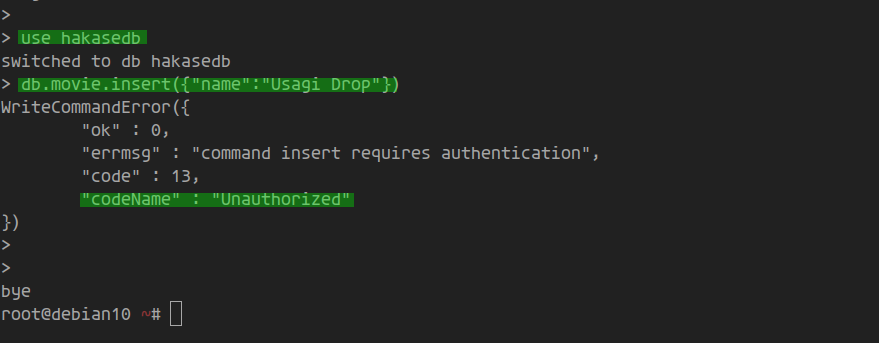
Login without Authentication
When the Authentication options on the MongoDB enabled, you will not be able to run some database operation without an authenticated user.
Log in to the MongoDB shell without the user using the command below.
mongo
Create a new database ‘hakasedb’ and insert new data into it.
use hakasedb
db.movie.insert({"name":"Usagi Drop"})
As a result, you will get an error message that you must be an authentication user for the insert operation.
Finally, the MongoDB installation on Debian has been completed successfully.