Nagios is a free and open-source network monitoring tool for Windows, Linux, BSD, etc. It monitors hosts, processes, and services for remote servers, routers, and other devices. It provides a simple and user-friendly web-based interface for management and monitoring. If the monitored devices fail, you can configure it to send a notification via email, SMS, or phone call. With Nagios, you can monitor CPU load, memory usage, disk usage, logged-in users, processes, and services such as HTTP, FTP, SSH, SMTP, etc.
In this article, you will learn how to install the Nagios monitoring tool on Alma Linux 8.
Prerequisites
- A server running Alma Linux 8.
- A root password is configured on the server.
Install the required dependencies
First you need to install Apache, PHP and other required dependencies on your server. You can install them all by running the following command:
dnf install httpd wget php perl unzip glibc automake glibc-common gettext autoconf php php-cli gcc gd gd-devel net-snmp openssl-devel unzip net-snmp postfix net-snmp-utils -y
Next, you also need to install the Development Tools group package to compile Nagios from source code. You can install it with the following command:
dnf groupinstall "Development Tools" -y
Next, start the Apache and PHP-FPM service and enable them with the following command so that they start after the system reboots:
systemctl start httpd
systemctl start php-fpm
systemctl enable httpd
systemctl enable php-fpm
Install Nagios on Alma Linux 8
By default, the Nagios package is not included in the Alma Linux standard repository. You must therefore compile it from the source code.
First, download the latest version of Nagios using the following command:
wget https://assets.nagios.com/downloads/nagioscore/releases/nagios-4.4.7.tar.gz
Once Nagios is downloaded, unzip the downloaded file with the following command:
tar -xzf nagios-4.4.7.tar.gz
Next, navigate to the unzipped Nagios directory and configure it with the following command:
cd nagios-4.4.7
./configure
You will get the following output:
 General Options:
 -------------------------
        Nagios executable:  nagios
        Nagios user/group:  nagios,nagios
       Command user/group:  nagios,nagios
             Event Broker:  yes
        Install ${prefix}:  /usr/local/nagios
    Install ${includedir}:  /usr/local/nagios/include/nagios
                Lock file:  /run/nagios.lock
   Check result directory:  /usr/local/nagios/var/spool/checkresults
           Init directory:  /lib/systemd/system
  Apache conf.d directory:  /etc/httpd/conf.d
             Mail program:  /usr/sbin/sendmail
                  Host OS:  linux-gnu
          IOBroker Method:  epoll

 Web Interface Options:
 ------------------------
                 HTML URL:  http://localhost/nagios/
                  CGI URL:  http://localhost/nagios/cgi-bin/
 Traceroute (used by WAP):


Review the options above for accuracy.  If they look okay,
type 'make all' to compile the main program and CGIs.
Next, compile all programs with the following command:
make all
Next, add the Nagios user and the Nagios group with the following command:
make install-groups-users
Next, add the Nagios user to the Apache group:
usermod -aG nagios apache
Next, install Nagios with the following command:
make install
Next, install the init service with the following command:
make install-init
Output:
/usr/bin/install -c -m 755 -d -o root -g root /lib/systemd/system
/usr/bin/install -c -m 755 -o root -g root startup/default-service /lib/systemd/system/nagios.service
Next, install the Nagios daemon service with the following command:
make install-daemoninit
Output:
/usr/bin/install -c -m 755 -d -o root -g root /lib/systemd/system
/usr/bin/install -c -m 755 -o root -g root startup/default-service /lib/systemd/system/nagios.service
Created symlink /etc/systemd/system/multi-user.target.wants/nagios.service → /usr/lib/systemd/system/nagios.service.
Next, install the Nagios command line with the following command:
make install-commandmode
Next, install the Nagios sample configuration file with the following command:
make install-config
Next, install the Apache configuration file for Nagios:
make install-webconf
Output:
/usr/bin/install -c -m 644 sample-config/httpd.conf /etc/httpd/conf.d/nagios.conf
if [ 0 -eq 1 ]; then \
	ln -s /etc/httpd/conf.d/nagios.conf /etc/apache2/sites-enabled/nagios.conf; \
fi
Next, create an admin user for Nagios with the following command:
htpasswd -c /usr/local/nagios/etc/htpasswd.users nagiosadmin
Set an admin password as shown below:
New password:
Re-type new password:
Adding password for user nagiosadmin
Next, set ownership of the Nagios password file:
chown apache:apache /usr/local/nagios/etc/htpasswd.users
chmod 640 /usr/local/nagios/etc/htpasswd.users
Next, restart the Apache service with the following command:
systemctl restart httpd
Now you can check the status of the Apache service with the following command:
systemctl status httpd
You will receive the following output:
? httpd.service - The Apache HTTP Server
   Loaded: loaded (/usr/lib/systemd/system/httpd.service; disabled; vendor preset: disabled)
  Drop-In: /usr/lib/systemd/system/httpd.service.d
           ??php-fpm.conf
   Active: active (running) since Fri 2022-04-15 09:36:16 UTC; 4s ago
     Docs: man:httpd.service(8)
 Main PID: 61846 (httpd)
   Status: "Started, listening on: port 80"
    Tasks: 213 (limit: 11412)
   Memory: 24.4M
   CGroup: /system.slice/httpd.service
           ??61846 /usr/sbin/httpd -DFOREGROUND
           ??61848 /usr/sbin/httpd -DFOREGROUND
           ??61849 /usr/sbin/httpd -DFOREGROUND
           ??61850 /usr/sbin/httpd -DFOREGROUND
           ??61851 /usr/sbin/httpd -DFOREGROUND

Apr 15 09:36:15 linux systemd[1]: httpd.service: Succeeded.
Apr 15 09:36:15 linux systemd[1]: Stopped The Apache HTTP Server.
Apr 15 09:36:15 linux systemd[1]: Starting The Apache HTTP Server...
Start Nagios service
Now you can start the Nagios service with the following command and enable it to be started when the system is restarted:
systemctl start nagios
systemctl enable nagios
To check the Nagios service, execute the following command:
systemctl status nagios
You will receive the following output:
? nagios.service - Nagios Core 4.4.7
   Loaded: loaded (/usr/lib/systemd/system/nagios.service; enabled; vendor preset: disabled)
   Active: active (running) since Fri 2022-04-15 09:36:35 UTC; 6s ago
     Docs: https://www.nagios.org/documentation
  Process: 62069 ExecStart=/usr/local/nagios/bin/nagios -d /usr/local/nagios/etc/nagios.cfg (code=exited, status=0/SUCCESS)
  Process: 62067 ExecStartPre=/usr/local/nagios/bin/nagios -v /usr/local/nagios/etc/nagios.cfg (code=exited, status=0/SUCCESS)
 Main PID: 62070 (nagios)
    Tasks: 6 (limit: 11412)
   Memory: 4.9M
   CGroup: /system.slice/nagios.service
           ??62070 /usr/local/nagios/bin/nagios -d /usr/local/nagios/etc/nagios.cfg
           ??62071 /usr/local/nagios/bin/nagios --worker /usr/local/nagios/var/rw/nagios.qh
           ??62072 /usr/local/nagios/bin/nagios --worker /usr/local/nagios/var/rw/nagios.qh
           ??62073 /usr/local/nagios/bin/nagios --worker /usr/local/nagios/var/rw/nagios.qh
           ??62074 /usr/local/nagios/bin/nagios --worker /usr/local/nagios/var/rw/nagios.qh
           ??62075 /usr/local/nagios/bin/nagios -d /usr/local/nagios/etc/nagios.cfg

Apr 15 09:36:35 linux nagios[62070]: qh: core query handler registered
Apr 15 09:36:35 linux nagios[62070]: qh: echo service query handler registered
Apr 15 09:36:35 linux nagios[62070]: qh: help for the query handler registered
Apr 15 09:36:35 linux nagios[62070]: wproc: Successfully registered manager as @wproc with query handler
Apr 15 09:36:35 linux nagios[62070]: wproc: Registry request: name=Core Worker 62073;pid=62073
Apr 15 09:36:35 linux nagios[62070]: wproc: Registry request: name=Core Worker 62074;pid=62074
Apr 15 09:36:35 linux nagios[62070]: wproc: Registry request: name=Core Worker 62071;pid=62071
Apr 15 09:36:35 linux nagios[62070]: wproc: Registry request: name=Core Worker 62072;pid=62072
Apr 15 09:36:37 linux nagios[62070]: Successfully launched command file worker with pid 62075
Install Nagios plugins
First install the SNMP plugins with the following command:
dnf config-manager --enable powertools
dnf install -y perl-Net-SNMP
Next, download the Nagios plugins with the following command:
wget -O nagios-plugins.tar.gz https://github.com/nagios-plugins/nagios-plugins/releases/download/release-2.3.3/nagios-plugins-2.3.3.tar.gz
Once the download is complete, unzip the downloaded file with the following command:
tar zxf nagios-plugins.tar.gz
Then change to the directory with the Nagios plugins and install them with the following command:
cd nagios-plugins-2.3.3
./configure
make
make install
Next, download the NRPE plugin with the following command:
wget https://github.com/NagiosEnterprises/nrpe/releases/download/nrpe-4.0.3/nrpe-4.0.3.tar.gz
Once the download is complete, unzip the downloaded file with the following command:
tar zxf nrpe-4.0.3.tar.gz
Then change to the unzipped directory and install it with the following command:
cd nrpe-4.0.3
./configure
make check_nrpe
make install
make install-plugin
make install-config
make install-init
Next, start the NRPE and Nagios service with the following command:
systemctl start nrpe
systemctl start nagios
Check the NRPE plugins with the following command:
/usr/local/nagios/bin/nagios -v /usr/local/nagios/etc/nagios.cfg
If everything is OK, you will get the following output:
Copyright (c) 1999-2009 Ethan Galstad
Last Modified: 2022-04-14
License: GPL

Website: https://www.nagios.org
Reading configuration data...
   Read main config file okay...
   Read object config files okay...

Running pre-flight check on configuration data...

Checking objects...
	Checked 8 services.
	Checked 1 hosts.
	Checked 1 host groups.
	Checked 0 service groups.
	Checked 1 contacts.
	Checked 1 contact groups.
	Checked 24 commands.
	Checked 5 time periods.
	Checked 0 host escalations.
	Checked 0 service escalations.
Checking for circular paths...
	Checked 1 hosts
	Checked 0 service dependencies
	Checked 0 host dependencies
	Checked 5 timeperiods
Checking global event handlers...
Checking obsessive compulsive processor commands...
Checking misc settings...

Total Warnings: 0
Total Errors:   0

Things look okay - No serious problems were detected during the pre-flight check
Access the Nagios web interface
Now open your web browser and call up the Nagios web interface via the URL http://your-server-ip/nagios. You will be redirected to the Nagios login page:
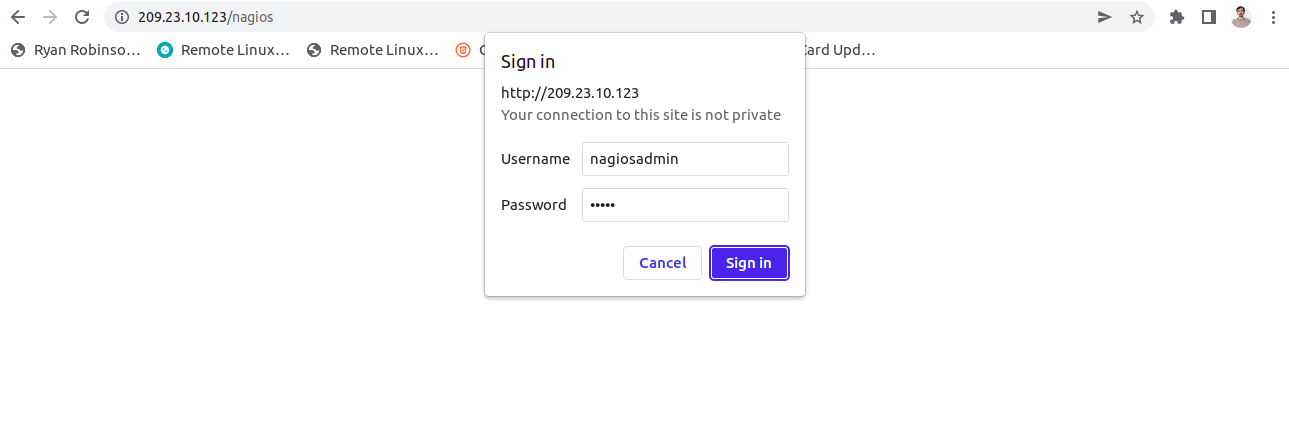
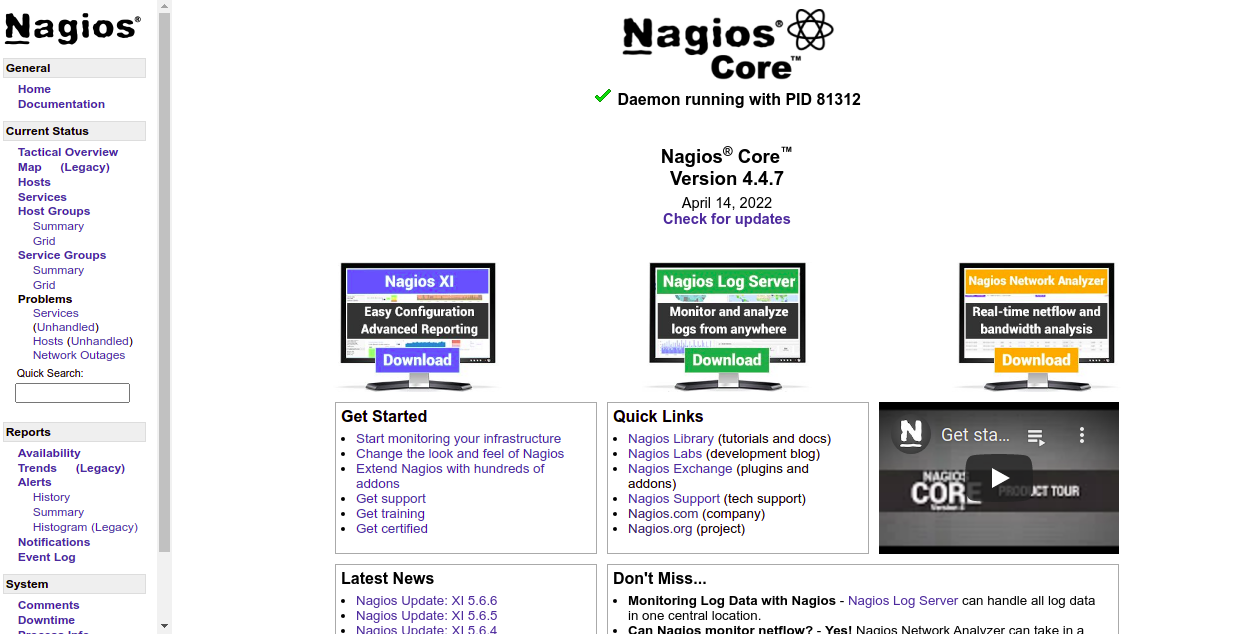
Enter your admin username and password and click on the ” Login ” button. Once you are logged in, you should see the Nagios dashboard on the following screen:
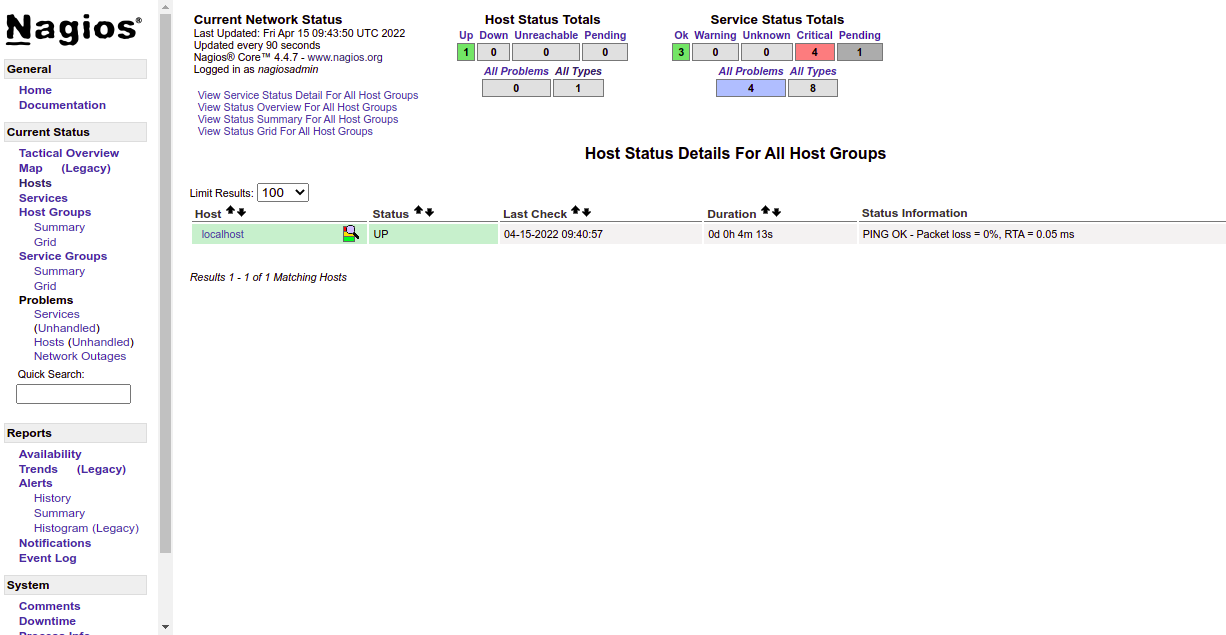
Click on Hosts in the left pane. On the following screen, you should see the details of the Nagios hosts:
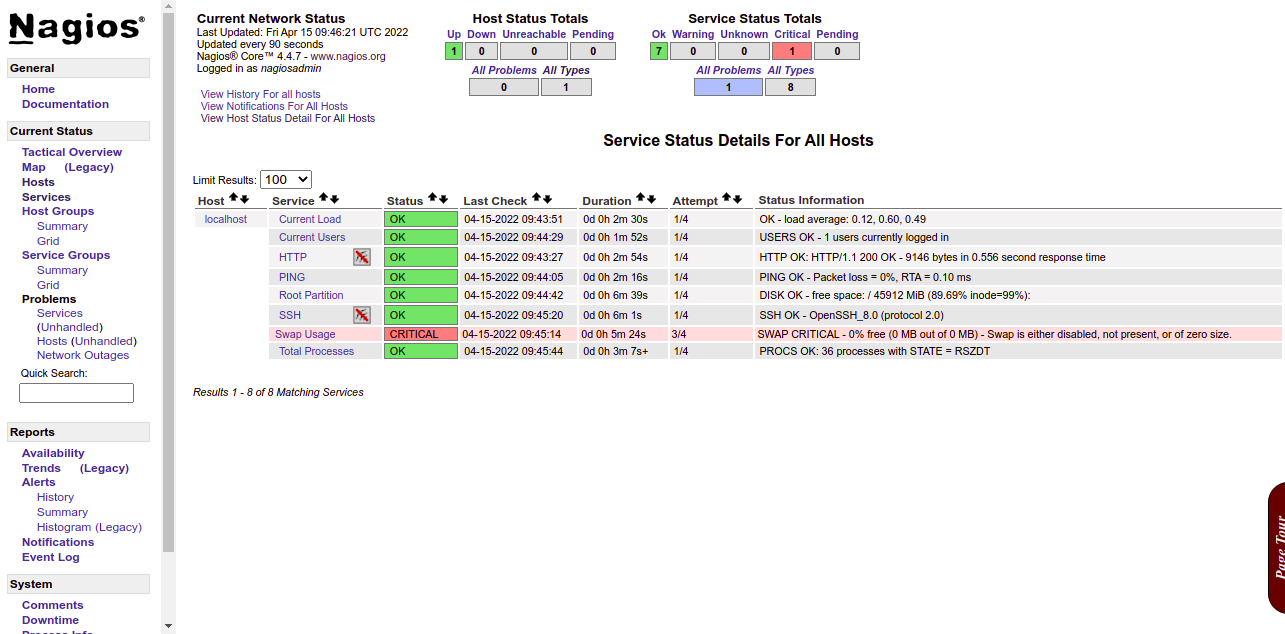
Click on the services. On the following screen, you should see the status of all services:
Conclusion
Congratulations! You have successfully installed and configured Nagios on Alma Linux 8. You can now add remote servers or devices to Nagios and monitor them from the Nagios dashboard. If you have any questions, please feel free to contact me.