Prestashop is a free and open-source e-commerce solution written in PHP. It allows you to create self-hosted online stores and grow your online business. Prestashop is a fully customizable and feature-rich e-commerce solution that lets you create comprehensive e-commerce websites. Now, Prestashop is used by more than 250,000 online stores worldwide and is available in 65 languages.
This post will show you how to install Prestashop on Debian 11. We also cover the basic installation of the LAMP stack on Debian Linux.
Requirements
- A Linux server Debian 11.
- A root user or a non-root user with administrator privileges.
- A domain name pointing to the IP address of the server.
Install LAMP Stack
The first step in this post is to install LAMP Stack on the Debian 11 server. This can be done with a single apt command.
Before installing the packages, update your Debian repository with the following command.
sudo apt update
Now install the LAMP stack packages with the following apt command.
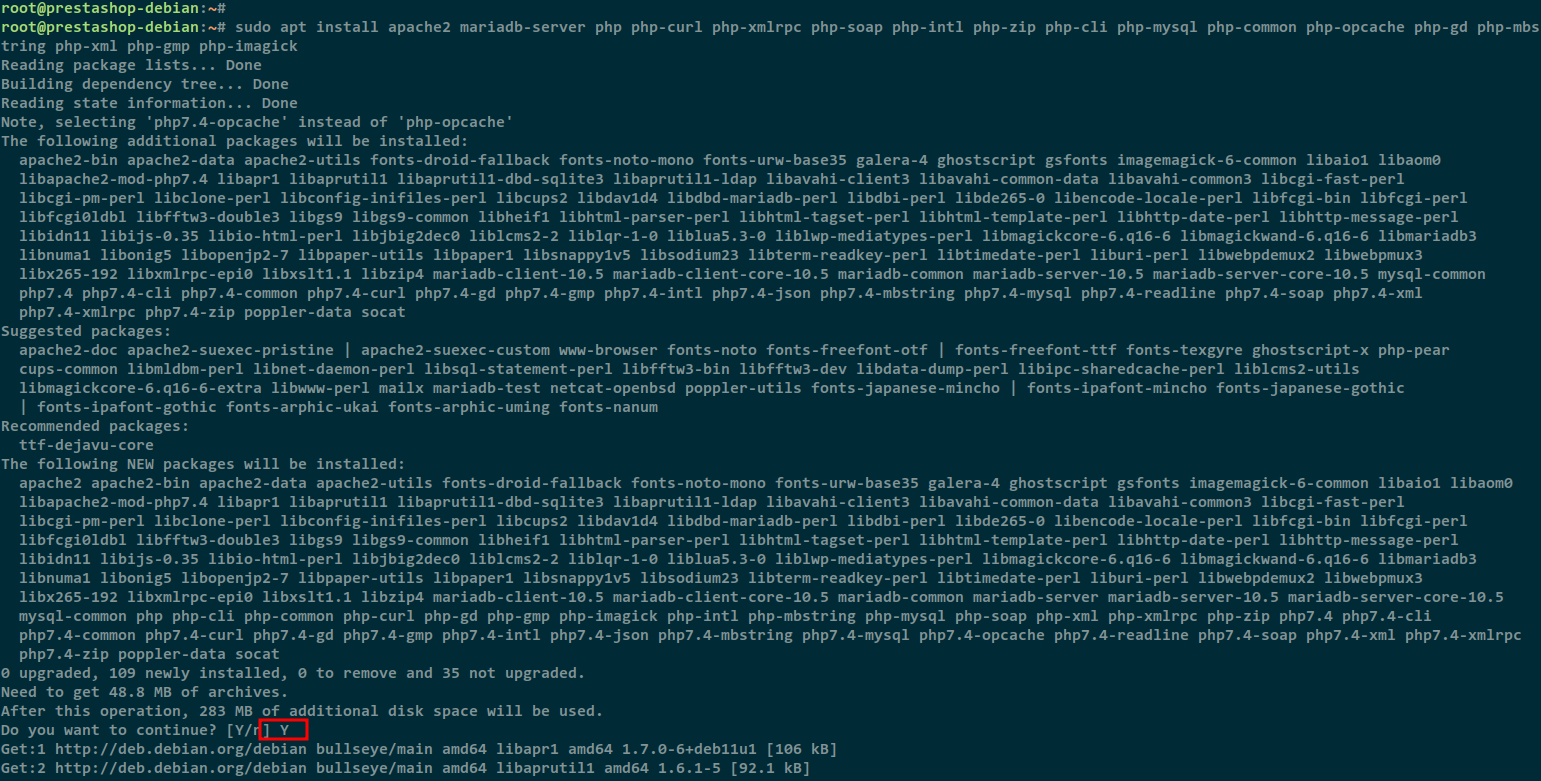
sudo apt install apache2 mariadb-server php php-curl php-xmlrpc php-soap php-intl php-zip php-cli php-mysql php-common php-opcache php-memcached php-bcmath php-gd php-mbstring php-xml php-gmp php-imagick
Type Y to confirm the installation.
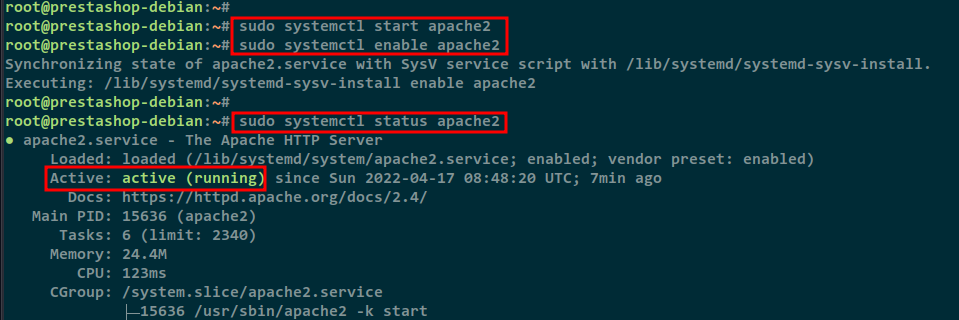
Now start the Apache2 service and activate it with the following command.
sudo systemctl start apache2
sudo systemctl enable apache2
Check the Apache2 service.
sudo systemctl status apache2
You should get the following output.
Next, start the MariaDB services and activate the service using the command below.
sudo systemctl start mariadb
sudo systemctl enable mariadb
Check and verify the MariaDB service.
sudo systemctl status mariadb
You should get the following output.
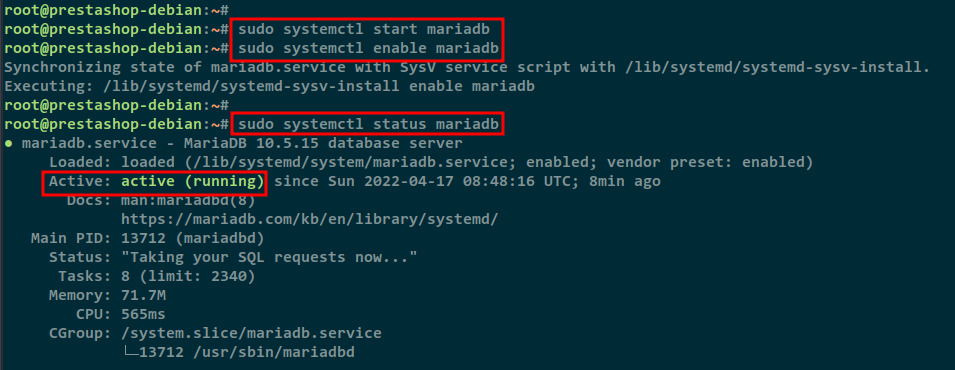
Apache2 and the MariaDB service are running on the Debian 11 server.
Setting up the UFW firewall
In the next step you will configure the UFW firewall to open the HTTP and HTTPS ports. So before you add new UFW firewall rules, you need to make sure that the UFW service is running.
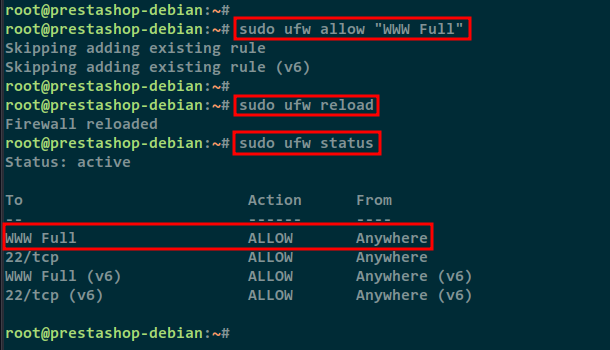
Now run the ufw command below to add the HTTP and HTTPS service.
sudo ufw allow "WWW Full"
Reload the UFW firewall rules using the command below.
sudo ufw reload
Check the UFW firewall rules by running the command below.
sudo ufw status
You should get the following output indicating that the WWW Full or HTTP and HTTPS services have been added to the UFW firewall.
Setting up the MariaDB deployment
To set up the MariaDB database, you need to set up the root password for your MariaDB server. You will use the mysql_secure_installation utility, which allows you to set up the MariaDB database on your server securely.
Run the following mysql_secure_installation command to begin configuring the MariaDB server.
sudo mysql_secure_installation
The default MariaDB installation does not include a password, so press ENTER to continue.
To log into MariaDB to secure it, we'll need the current
password for the root user. If you've just installed MariaDB, and
haven't set the root password yet, you should just press enter here.
Enter current password for root (enter for none):
OK, successfully used password, moving on…
Type Y to change the default authentication method for local users to unix_socket.
Setting the root password or using the unix_socket ensures that nobody
can log into the MariaDB root user without the proper authorisation.
Your root account is protected, so you can safely answer ‘n’.
Switch to unix_socket authentication [Y/n] Y
Enabled successfully!
Reloading privilege tables..
… Success!
Type Y to set the root password for the MariaDB server, and then type your new password for the MariaDB server.
You already have your root account protected, so you can safely answer 'n'.
Change the root password? [Y/n] Y
New password:
Re-enter new password:
Password updated successfully!
Reloading privilege tables..
… Success!
Remove the default anonymous user from your MariaDB server by typing Y.
By default, a MariaDB installation has an anonymous user, allowing anyone
to log into MariaDB without having to have a user account created for
them.  This is intended only for testing, and to make the installation
go a bit smoother.  You should remove them before moving into a
production environment.
Remove anonymous users? [Y/n] Y
… Success!
Type Y again to disable remote login for the MariaDB root user.
Normally, the root should only be allowed to connect from 'localhost'.  This
ensures that someone cannot guess at the root password from the network.
Disallow root login remotely? [Y/n] Y
… Success!
A database test is included with the default MariaDB installation. Type Y to remove the default test database from your MariaDB server.
By default, MariaDB comes with a database named 'test' that anyone can
access.  This is also intended only for testing, and should be removed
before moving into a production environment.
Remove test database and access to it? [Y/n] Y
– Dropping test database…
… Success!
– Removing privileges on test database…
… Success!
Now type Y to reload the permissions for the tables on your MariaDB server.
Reloading the privilege tables will ensure that all changes made so far
will take effect immediately.
Reload privilege tables now? [Y/n] Y
… Success!
Cleaning up…
When the process is complete, you will see the message below.
All done!  If you've completed all of the above steps, your MariaDB
installation should now be secure.
Thanks for using MariaDB!
Set up PHP
For PHP configuration, you need to change some default configurations for Prestashop installation.
Edit the PHP configuration /etc/php/7.4/apache2/php.ini with the nano editor.
sudo nano /etc/php/7.4/apache2/php.ini
Change the default PHP configuration as described below. This configuration is specific to the Prestashop installation.
date.timezone = Europe/Paris
max_execution_time = 130
memory_limit = 256M
allow_url_fopen = On
allow_url_include = Off
post_max_size = 128M
upload_max_filesize = 128M
max_input_vars = 5000
Save the configurations and close it when you are done.
Now restart the Apache2 service for the PHP changes to take effect.
sudo systemctl restart apache2
Now go to the next step to continue.
Create a database and user
After setting up PHP, you need to create a new database and user for the Prestashop installation.
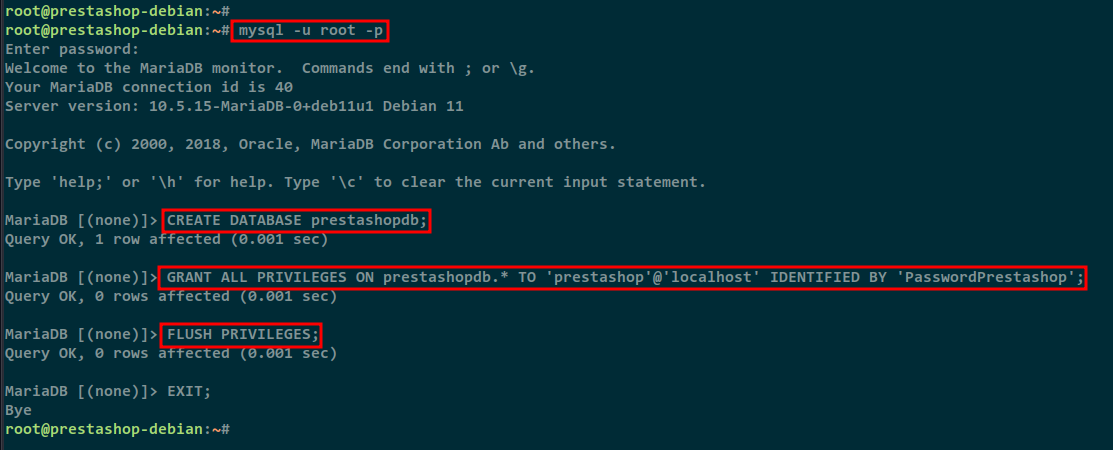
Log in to the MariaDB shell with the following command to create a new database and user.
mysql -u root -p
You will be prompted to enter the root password for the MariaDB server authentication. You can simply press ENTER or enter the correct password for your MariaDB root user.
Next, create a new database prestashopdb with the user prestashop and the password PasswordPrestashop. You can also change the default database name and password with your database data.
CREATE DATABASE prestashopdb;
GRANT ALL PRIVILEGES ON prestashopdb.* TO 'prestashop'@'localhost' IDENTIFIED BY 'PasswordPrestashop';
FLUSH PRIVILEGES;
EXIT;
Now go to the next step to test and verify the server environment for Prestashop installation.
Composer installation
In this tutorial, I will install Prestashop with the help of Composer. So you will install Composer on your Debian 11 server.
First, run the following command to download the PHP Composer installer and check the installation file.
php -r "copy('https://getcomposer.org/installer', 'composer-setup.php');"
php -r "if (hash_file('sha384', 'composer-setup.php') === '906a84df04cea2aa72f40b5f787e49f22d4c2f19492ac310e8cba5b96ac8b64115ac402c8cd292b8a03482574915d1a8') { echo 'Installer verified'; } else { echo 'Installer corrupt'; unlink('composer-setup.php'); } echo PHP_EOL;"
Make sure you get the message“Installer verified“, which means that the installation file is correct.
Next, run the Composer installation script to download the Composer. When the download is complete, remove the installer script.
php composer-setup.php
php -r "unlink('composer-setup.php');"
Now move the composer.phar file to the /usr/local/bin directory so that the Debian system users can run Composer.
sudo mv composer.phar /usr/local/bin/composer
Finally, check the Composer installation with the following command.
sudo -u www-data composer --version
sudo -u www-data composer -v
You will see that PHP Composer is installed on your Debian 11 system and you can install Prestashop.
Download Prestashop Checker
Before you install Prestashop, you need to test and verify your environment for Prestashop. To do this, download the PHP script that will allow you to check and verify your system environment.
Go to the /var/www/html directory and run the wget command to download the Prestashop installation system checker.
cd /var/www/html/
wget https://github.com/PrestaShop/php-ps-info/archive/refs/tags/v1.1.tar.gz
You will see the output file v1.1.tar.gz which contains the source code for the system checker tool.
Extract the v1.1.tar.gz file and rename the extracted directory to check-ps.
tar -xzvf v1.1.tar.gz
mv php-ps-info-1.1 check-ps
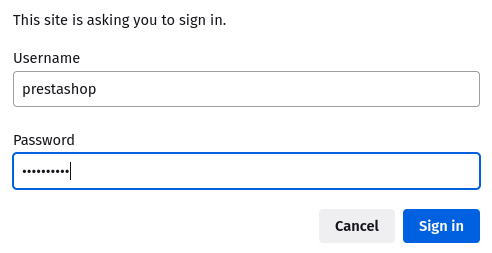
Now open your web browser and call the IP address of your server with the following path: /check-ps/phppsinfo.php.
http://server-ip/check-ps/phppsinfo.php
Log in with the default user and password Prestashop.
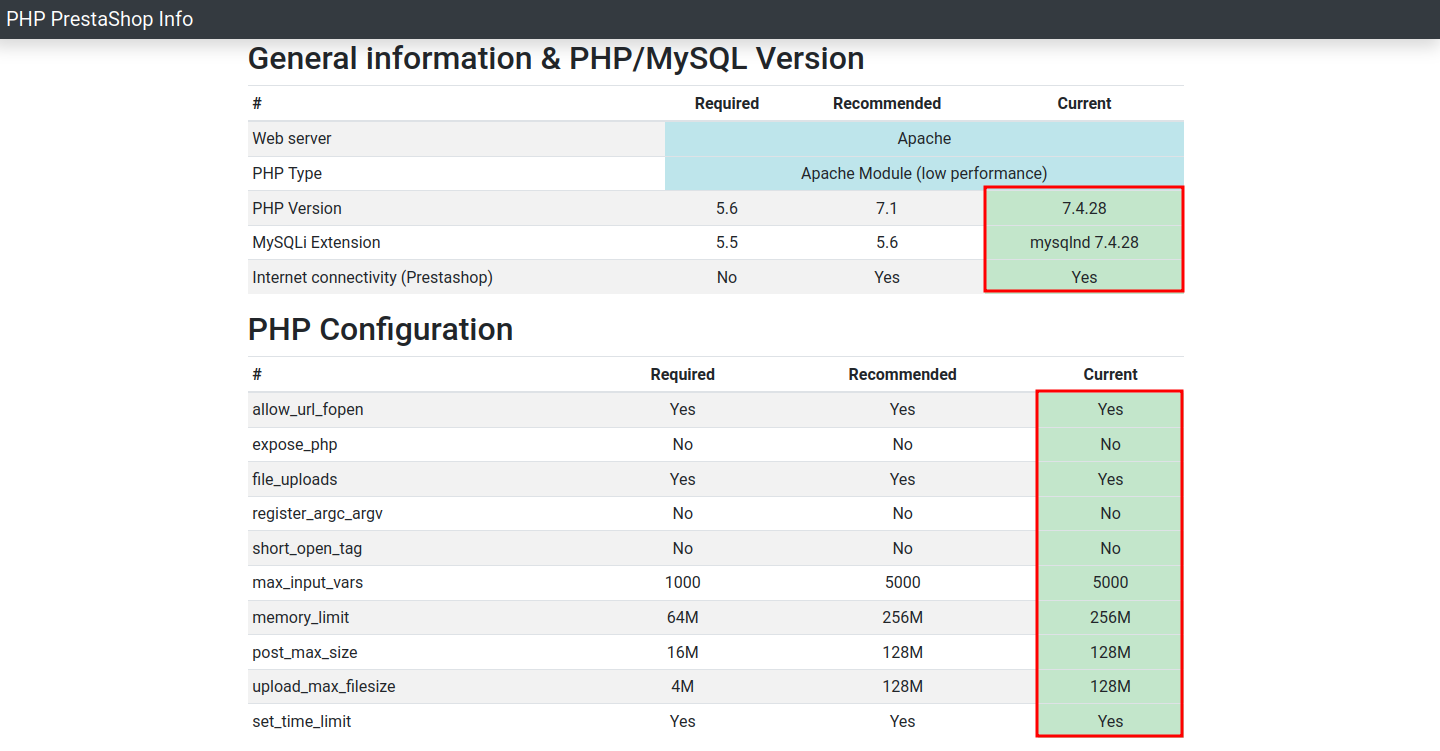
On the top page, you will see detailed system information for Prestashop installation and detailed PHP configuration. Make sure that all PHP configurations are as recommended.
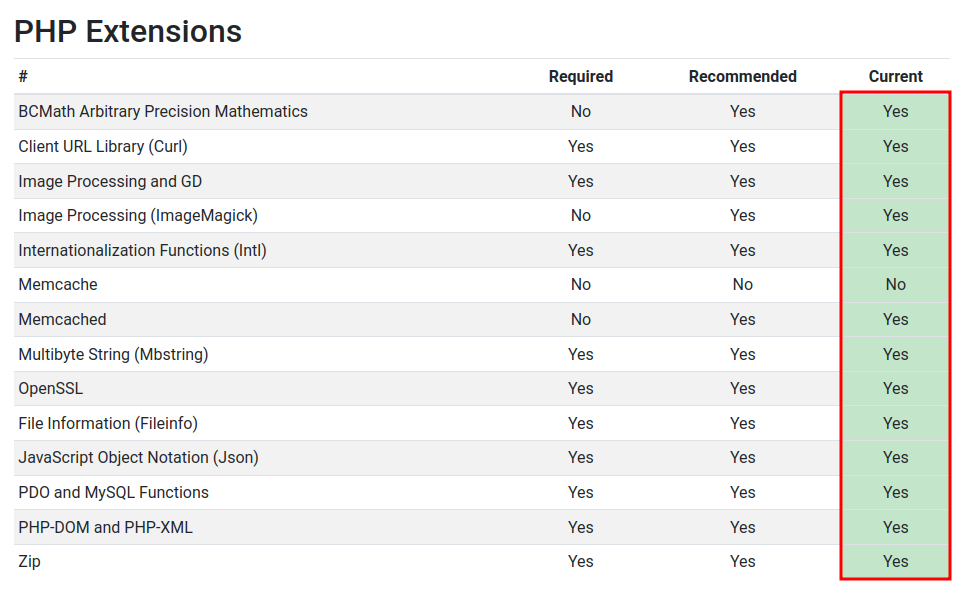
Now, scroll down to see the PHP extensions section. You need to ensure that all Prestashop installation extensions are installed on your system.
Downloading Prestashop
After the prerequisites are met, download Prestashop and install it using the Composer tool.
Change the working directory to /var/www/ and run the git command to download the Prestashop source code.
cd /var/www/
git clone https://github.com/PrestaShop/PrestaShop.git prestashop
Change the owner of the /var/www/prestashop directory to www-data and give the www-data user read and write permissions to this directory.
chown -R www-data:www-data /var/www/prestashop
chmod u+rw /var/www/prestashop
Change to the /var/www/prestashop directory and install all PHP dependencies for Prestashop using the composer command below.
cd /var/www/prestashop
sudo -u www-data composer install --no-dev
The composer will install the PHP dependencies for your Prestashop installation.
Setting up the Apache2 virtual host
You have now downloaded the Prestashop source code and installed all PHP dependencies using Composer. Now you will create a new Apache2 Virtual Host configuration for Prestashop.
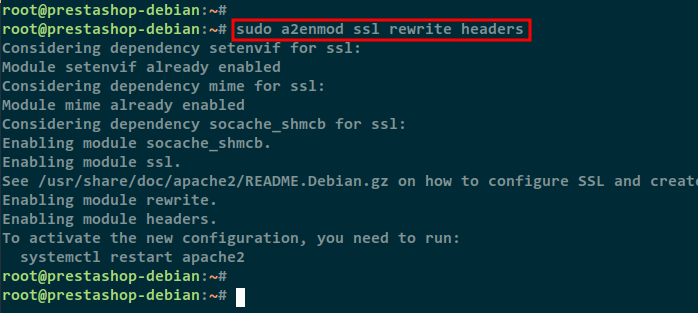
Run the following command to enable some Apache2 modules.
sudo a2enmod ssl rewrite headers
You will see the following output:
Now create a new Apache2 Virtual Host configuration /etc/apache2/sites-available/prestashop.conf using the nano editor.
sudo nano /etc/apache2/sites-available/prestashop.conf
Add the following virtual host configuration. You must also replace some information with your own, such as the domain name, SSL path, and DocumentRoot directory for your Prestashop installation.
<VirtualHost *:80>
    ServerName hwdomain.com
    Redirect permanent / https://hwdomain.com/
</VirtualHost>
<VirtualHost *:443>
ServerAdmin admin@hwdomain.com
DocumentRoot /var/www/prestashop
ServerName hwdomain.com

Protocols h2 http/1.1

SSLEngine On
SSLCertificateFile /etc/letsencrypt/live/hwdomain.com/fullchain.pem
SSLCertificateKeyFile /etc/letsencrypt/live/hwdomain.com/privkey.pem

<Directory /var/www/prestashop>
# enable the .htaccess rewrites
AllowOverride All
Options +Indexes
Require all granted

# Disable back office token
# SetEnv _TOKEN_ disabled
</Directory>

ErrorLog /var/log/apache2/prestashop_error.log
CustomLog /var/log/apache2/prestashop_access.log combined
</VirtualHost>
Save the configuration when you are done.
Next, activate the new prestashop.conf virtual host configuration and check your Apache2 configuration with the following command.
sudo a2ensite prestashop.conf
sudo apachectl configtest
If you see an output message like Syntax OK, it means that your Apache2 configuration is correct.
Restart the Apache2 service to apply the new virtual host prestashop.conf.
sudo systemctl restart apache2
Start Prestashop installation
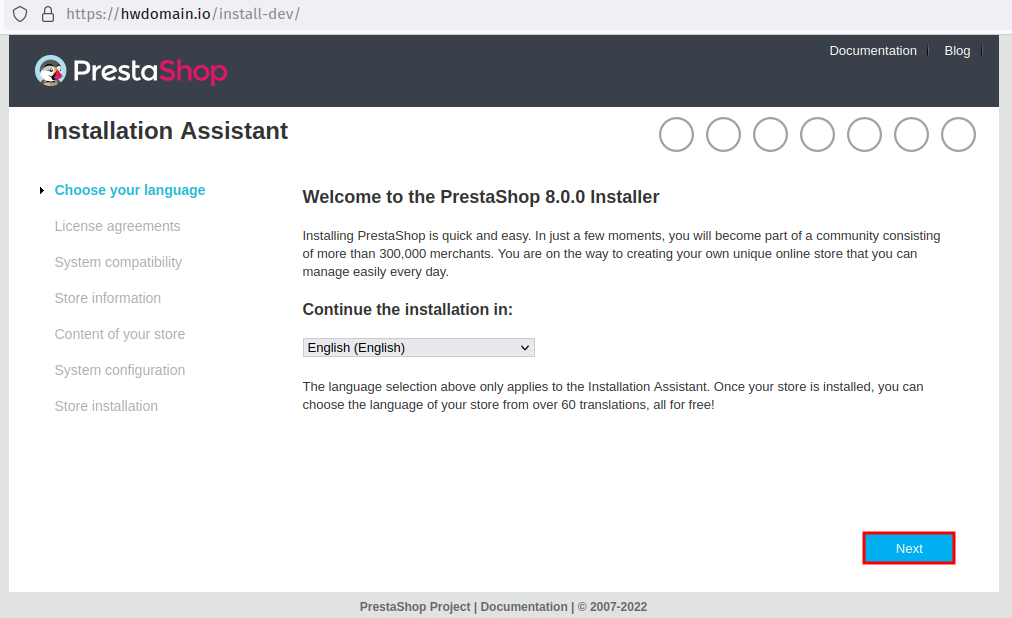
To start the Prestashop installation, go to the domain name of your Prestashop installation, e.g. https://hwdomain.io/.
First, select the language for your Prestashop and click Next. The default language is English.
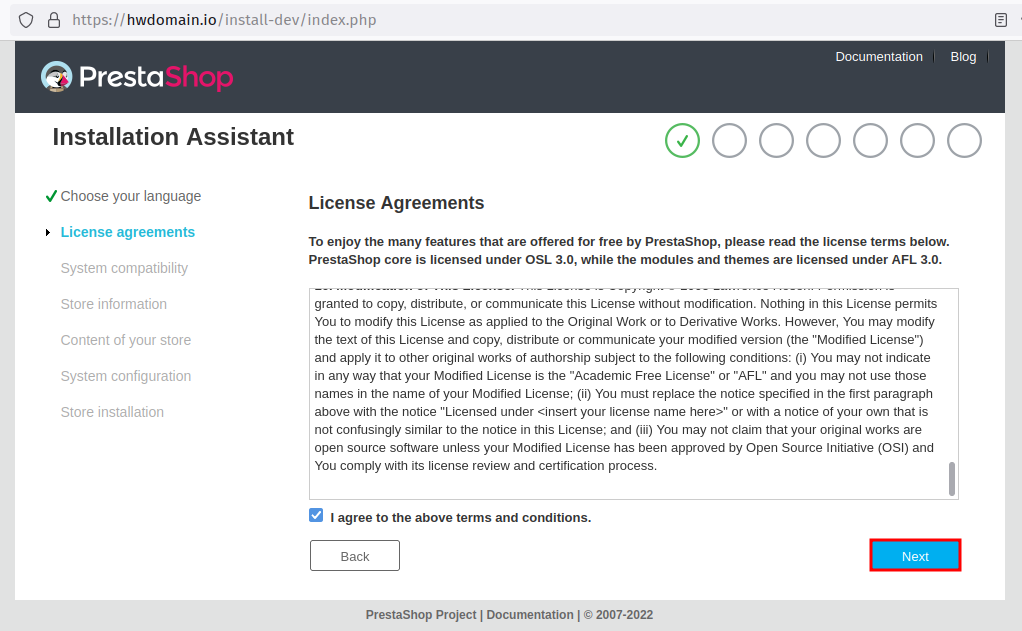
Check the box for the Prestashop license agreement and click Next.
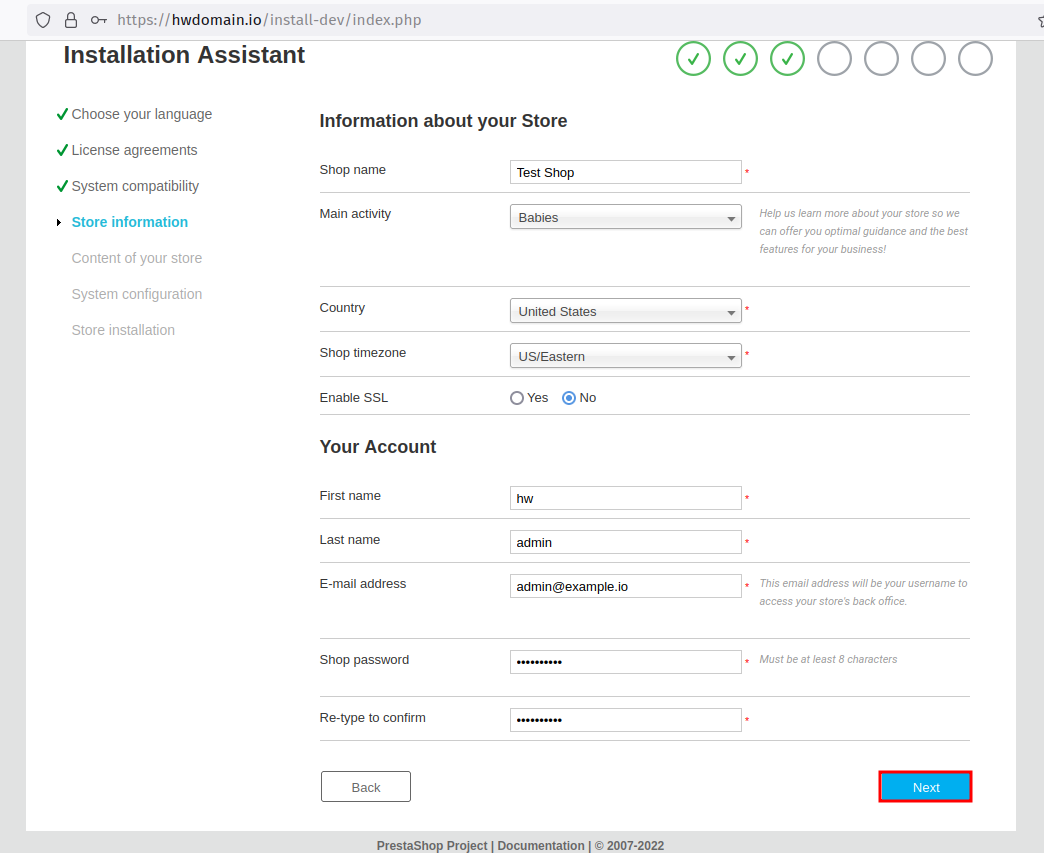
Enter the details of the new admin user for your Prestashop installation and then click Next.
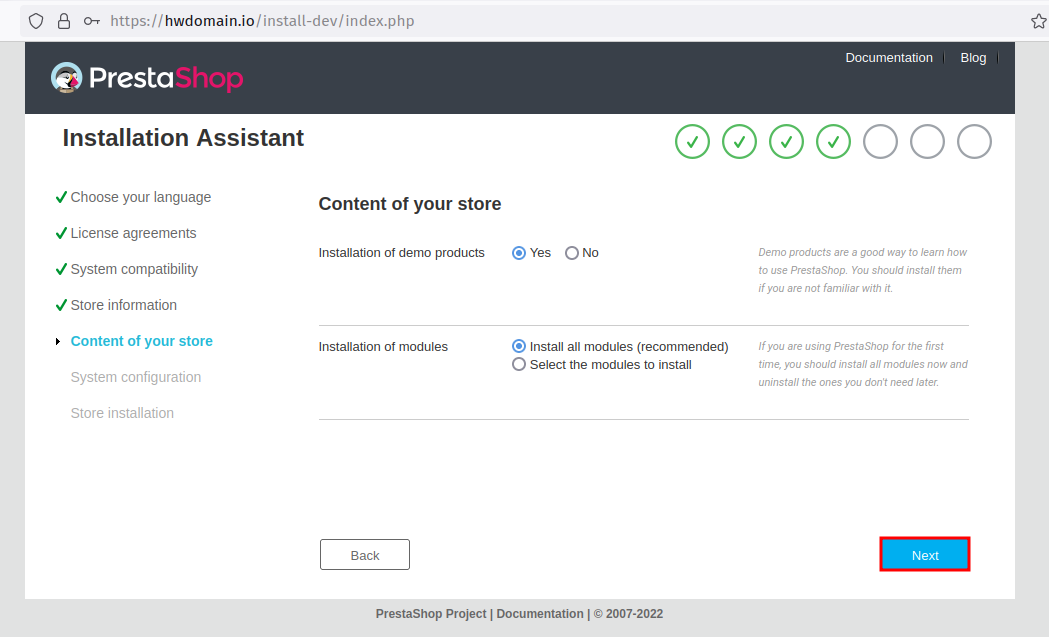
You can install demo products for your Prestashop installation. You can also install the recommended modules automatically.
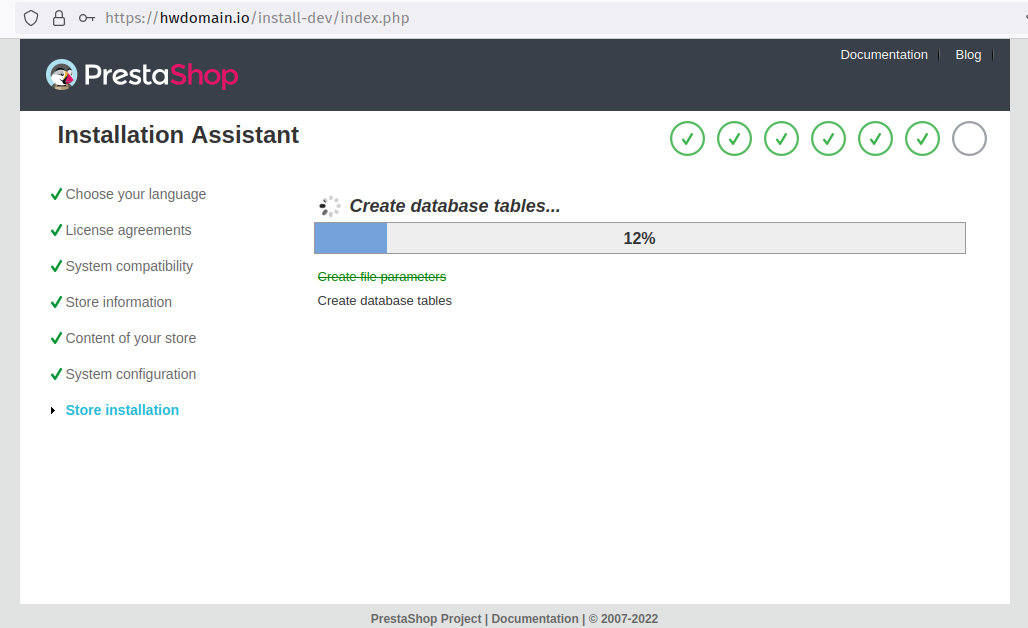
Enter the MariaDB database details for your Prestashop installation and click Next.

When the installation is complete, you will see the following page.
On the next page you will get an info message about deleting the installation directory.
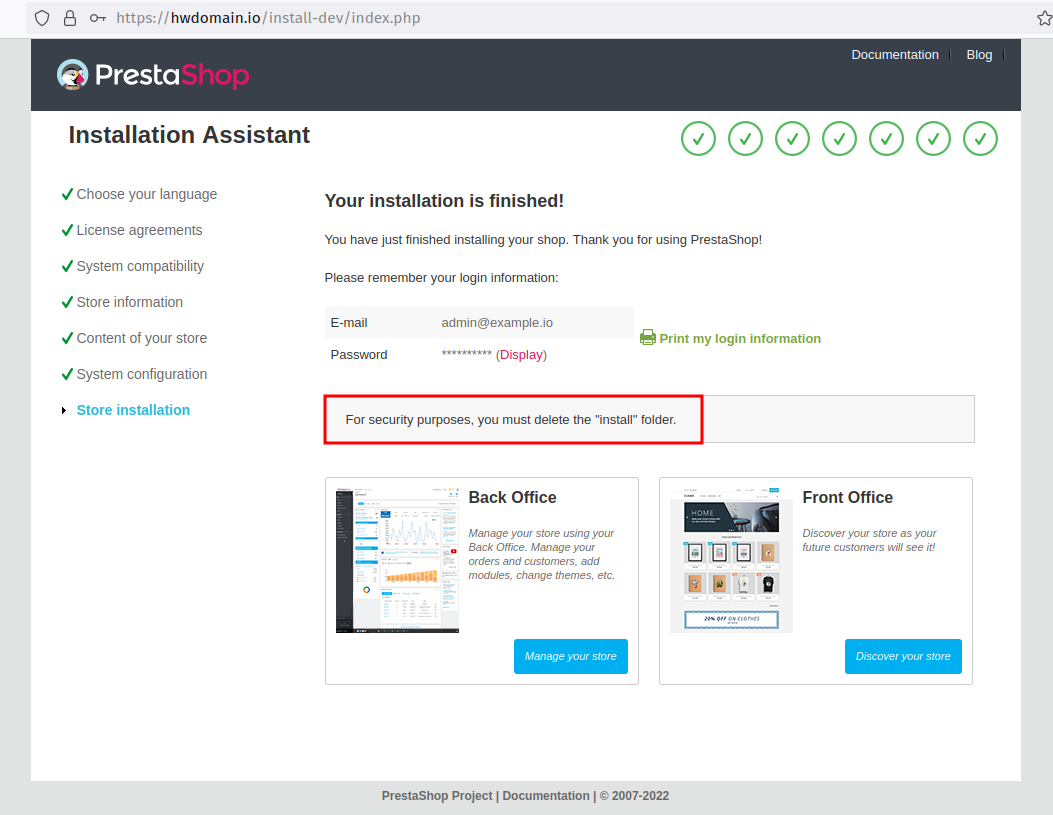
Go back to your Terminal Server Prestashop and delete the installation directory.
rm -rf /var/www/prestashop/install
Now, you have completed the Prestashop installation.
Conclusion
Congratulations! You have now learned how to install and use Prestashop on Debian 11 server with the basic LAMP stack.