In this tutorial, we will learn how to install the latest graphical version of Oracle Linux 7 on a dedicated hardware server or a private virtual machine using a DVD ISO image or a bootable Oracle Linux USB. Oracle Linux is a free and stable open source Linux distribution developed by Oracle and compiled largely from Red Hat Enterprise Linux source code.
The latest version of Oracle Linux includes many bug fixes, new packages, and improved system stability and performance. Some of the most notable changes in this new release are: Kernel support with Red Hat Compatible Kernel (RHCK), optimized Unbreakable Enterprise Kernel for Oracle Linux (UEK) with support for Oracle database, signed certificate from Oracle to support UEFI Secure Boot, server-side support for SSH1 protocol from SSH server has been deprecated, all cryptographic protocols and algorithms considered insecure have been deprecated, yum package manager with payload_gpgcheck support, NBDE support for encrypted disk drives, and extended support for the Btrfs file system.
The installation process will cover only the basic process of installing Oracle Linux 7 Server with graphical user interface on UEFI-based machines. However, the UEFI installation process can be successfully used on older BIOS motherboards or on UEFI systems with Legacy Mode or CSM (Compatibility Support Module) enabled.
PREREQUISITES
- The latest Oracle Linux Server ISO image for the x86_64bit architecture, which you can obtain from the following download mirrors https://community.oracle.com/docs/DOC-917963You. You may also need to log in to the Oracle Software Delivery Cloud to get the download links.
- A direct or proxy Internet connection to the machine where the installation is taking place to activate the RHEL system and then download and upgrade the system.
Preliminary Requirements
After downloading the Oracle Linux 7.4 DVD ISO image from the Oracle Mirrors download link, burn the bootable image to a DVD using DVD burning software or create a bootable USB drive with the Oracle Linux 7.4 image. The bootable USB drive must be created on Windows using the Rufus utility to be fully compatible with UEFI-based motherboards. On Linux, you can use the dd command line software to transfer the image to a USB drive. If you don’t have a UEFI motherboard, you can use any other program to create a bootable Oracle Linux 7.4 USB stick. Some of the most popular programs for creating bootable USB sticks can be found at https://www.pendrivelinux.com/.
Another important aspect to keep in mind to properly install Oracle Linux 7 on UEFI-based motherboards is to open your motherboard’s UEFI settings (by pressing a special key, e.g. F1, F2, F11, F12, Del, Esc) and disable the QuickBoot/FastBoot and Secure Boot options, even though the Oracle Linux boot loader is digitally signed for UEFI. The BIOS/EFI keys you need to press during hardware initialization or when powering on the computer to access BIOS/UEFI settings depend heavily on the motherboard manufacturer’s specifications and should be included in the motherboard’s manual. Another important aspect to consider is changing the boot order of the computer and instructing the BIOS/EFI to use the correct drive for booting (DVD drive or USB). On some machines, the boot order or boot drive can be changed or selected by pressing a special button when the hardware is turned on.
Installing Oracle Linux 7.4 Server with GUI (Desktop Version)
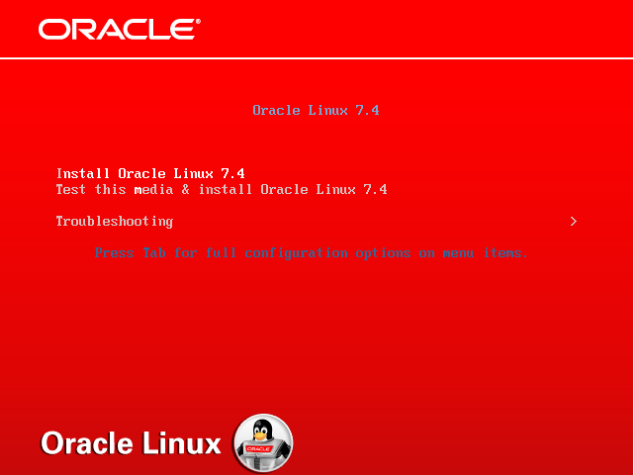
After you have made the above settings for your computer’s UEFI/BIOS motherboard, place the Oracle Linux 7.4 DVD ISO image or bootable USB stick into the appropriate drive on the motherboard and reboot or power on the computer. Press the appropriate boot key on the keyboard and instruct the BIOS or UEFI software to boot the computer from the appropriate DVD or USB drive. The bootable ISO image of Oracle Linux 7.4 should load and the first installation image will appear on your screen. From this menu, select Install Oracle Linux 7.4 and press Enter to start the installation process, as shown in the image below.
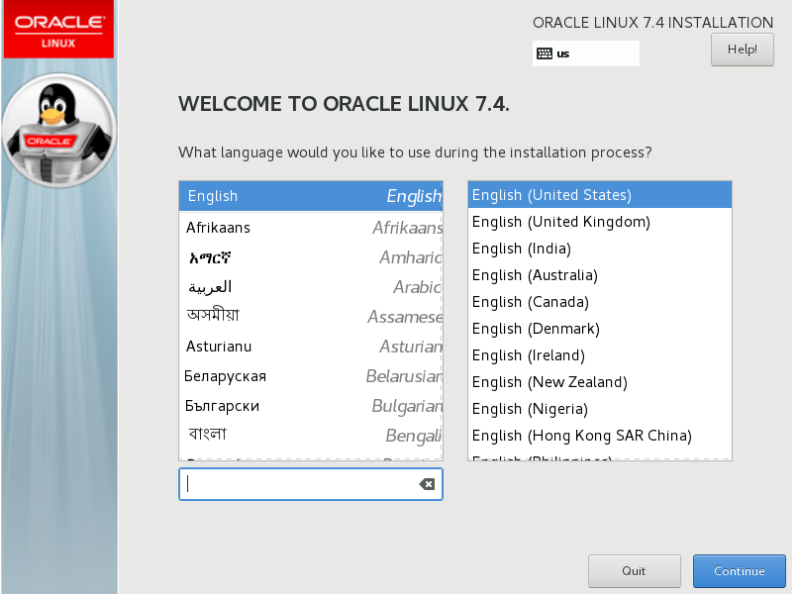
After a few seconds, the Oracle Linux graphical installer will load into your computer’s memory and show you the “Welcome to Oracle Linux 7.4” screen. Select the appropriate language to install your system and press the “Next” button.
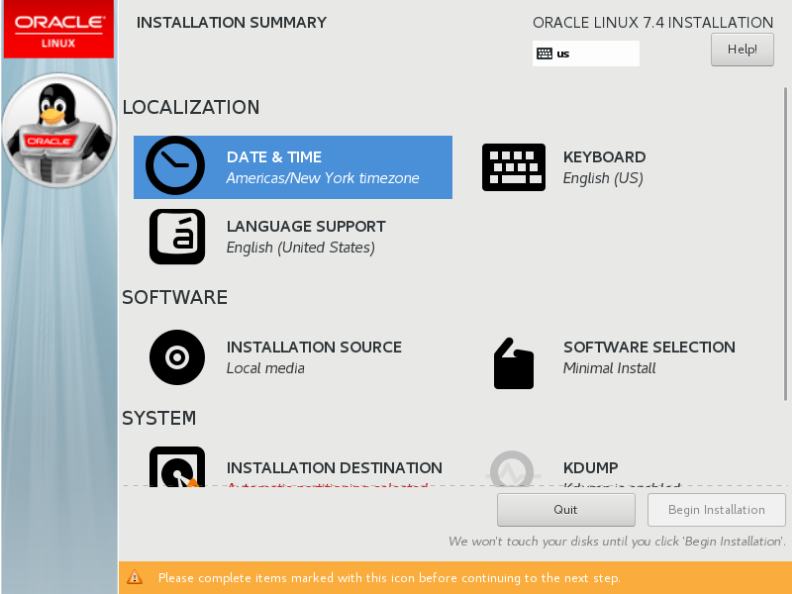
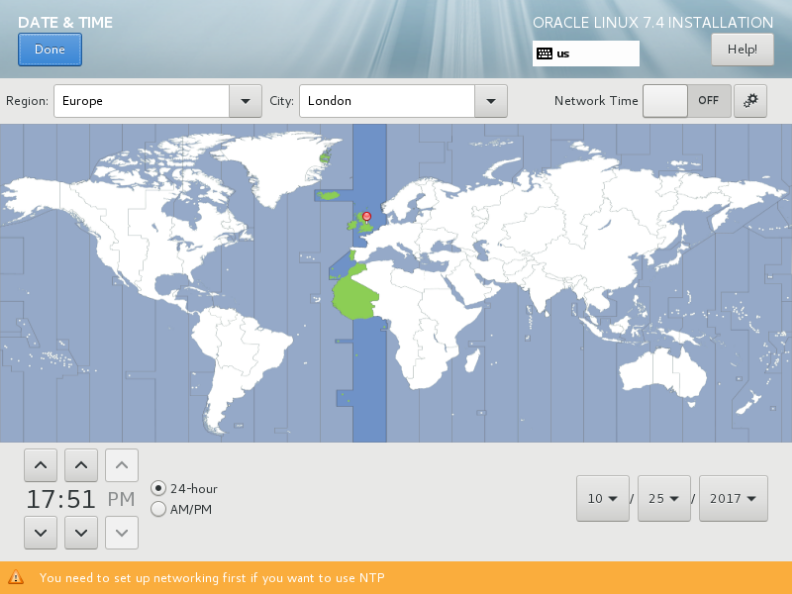
On the next screen you will see the “Installation Overview” menu. First select the Date and Time menu to open this menu. Use the map to select your geographical location. Below the map you also have the option to set the date and time. When the time is set correctly, click the Done button at the top left to complete this step and return to the initial menu, as shown in the figures below.
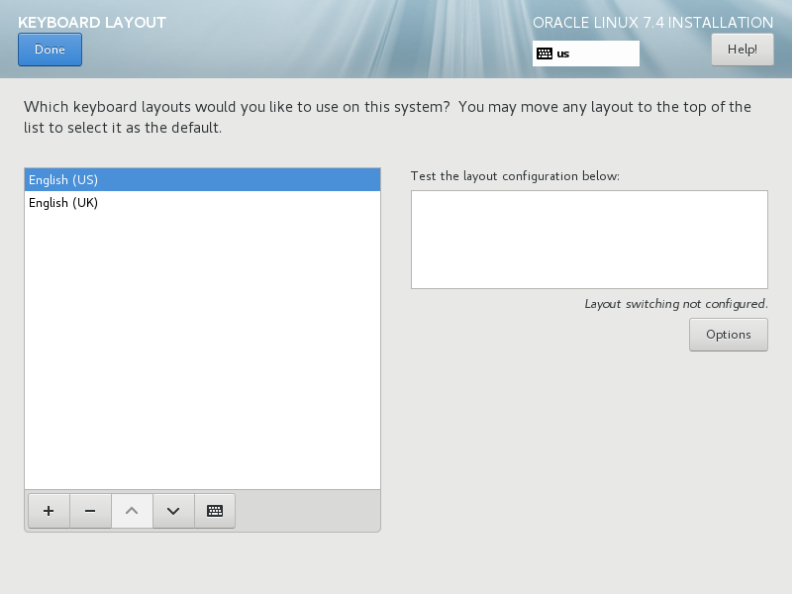
In the next step, click the Keyboard menu and set the keyboard layout for your system. To add another keyboard mapping, click the + button and select the appropriate keyboard. When you have finished this step, click Done to return to the main menu.
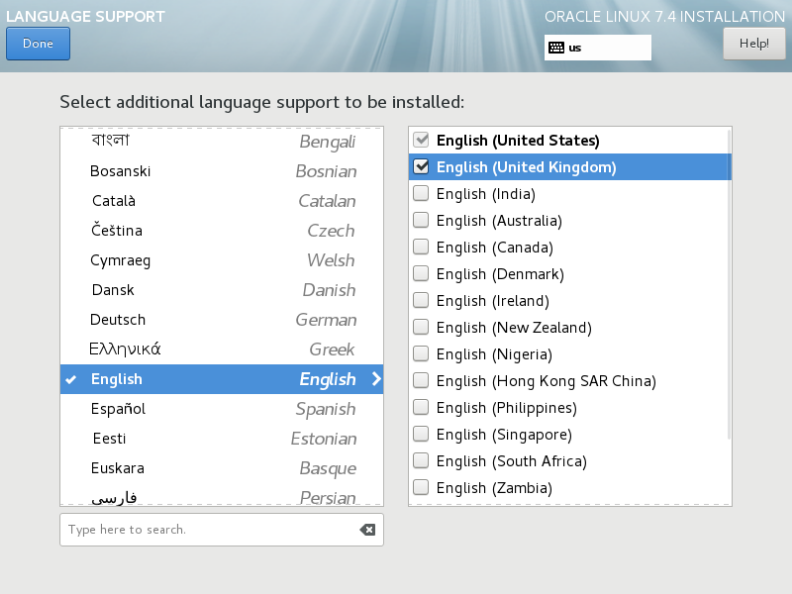
Next, select the Language Support menu and set the language support for your system. You can select and install multiple languages at once. When you have finished this step, click Done to return to the main menu.
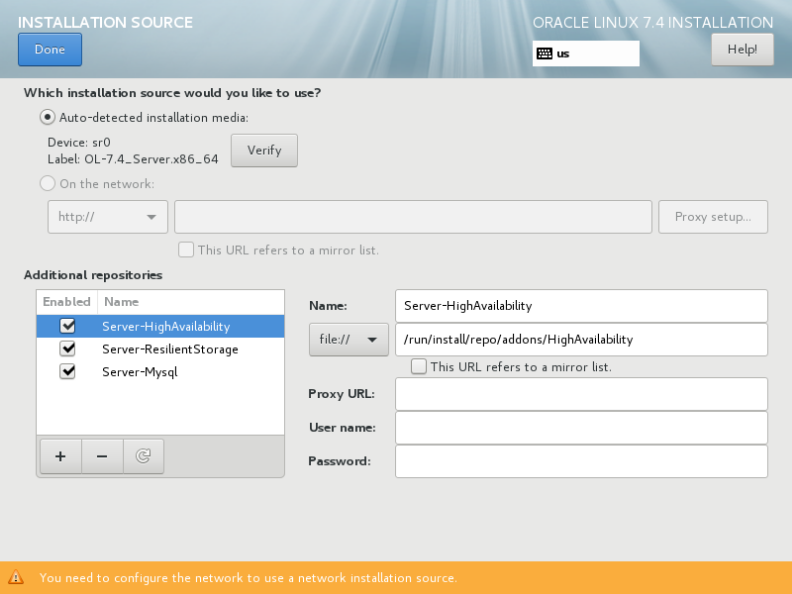
Next, go to the Installation Source menu and select Automatically detected installation media as the default. You also have other advanced options to install from other network locations such as HTTP, HTTPS, FTP or NFS servers. You should also enable the options for additional repositories. When you are done, click Done to return to the main menu.
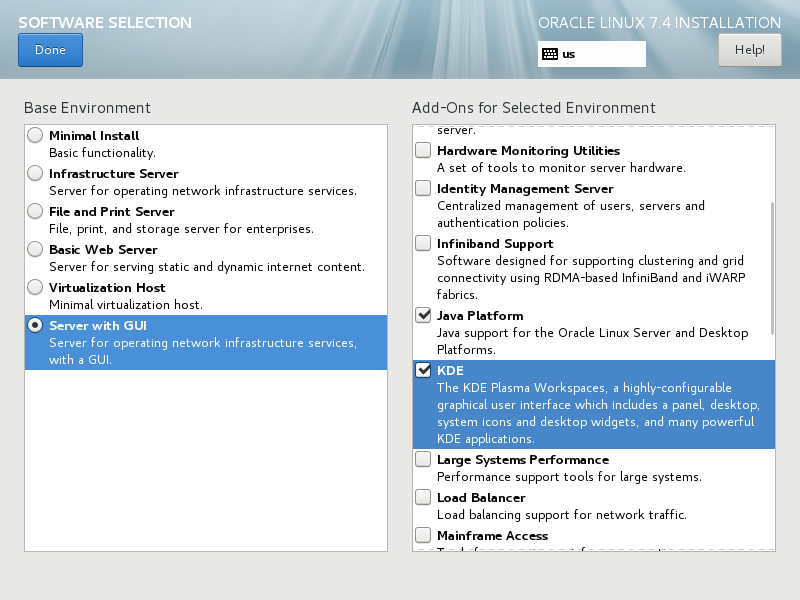
In the next step, go to the Software Selection menu. There you will find a list of some predefined base environments for your system. You can choose to install a graphical desktop environment such as Gnome, KDE Plasma, or Creative Workstation, or you can install a custom server installation such as a web server, compute node, virtualization host, infrastructure server, graphical user interface server, or file and print server. The most suitable environment for a server is the minimal installation, as it is the most flexible and requires little disk space.
However, for newcomers, it is more intuitive to manage Oracle through a graphical user interface. To install a GUI for Oracle Linux 7, select Server with GUI from the left pane and make sure you install the following add-ons for the GUI environment: Java Platform (in case you need Java support), KDE Plasma Workspaces desktop environment and Compatibility Libraries (provides compatibility for older applications built in Oracle). You can also select other add-ons for installation depending on the machine you need them for. When you have selected all the add-ons you need, click the Done button to continue the installation process.
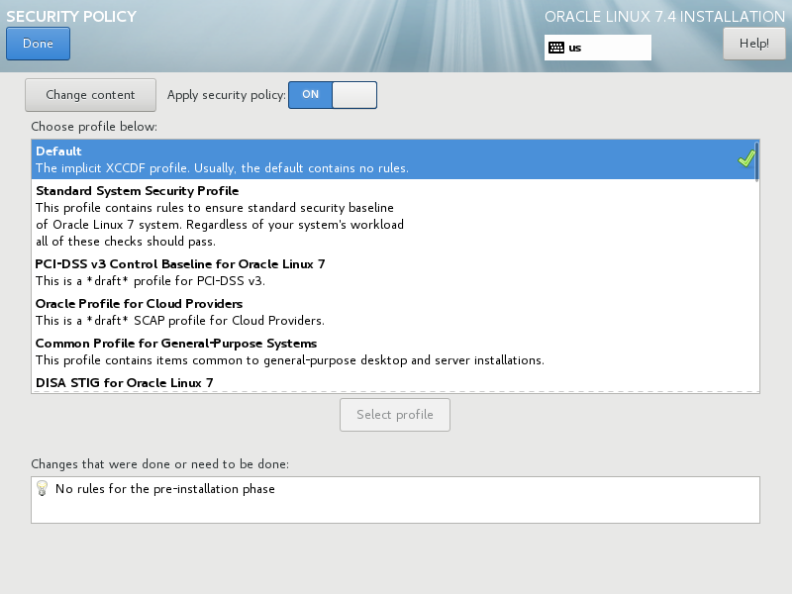
Next, click the System Security Policy menu and select a security profile from the list. It is safe to choose the default security profile. Click the Select Profile button and toggle the Apply Security Policy button to ON. When you are done, click the Done button to return to the main screen.
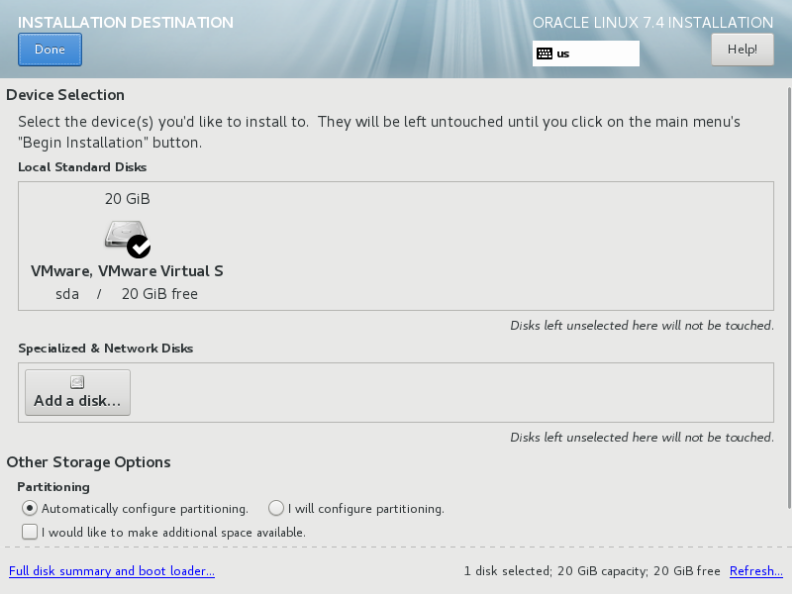
Next, click the Installation Target menu to open the Storage Partition settings. In the device selection select the hard disk of the local computer. Then, in the Other Storage Options menu, check the Auto-configure partitioning option. This option will automatically partition the computer’s hard disk with the correct /(root), /home and swap partitions. When you’re done, click the Done button to enable disk partitioning and return to the main menu.
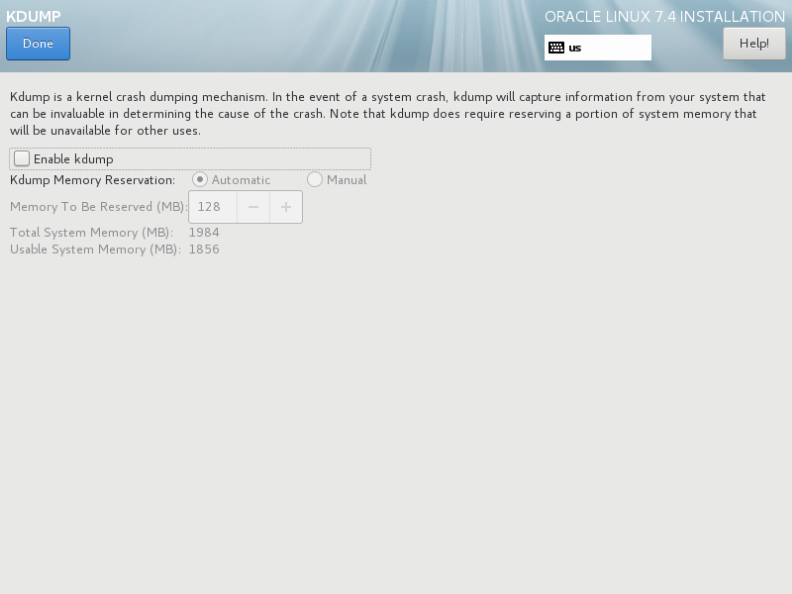
Next, select the KDUMP menu and disable the KDUMP kernel crash mechanism to free up system memory. Click the Done button to apply these settings and return to the main menu.
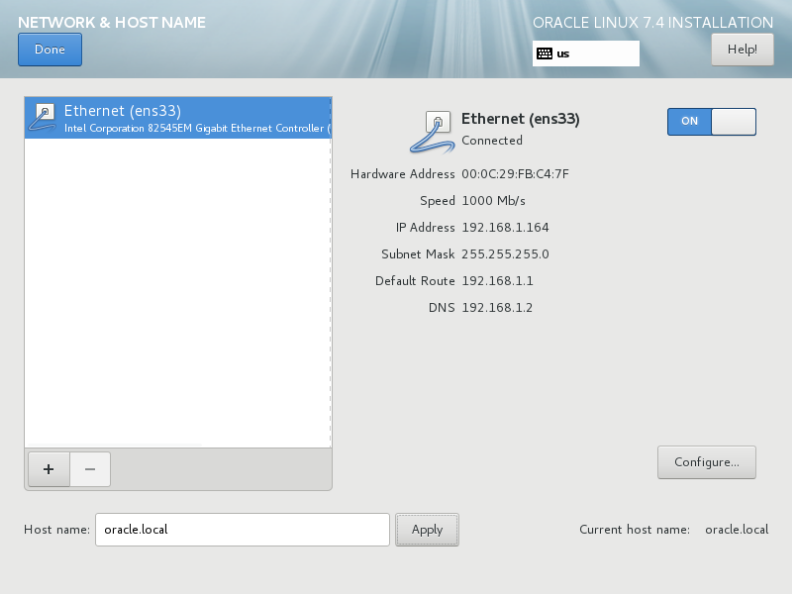
Next, select the Network & Hostname menu and configure your computer’s FQDN hostname. Click the Apply button to set up your computer’s hostname. Also, enable the network service for your Ethernet interface by changing the Ethernet button from OFF to ON. You can also manually configure the network interface at this step by clicking the Configure button. When you are done, click the Done button to return to the main installation menu.
Before you start the installation, you should double-check all the configurations of the installer. When you are done, click the Start Installation button to start the RHEL 7 installation.

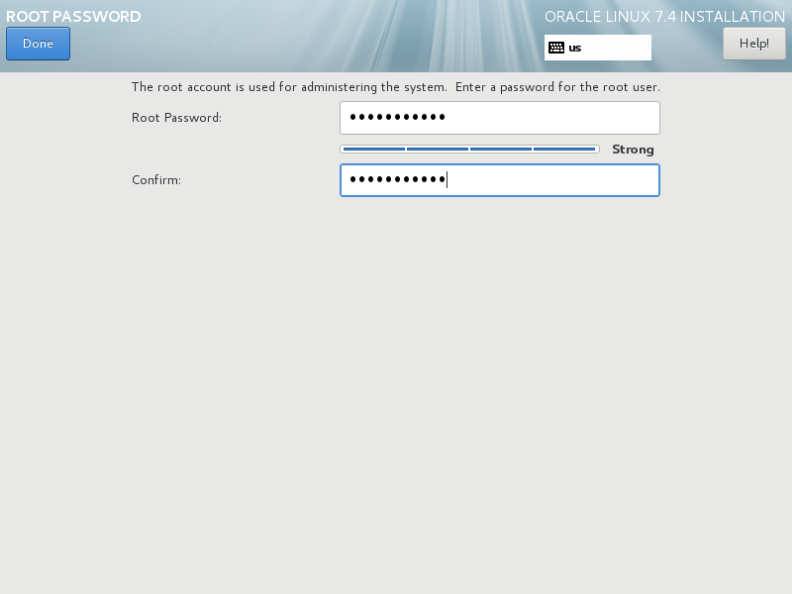
After the installer has started, the user account configuration screen will be displayed. Click the ROOT PASSWORD menu on the configuration screen and set up a secure password for the root account. When you’re done, click the Done button to return to the User Settings screen.
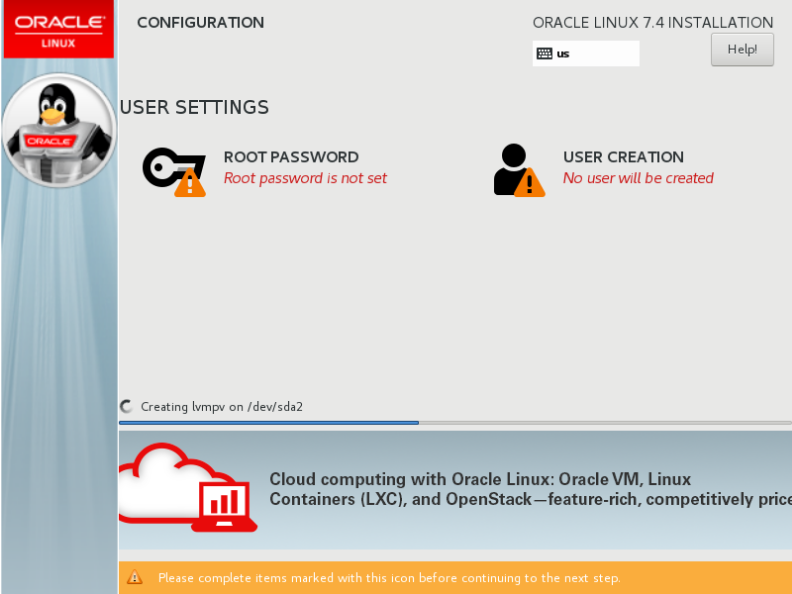
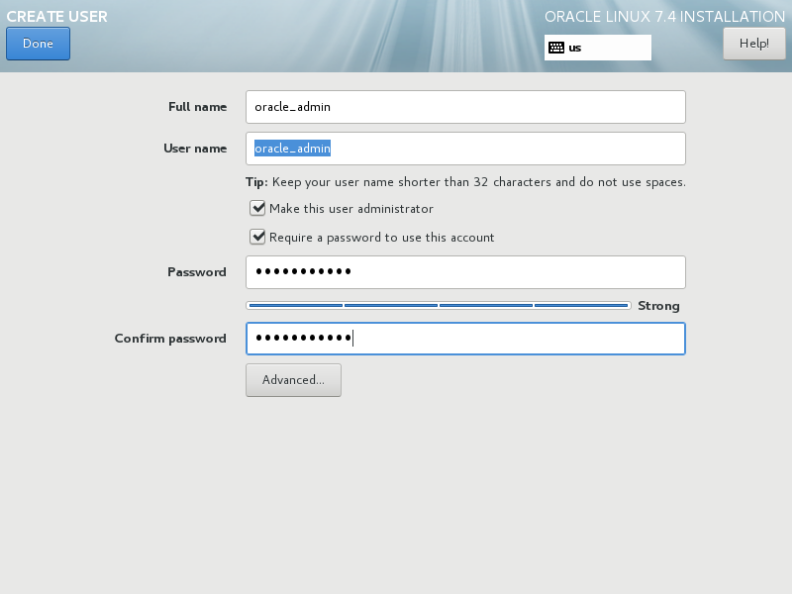
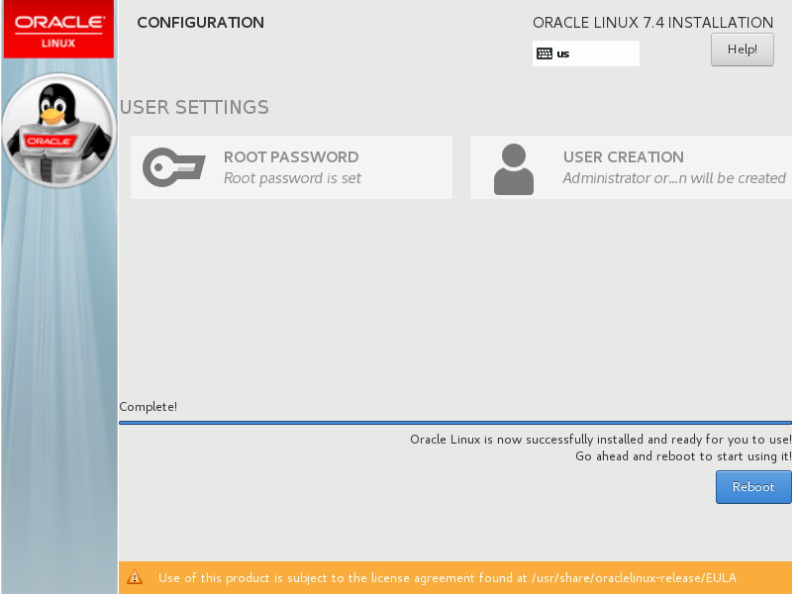
Next, click the User Creation menu and add a new system account and a secure password for that account. Check the ” Make this user an administrator ” and ” A password is required for this account ” options to give this user root privileges and require the password to be entered manually each time the user logs in to the system. When you have finished setting up the admin user, click the Done button to return to the initial menu and wait for the installation process to complete.
After a few minutes, depending on your system resources, the installation program will report that Red Hat Enterprise Linux has been successfully installed on your machine. To start using the system, simply remove the installation media and restart the computer.
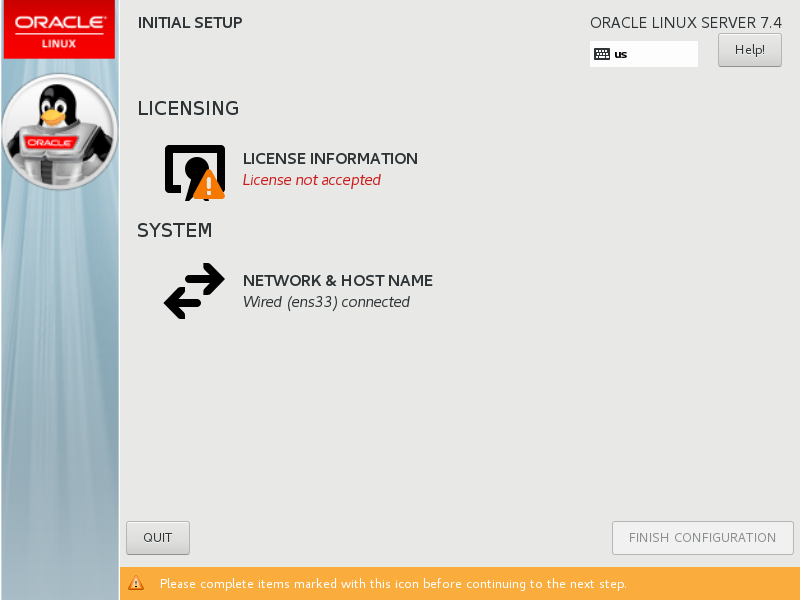
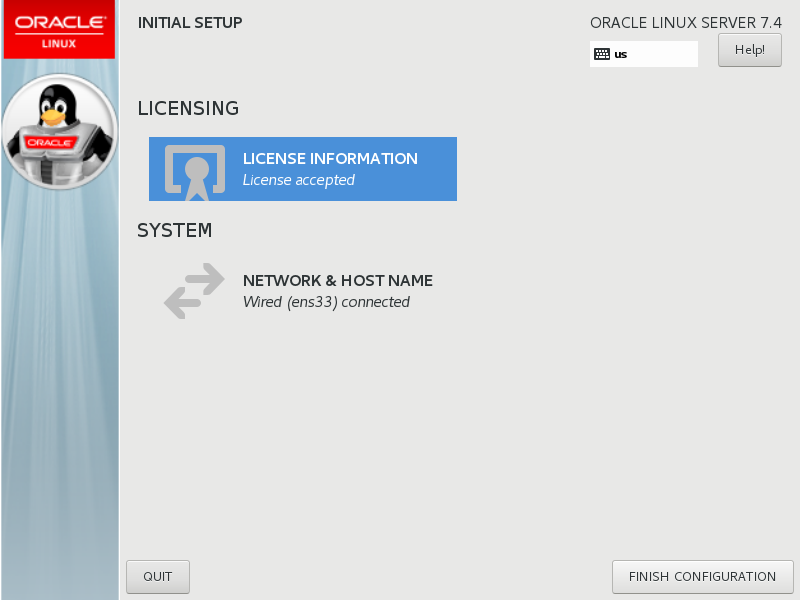
After rebooting, click the License Information menu on the first screen, read the Oracle license information, and click I accept the license agreement to accept the license. When you’re done, click the Done button to close the license agreement and return to the main menu, as shown in the screenshots below.

To log in to Oracle Desktop, click the Finish Configuration button to complete the initial setup (see the screenshot below).
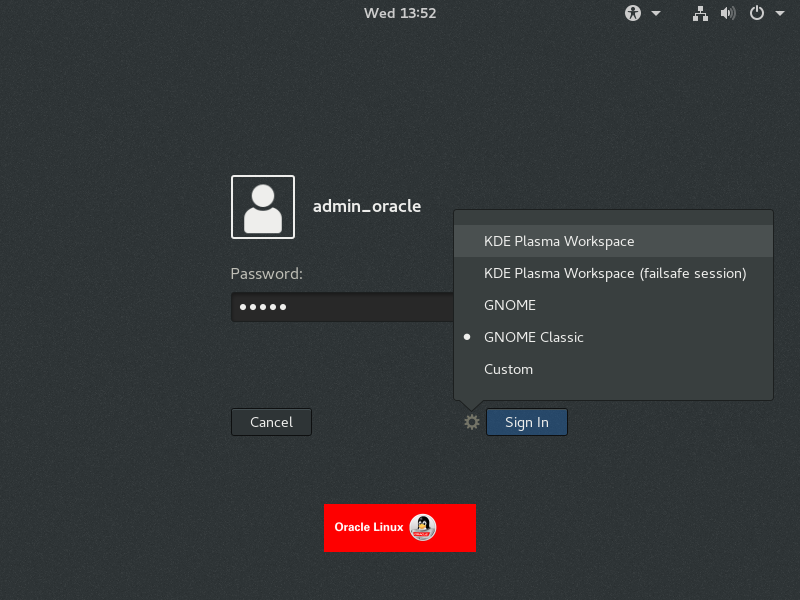
In the Oracle Linux login window, enter the username and password you set during installation and click the wheel next to the Log In button to select your preferred desktop environment, such as KDE Plasma Workspace or Gnome DE (see figure below).
After logging into Oracle Desktop, follow the initial Gnome setup program to configure the desktop language, spelling, privacy, and online accounts. Finally, navigate to Applications -> System Tools and open the Software Update utility to update your system.
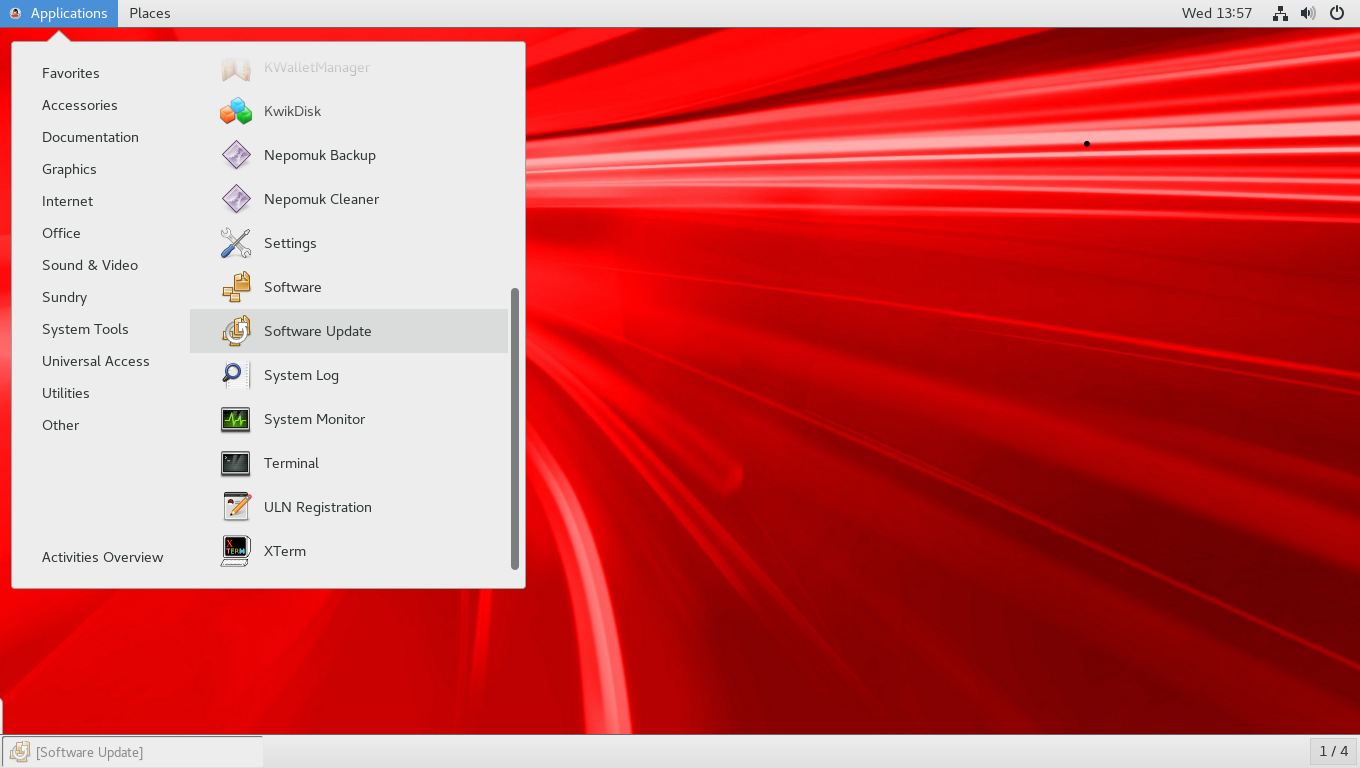
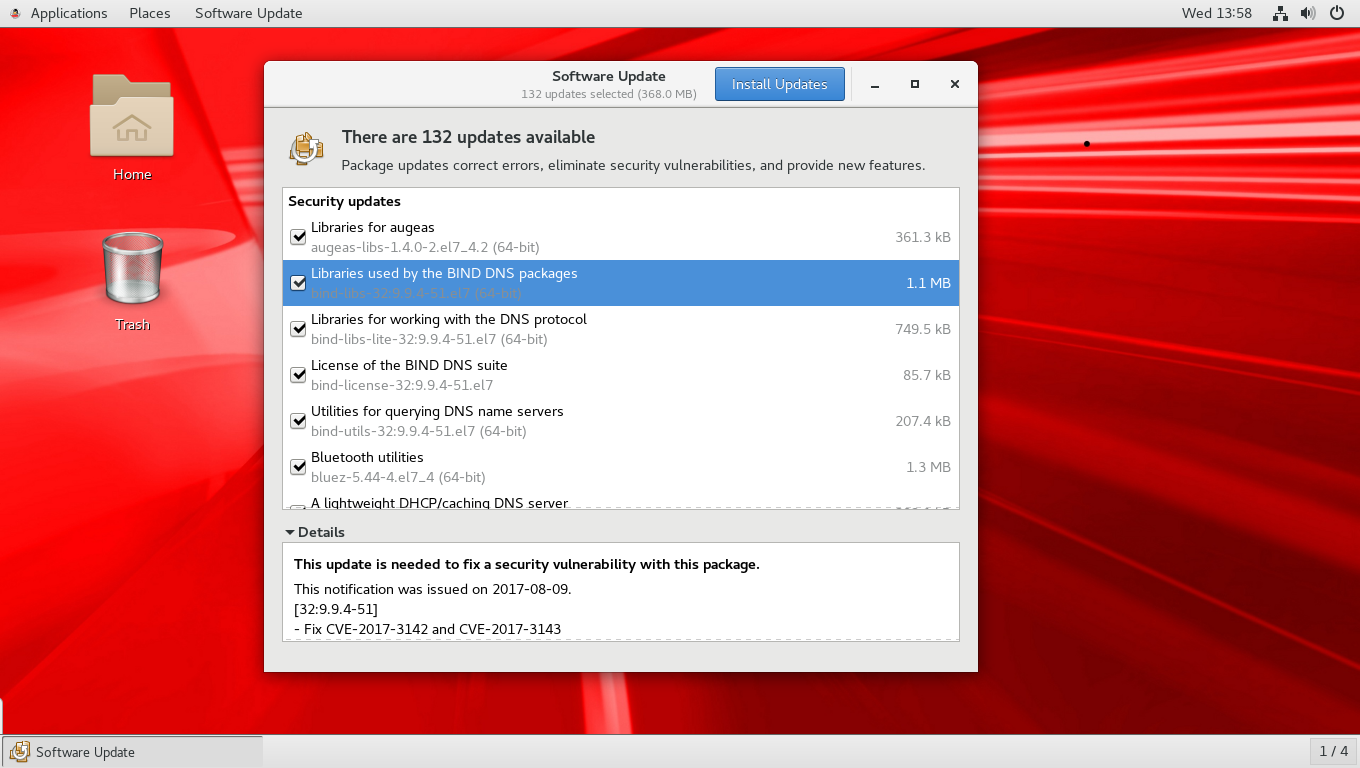
Wait for the Software Update graphical utility to check for the latest available updates for your system and click the Install Updates button to start installing the updates.
Congratulations! You have successfully installed the latest version of Oracle Linux 7 Server with graphical user interface on your computer.