Nagios, also known as Nagios Core, is a free and open-source monitoring tool that you can use to monitor systems, networks and infrastructures. Nagios continuously monitors your systems, applications and services and alerts you in the event of a failure. It can monitor HTTP, FTP, SSH, SMTP with various processes, CPU usage and disk usage. It was developed for use on Linux and can monitor devices with Linux, Windows and Unix operating systems. It has an extensible architecture and can be easily integrated with third-party applications using multiple APIs.
Features
- Powerful web interface
- Customized notifications
- Database backend
- Advanced user management
- Advanced configuration management charts for performance analysis
- Multiple plugins are available to support Nagios
In this tutorial, we will show you how to install Nagios Core on an Ubuntu 20.04 server.
Prerequisites
- A server running CentOS 8.
- The server is configured with a root password.
First steps
Before you start, you should update your system to the latest version. You can update it with the following command:
apt-get update -y
Once your system is up to date, install the other required dependencies with the following command:
apt-get install wget unzip vim curl openssl build-essential libgd-dev libssl-dev libapache2-mod-php php-gd php apache2 -y
Once all packages are installed, you can proceed to the next step.
Install Nagios Core from the source
By default, the latest version of Nagios Core is not available in the standard Ubuntu 20.04 repository. It is therefore recommended to compile Nagios from the source code.
First download the latest version of Nagios Core from the Git repository with the following command:
wget https://github.com/NagiosEnterprises/nagioscore/releases/download/nagios-4.4.6/nagios-4.4.6.tar.gz
After downloading, unzip the downloaded file with the following command:
tar -xvzf nagios-4.4.6.tar.gz
Then change to the unzipped directory and configure Nagios Core with the following command:
cd nagios-4.4.6
./configure
Next, run the following command to compile the main program:
make all
Next, create a user and a group with the following command:
make install-groups-users
usermod -a -G nagios www-data
Finally, install Nagios Core with the following command:
make install
Once Nagios Core is installed, you’ll need to create a systemd service file to manage the Nagios service. You can create the systemd init script with the following command:
make install-daemoninit
Next, you need to set the correct permissions for the Nagios installation directory using the following command:
make install-commandmode
Next, create a sample Nagios configuration file with the following command:
make install-config
Next, install the Nagios web interface with the following command:
make install-webconf
a2enmod rewrite cgi
systemctl restart apache2
Next, install the theme for the Nagios web interface.
make install-exfoliation
Create a Nagios admin user
Next, you need to create an admin user for the Nagios web interface. You can create it with the following command:
htpasswd -c /usr/local/nagios/etc/htpasswd.users nagiosadmin
Set your desired password as shown below:
New password:
Re-type new password:
Adding password for user nagiosadmin
Install Nagios Plugins
Next, you need to download the Nagios plugins to monitor the system services. You can download them from the Git repository using the following command:
wget https://github.com/nagios-plugins/nagios-plugins/releases/download/release-2.3.3/nagios-plugins-2.3.3.tar.gz
After downloading, unzip the downloaded file with the following command:
tar -xvzf nagios-plugins-2.3.3.tar.gz
Then change to the unzipped directory and configure it with the following command:
cd nagios-plugins-2.3.3
./configure --with-nagios-user=nagios --with-nagios-group=nagios
Next, install it with the following command:
make
make install
Check the Nagios sample configuration files before starting with the following command:
/usr/local/nagios/bin/nagios -v /usr/local/nagios/etc/nagios.cfg
If everything is fine, you should get the following output:
Nagios Core 4.4.6
Copyright (c) 2009-present Nagios Core Development Team and Community Contributors
Copyright (c) 1999-2009 Ethan Galstad
Last Modified: 2020-04-28
License: GPL

Website: https://www.nagios.org
Reading configuration data...
   Read main config file okay...
   Read object config files okay...

Running pre-flight check on configuration data...

Checking objects...
	Checked 8 services.
	Checked 1 hosts.
	Checked 1 host groups.
	Checked 0 service groups.
	Checked 1 contacts.
	Checked 1 contact groups.
	Checked 24 commands.
	Checked 5 time periods.
	Checked 0 host escalations.
	Checked 0 service escalations.
Checking for circular paths...
	Checked 1 hosts
	Checked 0 service dependencies
	Checked 0 host dependencies
	Checked 5 timeperiods
Checking global event handlers...
Checking obsessive compulsive processor commands...
Checking misc settings...

Total Warnings: 0
Total Errors:   0

Things look okay - No serious problems were detected during the pre-flight check
Start Nagios service
Now start the Nagios service and activate it with the following command so that it is started when the system is restarted:
systemctl start nagios
systemctl enable nagios
You can also check the status of the Nagios service with the following command:
systemctl status nagios
You should get the following output:
? nagios.service - Nagios Core 4.4.6
     Loaded: loaded (/lib/systemd/system/nagios.service; enabled; vendor preset: enabled)
     Active: active (running) since Sun 2020-08-09 15:57:49 UTC; 6s ago
       Docs: https://www.nagios.org/documentation
    Process: 76406 ExecStartPre=/usr/local/nagios/bin/nagios -v /usr/local/nagios/etc/nagios.cfg (code=exited, status=0/SUCCESS)
    Process: 76422 ExecStart=/usr/local/nagios/bin/nagios -d /usr/local/nagios/etc/nagios.cfg (code=exited, status=0/SUCCESS)
   Main PID: 76423 (nagios)
      Tasks: 6 (limit: 2353)
     Memory: 2.6M
     CGroup: /system.slice/nagios.service
             ??76423 /usr/local/nagios/bin/nagios -d /usr/local/nagios/etc/nagios.cfg
             ??76424 /usr/local/nagios/bin/nagios --worker /usr/local/nagios/var/rw/nagios.qh
             ??76425 /usr/local/nagios/bin/nagios --worker /usr/local/nagios/var/rw/nagios.qh
             ??76426 /usr/local/nagios/bin/nagios --worker /usr/local/nagios/var/rw/nagios.qh
             ??76427 /usr/local/nagios/bin/nagios --worker /usr/local/nagios/var/rw/nagios.qh
             ??76428 /usr/local/nagios/bin/nagios -d /usr/local/nagios/etc/nagios.cfg

Aug 09 15:57:49 ubuntu2004 nagios[76423]: qh: Socket '/usr/local/nagios/var/rw/nagios.qh' successfully initialized
Aug 09 15:57:49 ubuntu2004 nagios[76423]: qh: core query handler registered
Aug 09 15:57:49 ubuntu2004 nagios[76423]: qh: echo service query handler registered
Aug 09 15:57:49 ubuntu2004 nagios[76423]: qh: help for the query handler registered
Aug 09 15:57:49 ubuntu2004 nagios[76423]: wproc: Successfully registered manager as @wproc with query handler
Aug 09 15:57:49 ubuntu2004 nagios[76423]: wproc: Registry request: name=Core Worker 76424;pid=76424
Aug 09 15:57:49 ubuntu2004 nagios[76423]: wproc: Registry request: name=Core Worker 76425;pid=76425
Aug 09 15:57:49 ubuntu2004 nagios[76423]: wproc: Registry request: name=Core Worker 76426;pid=76426
Aug 09 15:57:49 ubuntu2004 nagios[76423]: wproc: Registry request: name=Core Worker 76427;pid=76427
Aug 09 15:57:49 ubuntu2004 nagios[76423]: Successfully launched command file worker with pid 76428
Access the Nagios web interface
Now open your web browser and enter the URL http://your-server-ip/nagios. You will be redirected to the Nagios login screen:
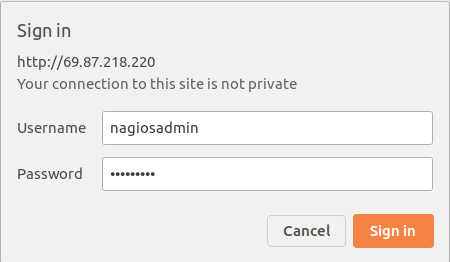
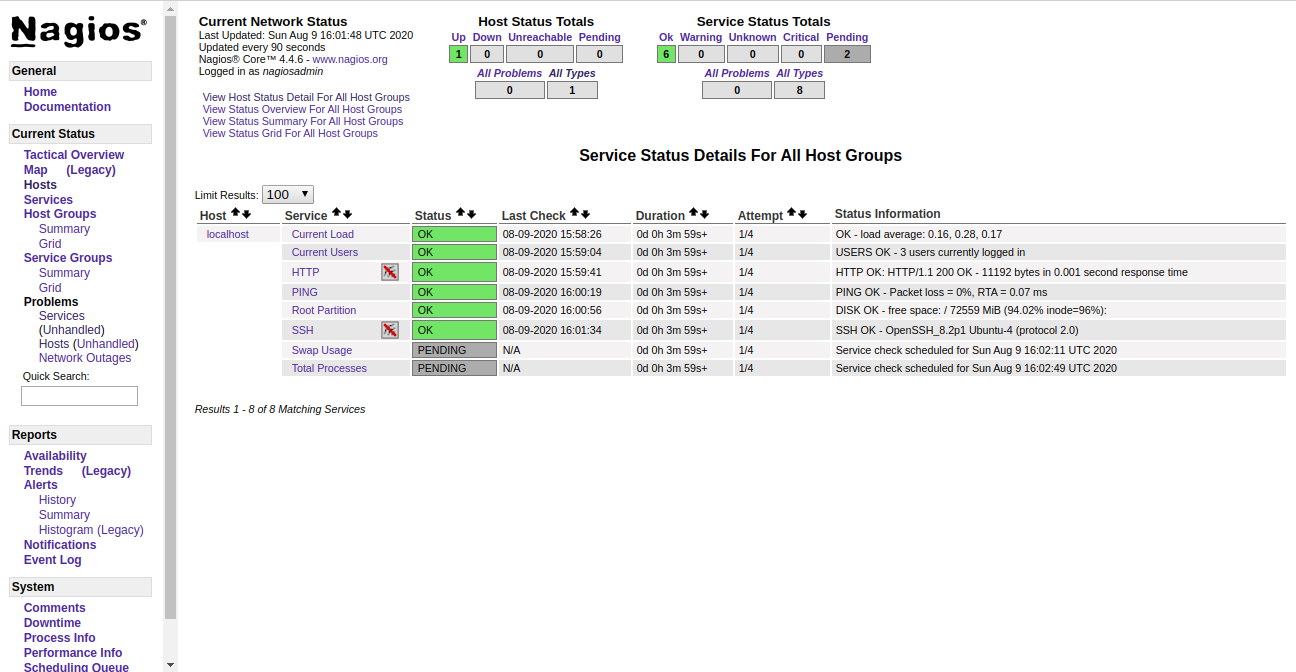
Enter your Nagios administrator username and password and click on the “ Login” button. On the following screen, you should see the default Nagios dashboard:

Conclusion
Congratulations! You have successfully installed Nagios Core on the Ubuntu 20.04 server. Now you can install the Nagios client on the remote host, add it to the Nagios server and start monitoring. If you have any questions, please feel free to contact me.