
Seafile is the high-performance open-source cross-platform software for file sharing and sync. The stored file can be synchronized from various devices from the central server through built-in file encryption. Before syncing the files to the server files are encrypted. The Seafile core is built using C programming which may be small but has fantastic performance. Files can be organized into libraries that can be encrypted by the password set by the user itself.
Seafile provides similar functionality just like other file hosting services like dropbox, google drive, etc. but seafile is a self-hosted file sharing service. If you are curious about how we can sync and share files from self-hosted Seafile this article is for you. All the procedures in this article are performed on an Ubuntu 20.04 LTS system.
Before continuing the installation we need to pre-install the Nginx, Mysql, and Python along with additional Python modules.
Configuring Database
You can install MySQL or MariaDB to set up the database for the seafile. In this demo, we will be using mariadb-server as our database backend.
$ sudo apt update
$ sudo apt install mariadb-server
Once you installed the MariaDB you need to update the root user authentication plugin to be able to login with the password so execute,
$ sudo mysql
MariaDB [(none)]> UPDATE mysql.user SET plugin = 'mysql_native_password' WHERE User = 'root';
MariaDB [(none)]> FLUSH PRIVILEGES;
MariaDB [(none)]> QUIT;
Next, you need to perform a MySQL secure installation. In this process, you can set the root user’s strong password as well as disable root access outside the localhost and other security-related configurations to make MySQL secure.
$ sudo mysql_secure_installation
When you execute the above command you will be prompted to secure the installation process, then finish up the installation process.
Now, the Seafile server has three components and separate databases are needed to the respective component. So, create the following databases for the respective component.
- ccnetdb for the Ccnet server.
- seahubdb for the Seahub web frontend.
- seafiledb for the Seafile file server.
Then let’s create the above databases.
$ mysql -u root -p
MariaDB [(none)]> CREATE DATABASE ccnetdb;
MariaDB [(none)]> CREATE DATABASE seahubdb;
MariaDB [(none)]> CREATE DATABASE seafiledb;
Create a new user and provide the required privileges of three databases using the following command in MariaDB CLI.
MariaDB [(none)]> CREATE USER 'seafile'@'localhost' IDENTIFIED BY 'Password';
Then to grant privileges run,
MariaDB [(none)]> GRANT ALL ON ccnetdb.* TO 'seafile'@'localhost';
MariaDB [(none)]> GRANT ALL ON seahubdb.* TO 'seafile'@'localhost';
MariaDB [(none)]> GRANT ALL ON seafiledb.* TO 'seafile'@'localhost';
MariaDB [(none)]> FLUSH PRIVILEGES;
Now, your database setup is completed.
Installing Python Modules
Even though the core part of the seafile server is written in C but the remaining are written in python. So, we need to install additional Python modules in order for seafile services to work.
$ sudo apt update
$ sudo apt-get install python3 python3-setuptools python3-pip libmysqlclient-dev memcached libmemcached-dev -y
$ sudo pip3 install --timeout=3600 Pillow pylibmc captcha jinja2 sqlalchemy==1.4.3 django-pylibmc django-simple-captcha python3-ldap mysqlclient
Installing & Configuring Seafile Server
Now, download the binary file from its official page using wget and run the script. If your system doesn’t contain the package you can install it using the apt command.
$ sudo apt install wget
$ wget https://s3.eu-central-1.amazonaws.com/download.seadrive.org/seafile-server_8.0.7_x86-64.tar.gz
Now, extract the tar file using the command given below.
$ tar -xvzf seafile-server_8.0.7_x86-64.tar.gz
$ mv seafile-server-8.0.7/ ./seafile
Once you extracted the files then, go to the folder and run the following script.
$ cd seafile/
$ ./setup-seafile-mysql.sh
The script will prompt the configuration process in your terminal. Press enter to continue and follow up the process accordingly just like the example mentioned below.
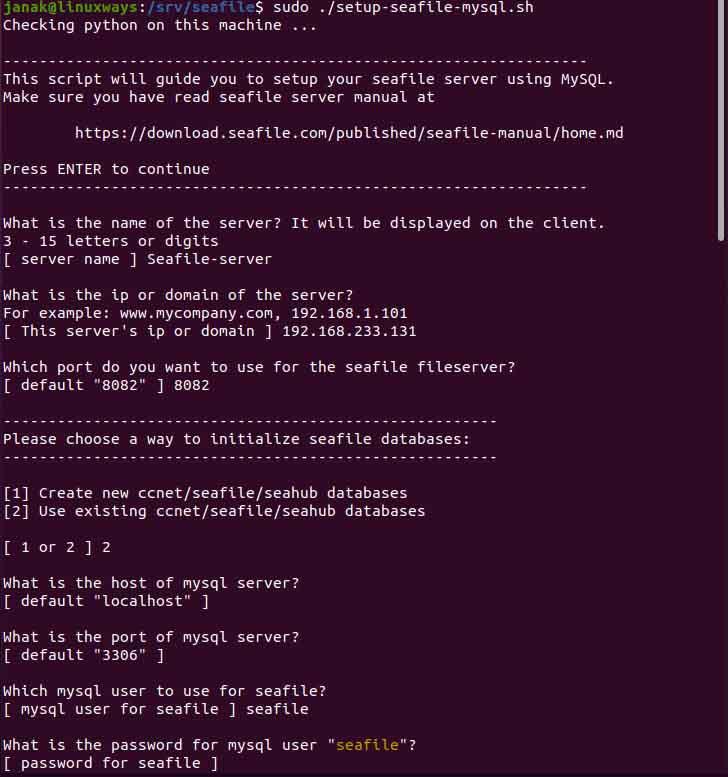
Configuring Seafile server.
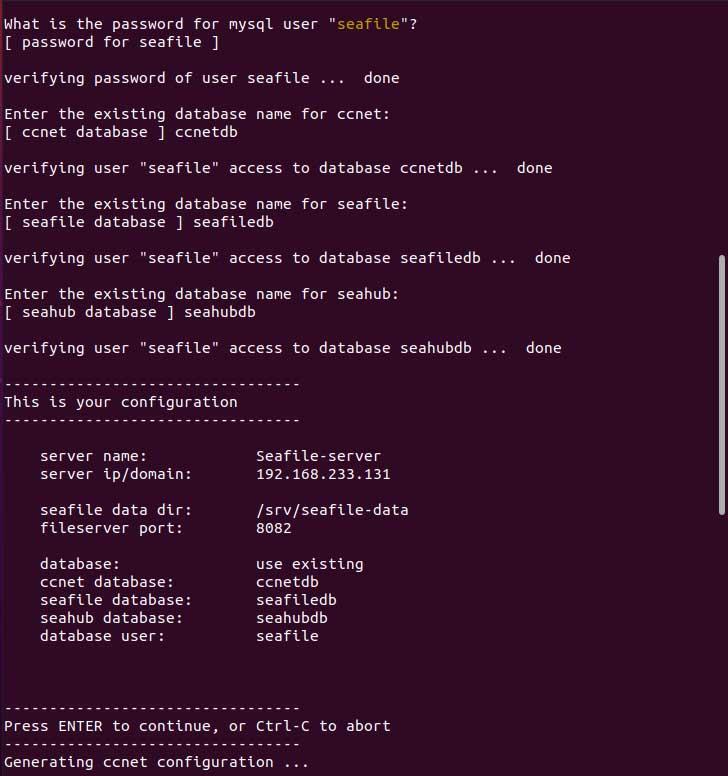
Configuring Seafile Server.
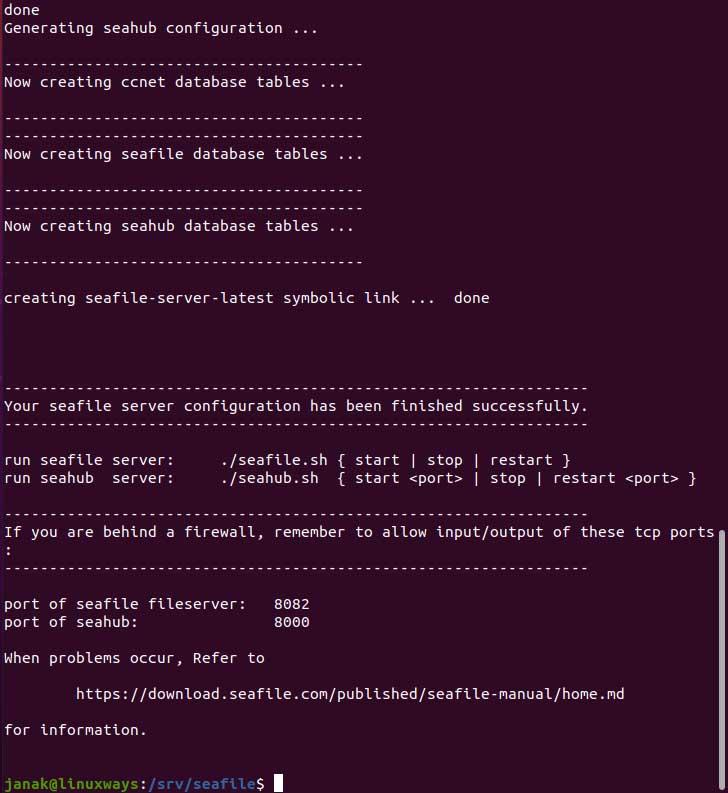
Configuring Seafile Server.
As mentioned in the above example default port of the seafile server and the seafile web UI is 8082 and 8000 respectively.
Seafile servers are responsible for managing downloads, raw file upload, and synchronization. You can start the seafile server using the following script.
$ cd seafile/
$ ./seafile.sh start

Starting Seafile Server.
Again, start the seahub web interface using the script mentioned below. The script will prompt you to set up the admin email and password for login so as for email to continue with the valid one. Then it will proceed to start the seahub.
$ ./seahub.sh start

Starting Seahub Web Interface.
Configuring Nginx Reverse Proxy
Nginx is a lightweight web server that is popular for its reverse proxy, load balancer, etc. To download Nginx execute the following command.
$ sudo apt update
$ sudo apt install nginx
Now, create and open the configuration file for seafile in the following dir using your preferable editor.
$ sudo vim /etc/nginx/conf.d/seafile.conf
Then, copy-paste the following Nginx configuration and make necessary changes if needed.
server {
  listen 80;
  listen [::]:80;
  #server_name example.com;
  autoindex off;
  client_max_body_size 100M;

  access_log /var/log/nginx/seafile.access.log;
  error_log /var/log/nginx/seafile.error.log;

  location / {
    proxy_pass http://127.0.0.1:8000;
    proxy_set_header Host $host;
    proxy_set_header X-Real-IP $remote_addr;
    proxy_set_header X-Forwarded-For $proxy_add_x_forwarded_for;
    proxy_set_header X-Forwarded-Host $server_name;
    proxy_read_timeout 1200s;
  }

  location /seafhttp {
    rewrite ^/seafhttp(.*)$ $1 break;
    proxy_pass http://127.0.0.1:8082;
    proxy_set_header X-Forwarded-For $proxy_add_x_forwarded_for;
    proxy_connect_timeout 36000s;
    proxy_read_timeout 36000s;
    proxy_send_timeout 36000s;
    send_timeout 36000s;
  }

  location /media {
    root /home/janak/seafile-server-latest/seahub;
  }
}
In the above config, I will be accessing through IP so I have commented on the server name. If you have a valid domain uncomment it enters the valid domain.
Now, restart or reload the Nginx server using the systemd daemon.
On browsing the URL http:// your_ip or domain you will see the following login interface.

Seafile Login Page.
Enter the admin email and password you configured earlier you will see the following type of dashboard.
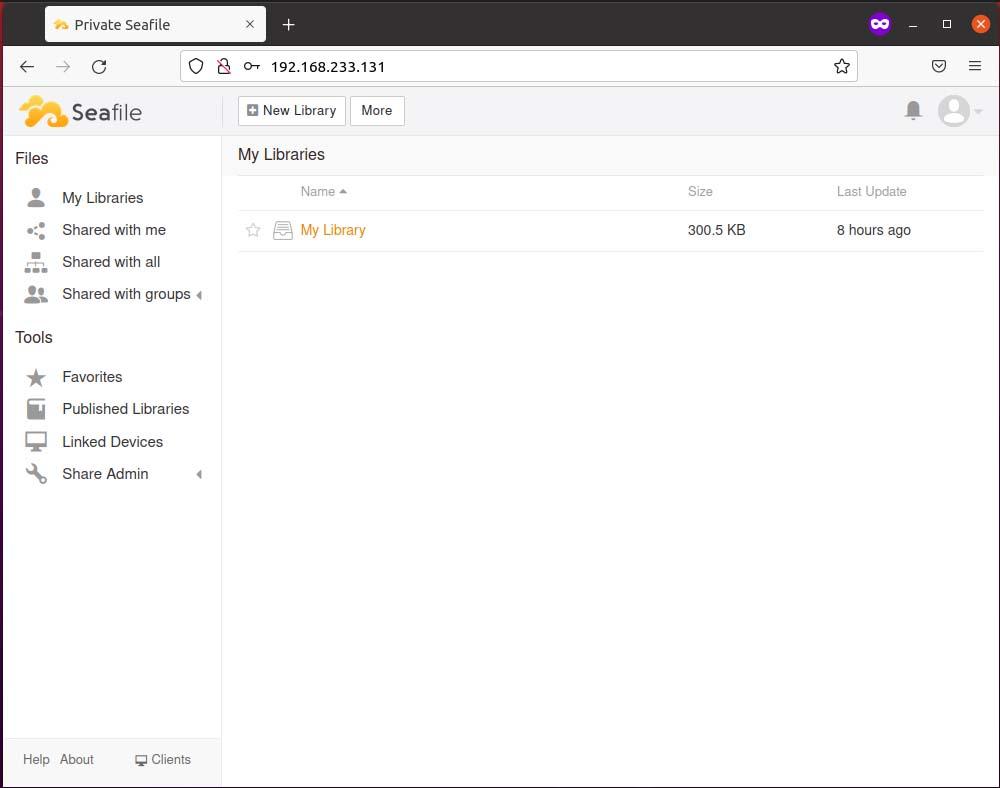
Seafile Dashboard After Login.
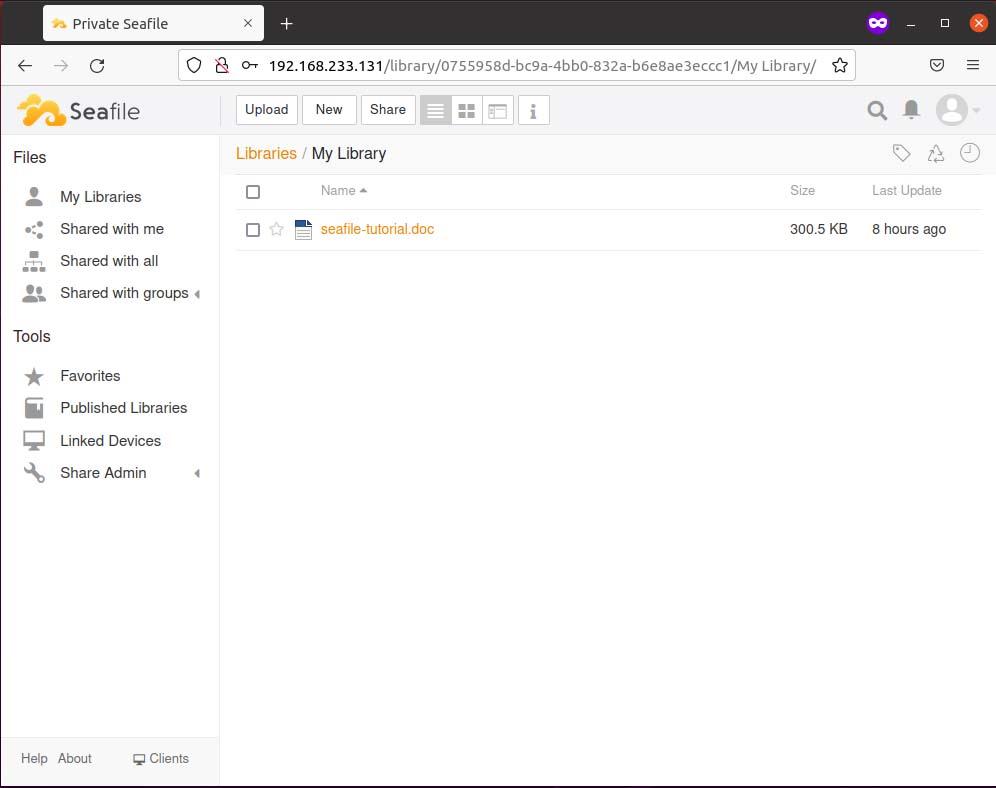
Exploring My Library.
Testing File Share and Sync Using Seafile Client
If you visit the official site of the seafile you can find seafile clients for different distributions. So my current system is Ubuntu 20.04 LTS so the installation process is only for Ubuntu 20.04.
To install we first download the sign-in key using the following command.
$ sudo wget https://linux-clients.seafile.com/seafile.asc -O /usr/share/keyrings/seafile-keyring.asc
Then, add a repository to your apt repository list.
$ sudo bash -c "echo 'deb [arch=amd64 signed-by=/usr/share/keyrings/seafile-keyring.asc] https://linux-clients.seafile.com/seafile-deb/focal/ stable main' > /etc/apt/sources.list.d/seafile.list"
Now install the client using the apt command,
$ sudo apt update
$ sudo apt install -y seafile-gui
Once installation is completed you can access the seafile client from your application explorer. Setup everything including the hosted seafile url, admin email, and password then you will see the following type of interface from where you can sync the library.
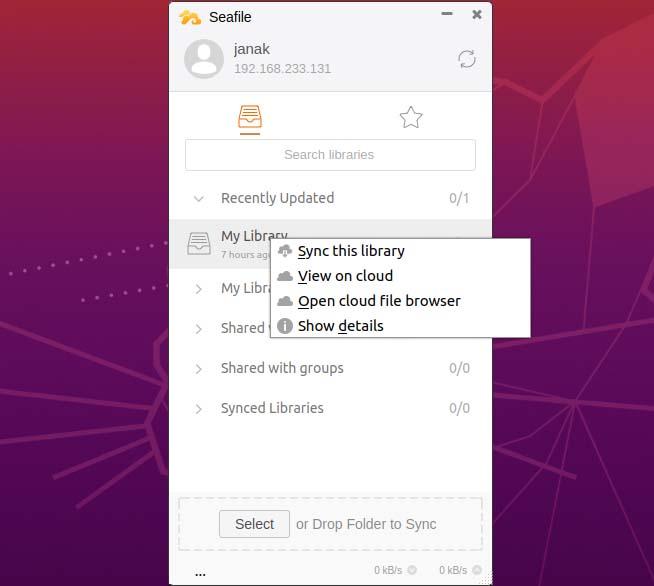
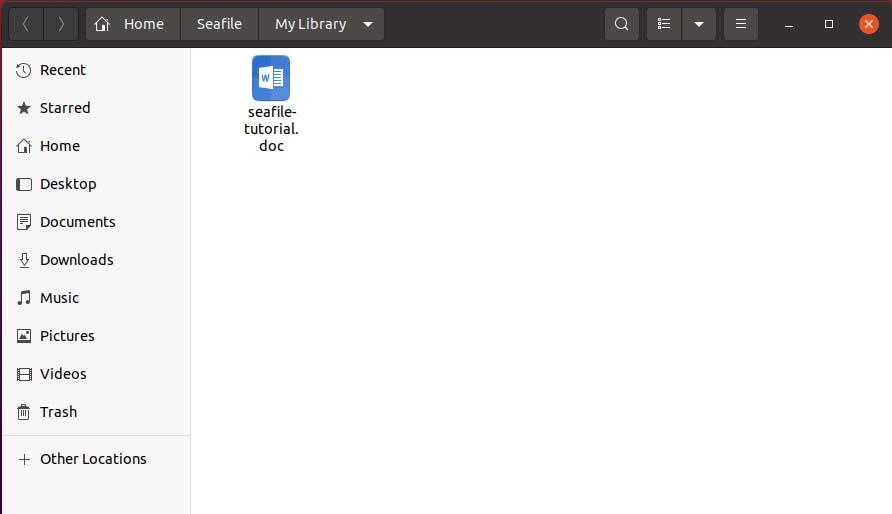
After sync is completed you can see the file in your setup location on your system.
Conclusion
If you explore the seafile feature you will notice it’s quite similar to other file hosting services but the difference is seafile is self-hosted on your own server. I hope you have a clear concept of the seafile share and sync as well as its procedure to install it.