OpemProject is particularly suitable for users who have problems managing large projects. Since it is based on Agile and Scrum, it greatly helps users. This guide will show you how to install and configure OpemProject on your Ubuntu 20.04 system. So, let’s start with the implementation.
Step 01: Update system
At the beginning of the implementation, you need to open your command line terminal for Ubuntu 20.04. We have used the terminal application because the installation is done via commands. So press “Ctrl+Alt+T” on the Ubuntu 20.04 desktop, and the terminal application will open quickly. We will use the apt command to update and upgrade the Ubuntu 20.04 system (see below). To continue, you will need the password of the sudo account. After that, it can start updating the apt packages and the system.
$ sudo apt update && sudo apt upgrade

During the update and upgrade process, the system may stop and ask the user to confirm one thing. It will tell you how much disk space your system will free up. If you want to continue the process, simply tap “Y”. Otherwise, press “n”. The update and upgrade process may take a little longer to complete. So, relax and wait.
![]()
![]()
Step 02: Download OpenProject key and repository
After the update and upgrade of the Ubuntu 20.04 system is complete, it’s time to start the installation of OpenProject. Here, you must know that the Linux system provides the integrated OpenProject repository. You need to download and add it manually. First, you need to download the OpenProject key and add it to your system. To do this, try the query below in the shell and press Enter. You may also be asked for a root user password. Enter the password and press “Enter”. After successfully adding a key to the Ubuntu 20.04 system, “OK” is displayed.
$ sudo wget –qO- https:..dl.packager.io/srv/opf/openproject/key | sudo apt-key add -

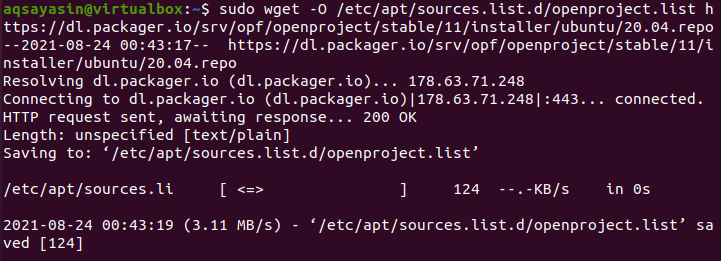
After adding the key, it is time to download the repository for OpenProject in the Ubuntu 20.04 system. Use the query in the image below to download it in no time.
$ sudo wget –O /etc/apt/sources.list.d/openproject.list https://dl.packager.io/srv/opf/openproject/stable/11/installer/ubuntu/20.04.repo
After adding and downloading the key and repository, we need to update our system again to reflect the changes. Try the query below to do this:
$ sudo apt update

Step 03: Install OpenProject

Now that apt and the system are up to date, it’s time to install the downloaded OpenProject. So we used the “apt” command in the console to install OpenProject, using the keyword given below.
$ sudo apt-get install openproject
Again, the system will show you how much disk space is used during this process. If you are happy with this, press “Y”, otherwise “n” and press the “Enter” key.
![]()
![]()
The installation of OpenProject under Ubuntu 20.04 may take a little longer. The final lines of OpenProject are displayed.
Step 04: Configure OpenProject
After OpenProject has been installed on Ubuntu 20.04, it still needs to be configured on your system. You can call it the post-installation configuration of OpenProject in the Ubuntu 20.04 system. This configuration involves setting up and configuring many servers in it. As mentioned, let’s start with the sudo command for the OpenProject configuration in the shell. The system may ask for the root user’s password.
$ sudo openproject configure

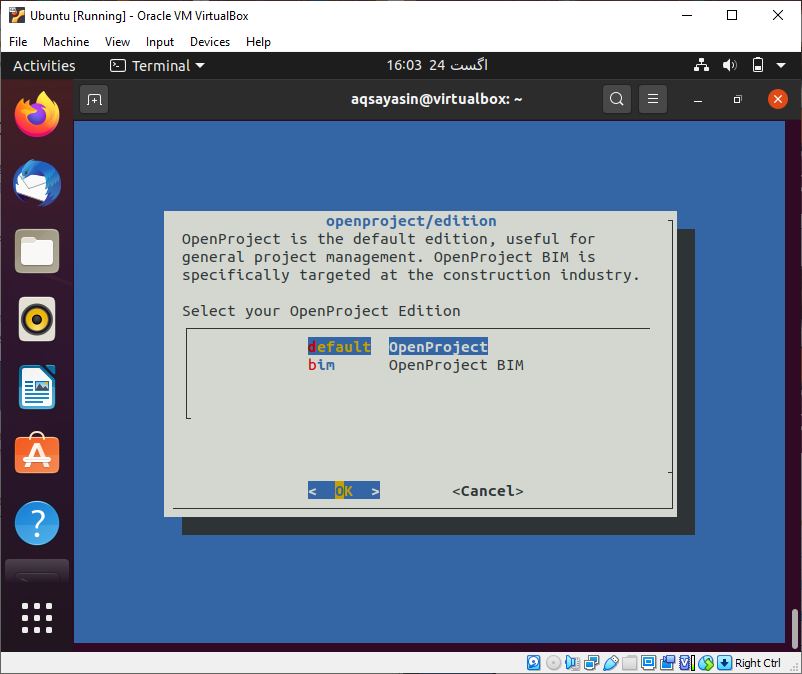
The “openproject/edition” window opens. Select the default OpenProject and click “OK” to continue.
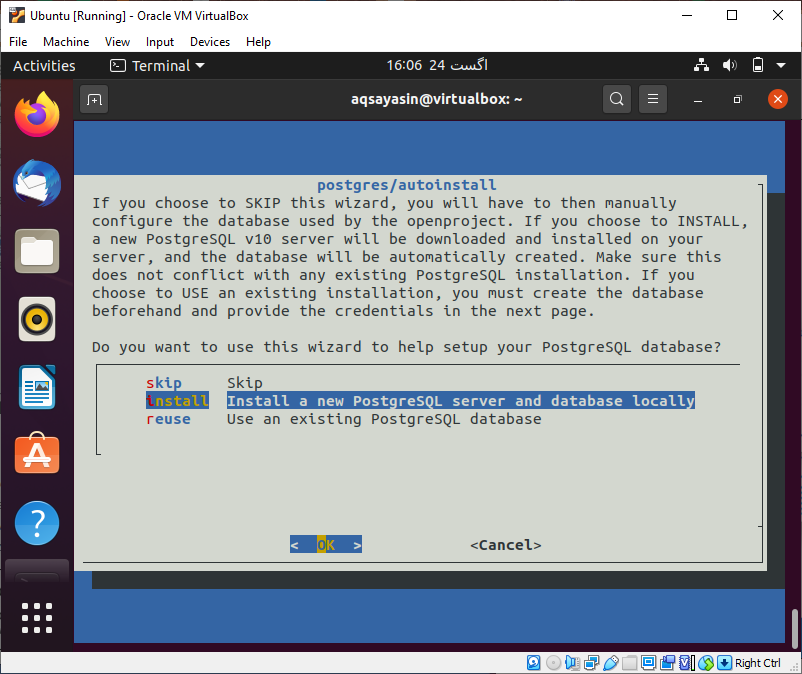
The screen will keep changing as you select the different options. This time the “Postgres/autoinstall” window will open. Select the “Install” option to install the PostgreSQL server on your system. Then select the “OK” button and press “Enter” to continue.
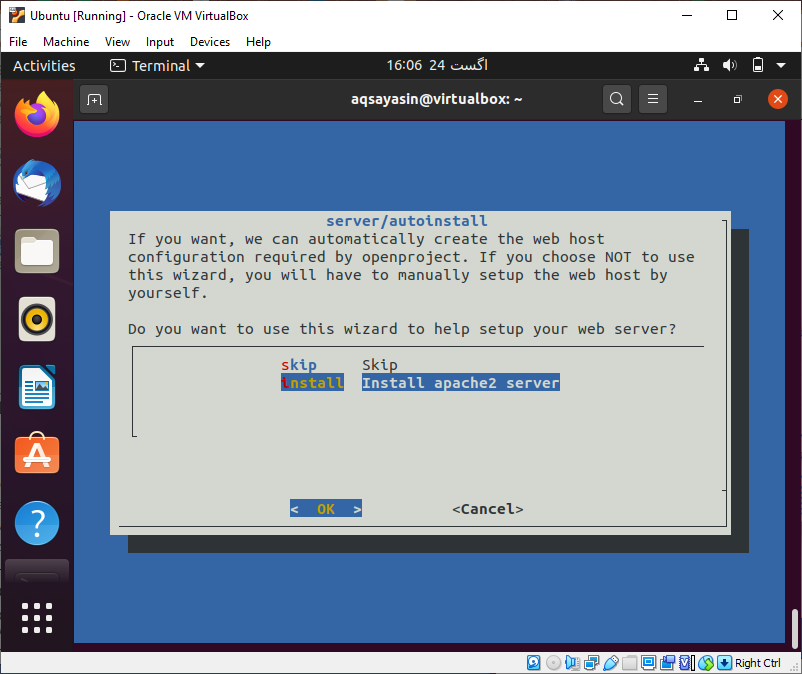
The “server/autoinstall” window will appear. It is used to install an Apache server on your system. So if you want to install an Apache server on your system, scroll to the “Install Apache Server” option and select “OK” to continue. Press Enter to continue.
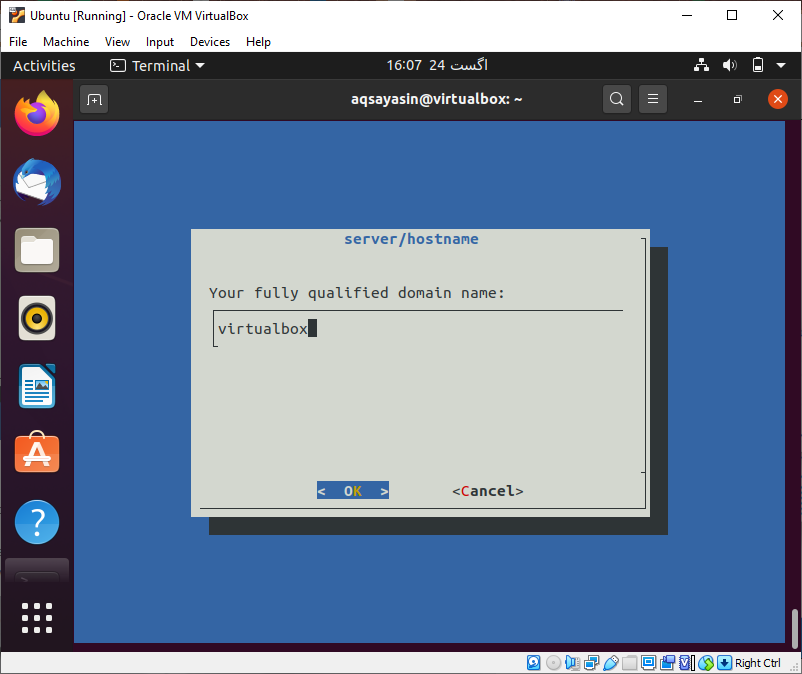
You will be redirected to the “Server/Hostname” screen to add the domain name. You can keep the default name and click “OK”.
Leave the prefix for the server path blank to install it on our root domain. Press the “OK” button.

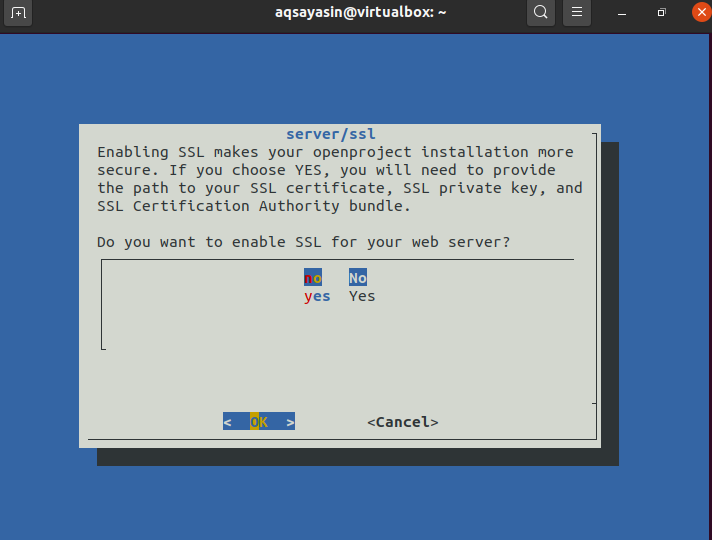
If you want to enable “Server/SSL” on your system, select “yes”, otherwise “no”. We have selected “no” and click on “OK”.
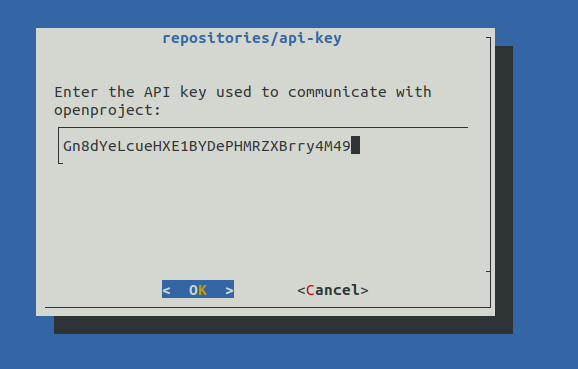
The system may or may not display the API key on your screen by default. You must continue the process in any case. Since we have received the key, we continue the process by tapping the “OK” button followed by the “Enter” key.
Select the “Install” option followed by “OK” to install support for the Subversion repository. Press Enter.

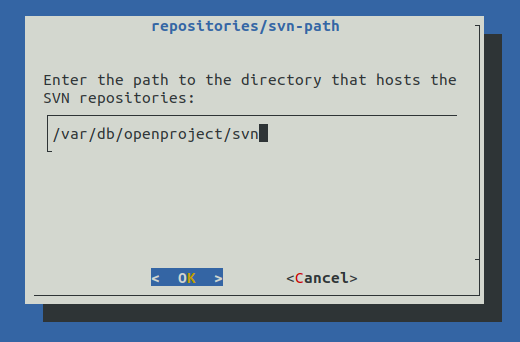
Now the SVN path will be created automatically. Click on the “OK” button on the screen and press Enter.
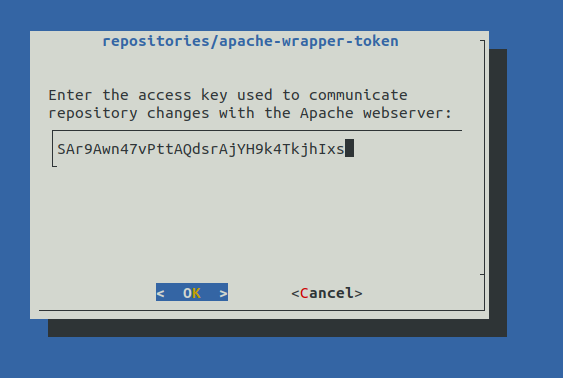
You will see the Apache server wrapper token. Select “OK” and press Enter.
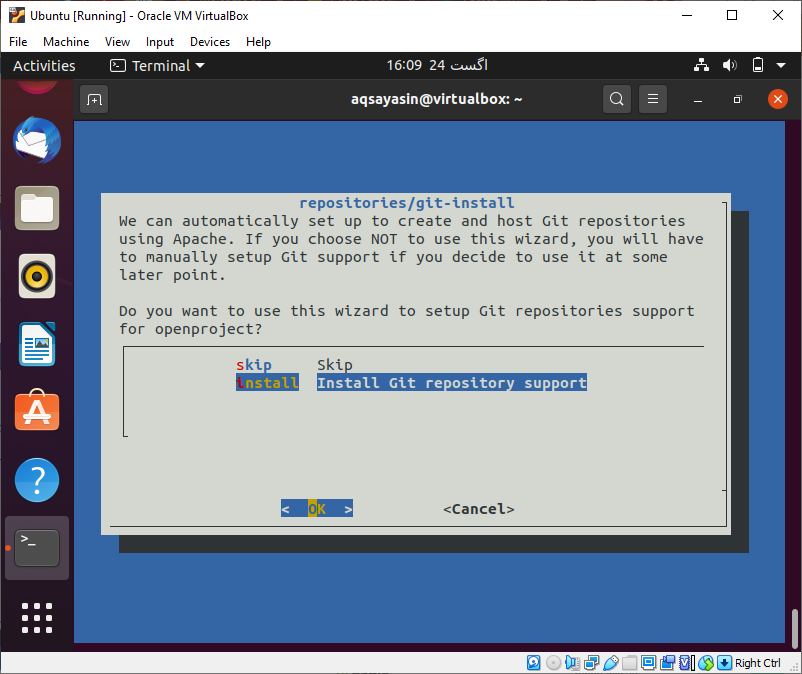
Install the “Git” repository on the system by selecting “Install”. Tap “OK” and press Enter.
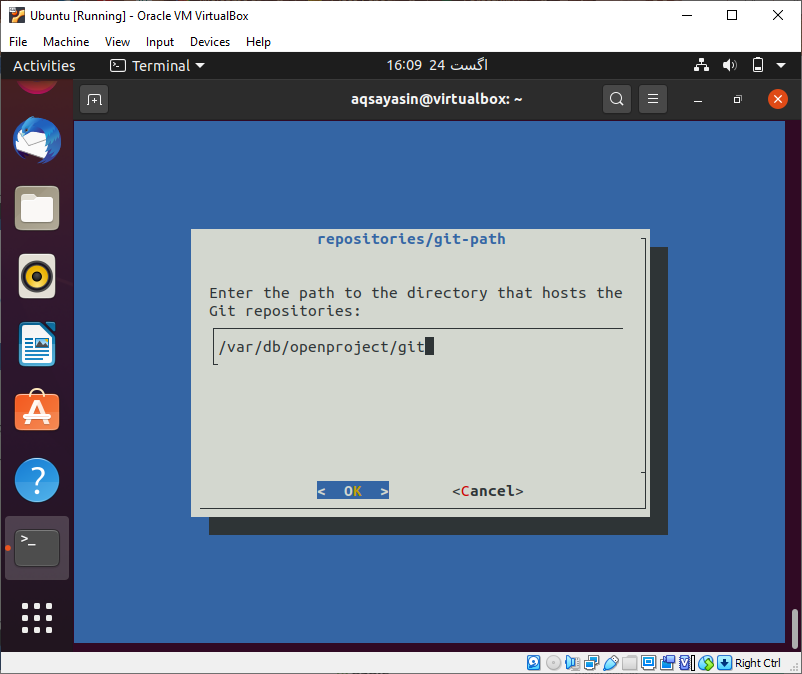
The Git path is displayed. Tap “OK” and press Enter.
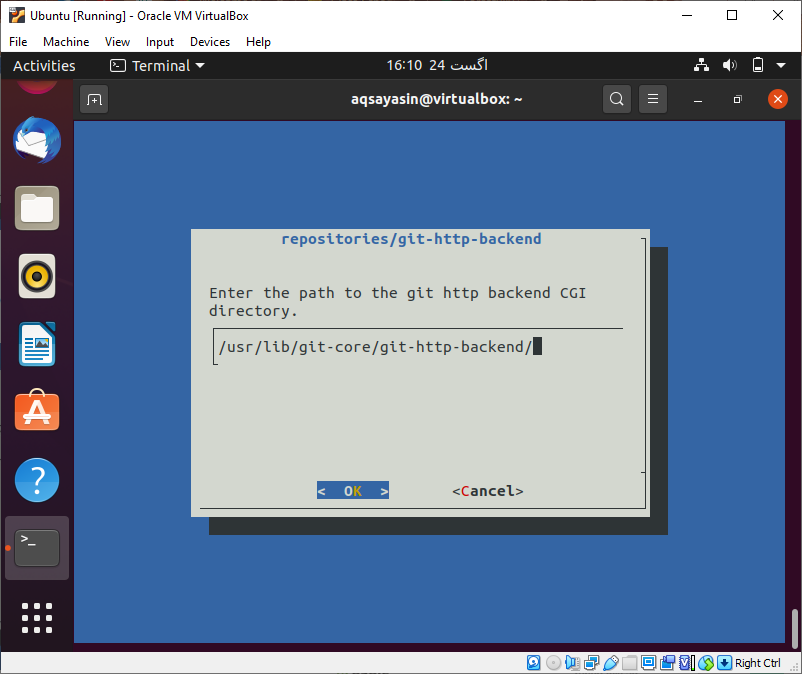
The path to the Git backend is displayed. Select “OK” and tap Enter.
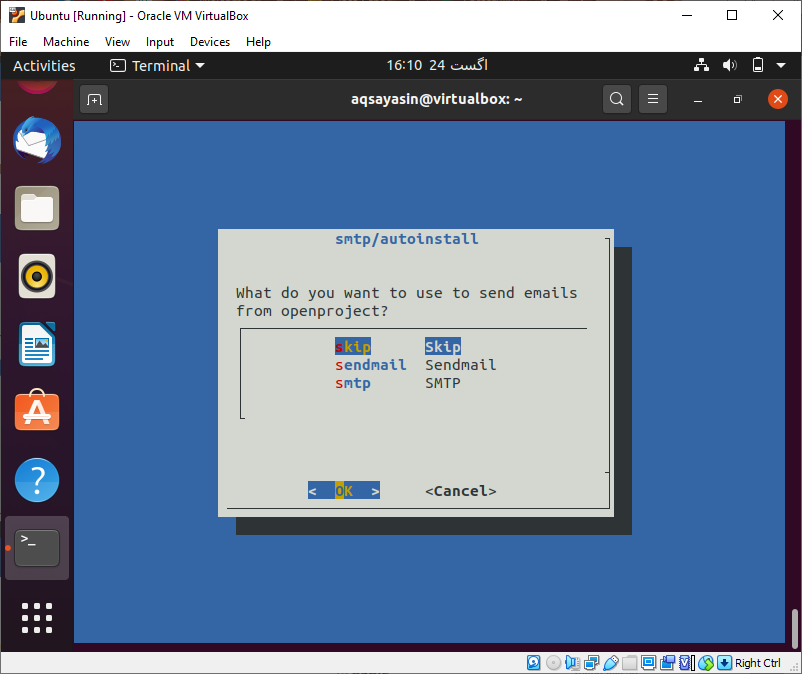
Skip the installation of “SMTP” by selecting “Skip”. Select “OK” and press enter.
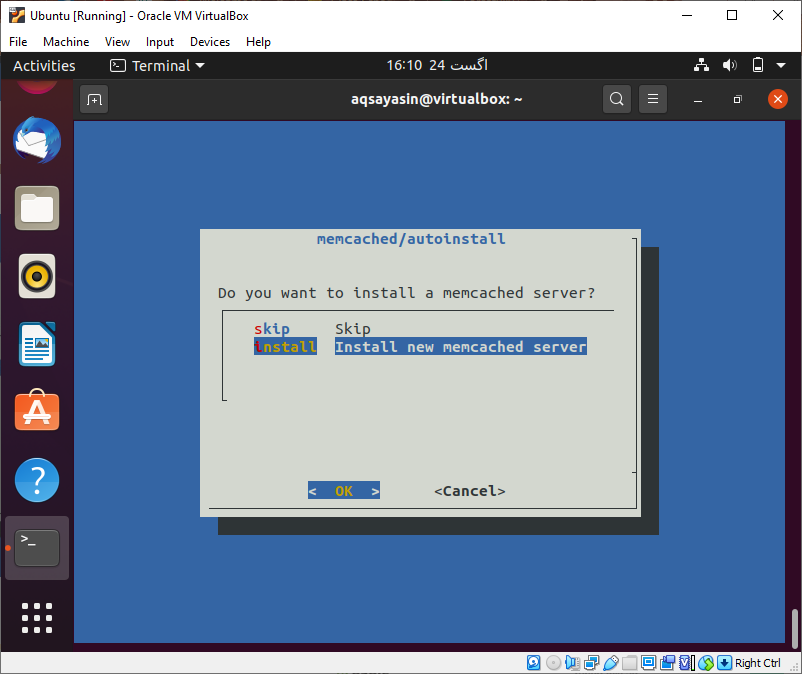
Install the Memcached server by selecting “Install”. Select “ok” and tap the “Enter” key.
The OpenProject installation process is now complete.

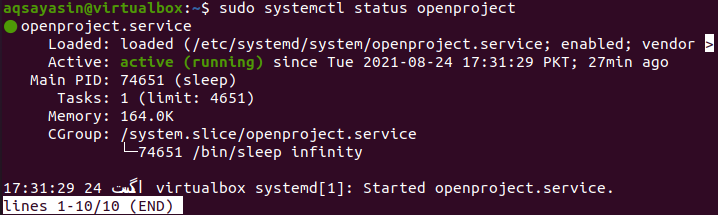
You can check the status of the OpenProject service with the systemctl command. It works perfectly.
$ sudo systemctl status openproject
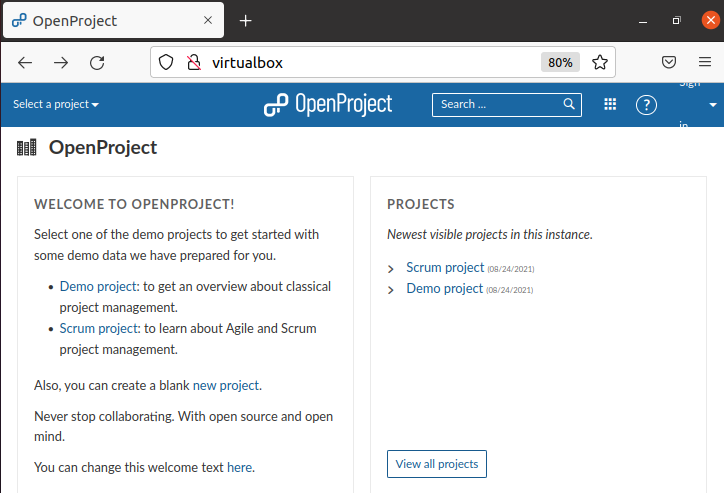
Step 5: Accessing OpenProject via the web
Open your browser and enter the domain URL to continue using OpenProject.
Conclusion
We have discussed all the steps to install and configure OpenProject on the Ubuntu 20.04 system. We hope that this guide will help you a lot with the implementation.