
Loss of valuable data and not being able to recover it is the most painful incident that can happen to any of us. To take precautions against this problem, a backup copy of the data needs to be created. A data backup is a copy of valuable data kept on your devices, such as computers, phones, or tablets, that is used to recover the valuable data that has been lost. Data loss is caused in a variety of ways, including failure of hard drives, ransomware, and even human error. Whatever the disaster, a backup of data could provide the relief you need to restore the data on your devices. It’s usually kept in a safe, different location from the original device, such as the cloud. One of the approaches we use in Linux to back up our data is using “rsync”. In this article on Ubuntu 20.04, we use the rsync approach to back up data.
The “rsync ” is a command-line application that is used for the transfer of files from local to local, local to remote places, and vice versa. It enables rapid progressive file transfer by sending the difference between the source and destination files.
How to Use rsync to Back Up Data on Linux
We can perform two types of backups using rsync mentioned below, which will be discussed later in detail:
- Use of rsync for Local Backups
- Automate backup using rsync
Syntax
From local to local:
$ rsync [Option]… [src]… dest
From local to remote:
$ rsync [option]… [src]… [user@]host:dest
From remote to local:
$ rsync [option]… [user@]host:src… [DEST]
- src: It is the source directory
- dest: It is the destination directory
- user: remote user
- host: remote hostname/ipaddress
Some of the options for rsync are:
Options
Explanation
- -a: archive
- -z: Compress
- -p: It shows a progress bar of the transfer of the file.
- –delete: It removes unnecessary files from the destination.
- -q: Quiet (displays no error message)
- -e: It allows you to choose a remote location.
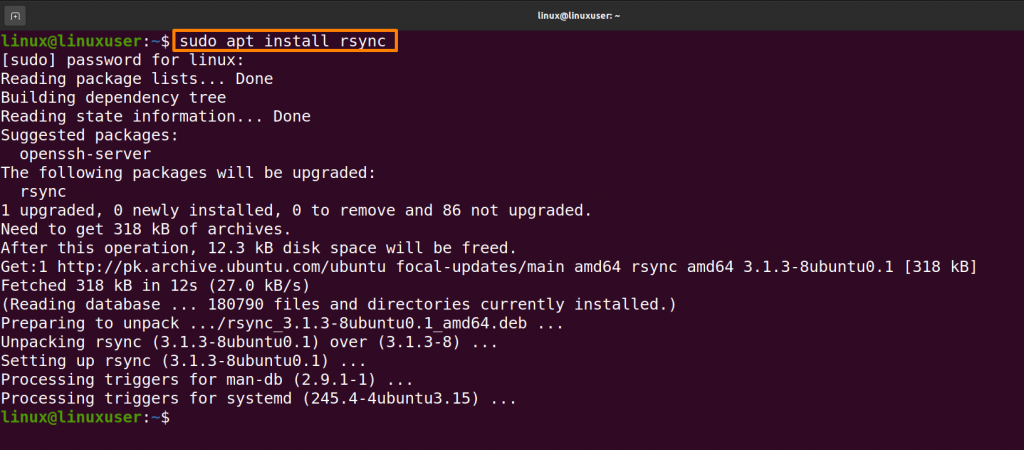
The rsync command comes pre-installed with new versions of Ubuntu, but if it is not installed, run the below-mentioned command:
$ sudo apt install rsync
Use of rsync for Local Backups
In this approach, we create the backup between two directories on the same drive. Below, we’ll copy the files from the “linux1” directory to the “linux2” directory. These directories are all on a similar hard drive, but this would function just as well if the directories were on separate drives.
$ rsync -av --delete linux_directory1 linux_directory2
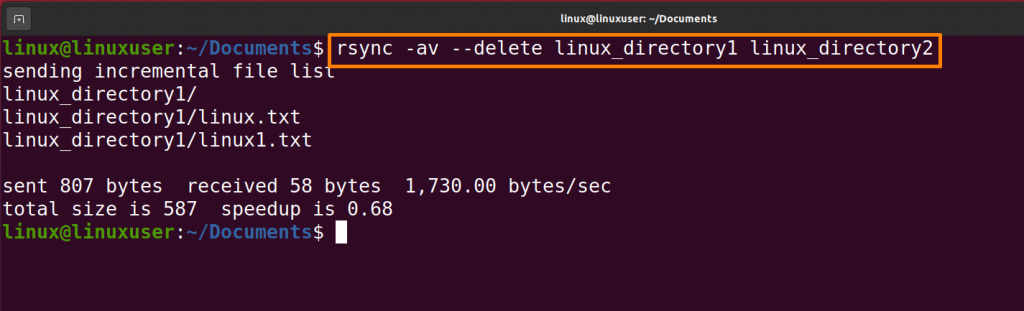
This copy command will create a backup of linux_directory1 to linux_directory2. The above will synchronize the contents of linux_directory1 and linux_directory2, leaving no gaps between the two. If “rsync ” discovers a file in linux_directory2 that linux_directory1 does not, it will destroy it. If rsync discovers a file in Directory1 that has been updated, created, or destroyed, it will replicate those modifications in linux_directory2.
Verification
Now list the contents of linux_directory2 with the below-mentioned command to check whether the data backup was created or not.
$ ls linux_directory2

Automate Backup using rsync
On Linux, Cron is used for automating command execution like rsync. We can run backups over the whole night on our Linux system, or however frequently you want them to run, using Cron. Run the below-mentioned command to edit the cron table.
$ crontab -e
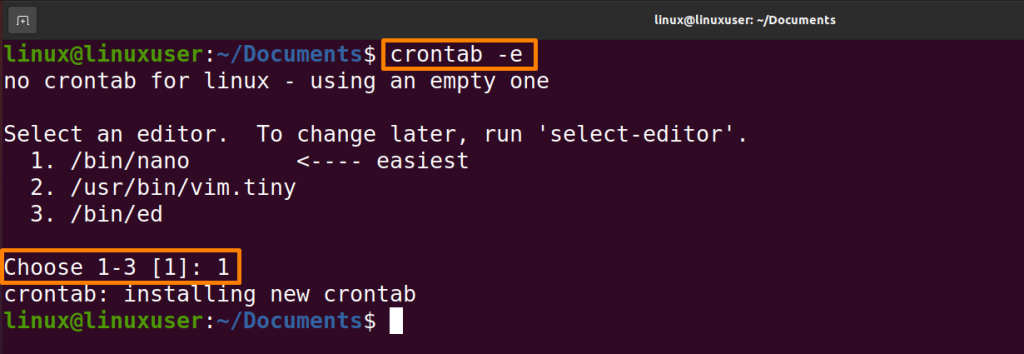
You can use any editor you’re comfortable with to modify this file. I want to edit a file in the “nano” editor, so I press “1” on the keyboard and press the Enter key. Cron’s syntax is as follows: minutes, hours, day of the month, month of the year, day of the week, command. The below-mentioned command, which is added to crontab, will run rsync to automatically create a backup of linux_directory1 in linux_directory2 every night at sharp 11 PM.
0 23 * * * rsync -av --delete /home/linux/Documents/linux_directory1 /home/linux/Documents/linux_directory2
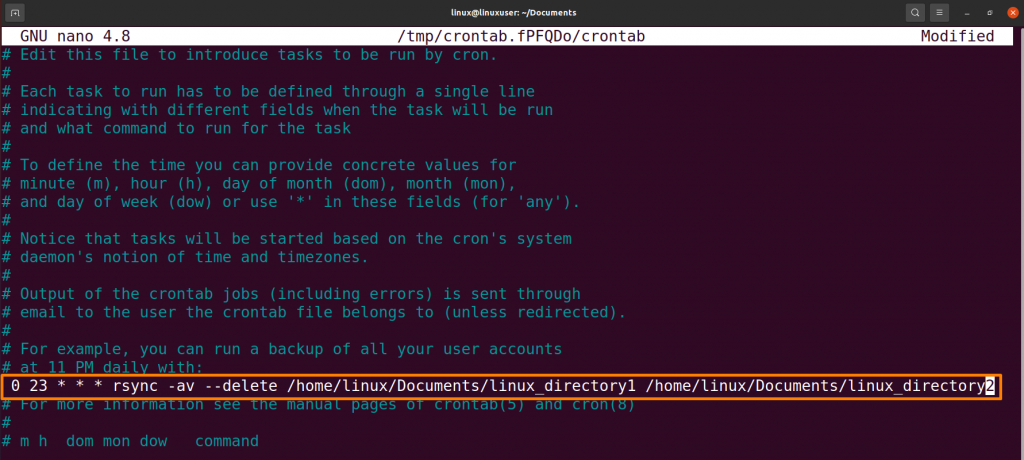
“0” shows minutes of 23, “23” shows 11, and since we want this command to run daily, we’ll leave the rest of the fields blank by placing “*”. After editing the cron, press escape (Ctrl+S) to save and Ctrl+X to exit the file.
Conclusion
Making a backup copy of your essential data is essential when you are using computers. Different tools are used for backing up data in Linux, in this article we discussed “rsync” to backup data on Ubuntu. The rsync is a command that is particularly used for copying files from local and remote networks. If you want to get saved from the problem of loss of data then follow the detailed procedure in this article.