Automad is a file-based open-source content management system and template engine written in PHP. Instead of using a database, Automad uses human-readable text files to store content, hence making it portable and easy to install. It can also be version-controlled by using Git or Mercurial. It offers database features like searching and tagging and provides a template engine that allows anyone to create their themes and templates.
Requirements
You require the following software
- PHP version 7.3 or higher.
- Web server software
Before we begin, let’s confirm if our system is running on Fedora 30 version. Issue the command below.
cat /etc/fedora-release
Fedora release 30 (Thirty)
Create a non-root user with sudo privileges.
useradd -c "Jane Doe" janedoe && passwd janedoe
Proceed to add the user to the wheel group since this group has full admin privileges.
sudo usermod -aG wheel janedoeSwitch to the user you just created
su - janedoeCheck for system updates and update the system packages.
sudo dnf check-upgrade && sudo dnf upgrade -y
Configure Date and time
The next step is to configure the date and time for your region’s timezone using the timedatectl utility.
To list all the available timezones, issue the following command
timedatectl list-timezonesNow issue the following command to change the current timezone
timedatectl set-timezone <time_zone>
Replace timezone with your preferred timezone value from the timedatectl list-timezones command.
INSTALL PHP
Let’s install PHP and its dependencies
dnf install phpInstall the following basic PHP extensions
sudo dnf -y install php-cli php-fpm php-mysqlnd php-zip php-devel php-gd php-mcrypt php-mbstring php-curl php-xml php-pear php-bcmath php-jsonTo confirm if PHP has installed, issue the following command
php -v
You should obtain PHP 7. 3 or higher, as shown below.
PHP 7.3.11 (cli) (built: Oct 22 2019 08:11:04) ( NTS )Copyright (c) 1997-2018 The PHP GroupZend Engine v3.3.11, Copyright (c) 1998-2018 Zend Technologies[root@fedora-s-1vcpu-1gb-nyc3-01 ~]# Start and enable the PHP-FPM service using the following commands
systemctl start php-fpmsystemctl enable php-fpmYou should obtain the following output
Created symlink /etc/systemd/system/multi-user.target.wants/php-fpm.service → /usr/lib/systemd/system/php-fpm.service.INSTALL NGINX
NGINX, pronounced like “engine-ex” is a popular open-source web server used as a web server, reverse proxy, HTTP cache load balancer well as an IMAP/POP3 proxy server. Nginx is powering over 400 million websites worldwide. In addition, it also offers low memory usage and high concurrency since it uses an asynchronous, event-driven approach for handling connections.
sudo dnf install -y nginx
You should see something like this:
Last metadata expiration check: 0:37:48 ago on Thu 07 Nov 2019 09:03:43 PM EAT.Dependencies resolved.================================================================================ Package Architecture Version Repository Size================================================================================Installing: nginx x86_64 1:1.16.1-1.fc30 updates 548 kInstalling dependencies: gperftools-libs x86_64 2.7-5.fc30 fedora 287 k libunwind x86_64 1.3.1-2.fc30 fedora 63 k nginx-mimetypes noarch 2.1.48-5.fc30 fedora 20 Start the NGINX server by executing the following command.
systemctl start nginxYou can also check the status of the NGINX server by issuing the following command.
systemctl status nginxYou should obtain the following output if iNGINX is active.
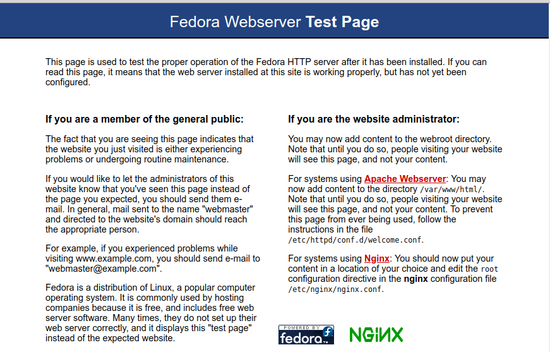
? nginx.service - The nginx HTTP and reverse proxy server Loaded: loaded (/usr/lib/systemd/system/nginx.service; disabled; vendor preset: disabled) Drop-In: /usr/lib/systemd/system/nginx.service.d ??php-fpm.conf Active: active (running) since Thu 2019-11-07 21:45:56 EAT; 10s agoNavigate to your server, and you should see something like this:
NGINX Configuration
Automad comes already configured to run on the Apache server, but since you want to install Automad on an NGINX server, you need to create automad.conf file
Create automad.conf by running the command:
sudo nano /etc/nginx/conf.d/automad.conf Add the following contents to it
server {
  listen 80;
  server_name example.com;
  root /var/www/automad;
  index index.php index.html;
  client_max_body_size 100M;
  location / {
    try_files $uri $uri/ /index.php$is_args$args;
  }
  location ~ \.php$ {
   fastcgi_index index.php;
   fastcgi_pass unix:/run/php-fpm/www.sock;
   fastcgi_param SCRIPT_FILENAME $document_root$fastcgi_script_name;
   include fastcgi_params;
   }
}
Replace example.com at server_name example.com; with your server name
Test if the configuration file is okay.
sudo nginx -tIf the configuration file is okay, you should get a message like this:
nginx: the configuration file /etc/nginx/nginx.conf syntax is ok
nginx: configuration file /etc/nginx/nginx.conf test is successful
Install Automad CMS
The last part is to install Automad CMS on your fedora server. The latest version of Automad can be found on the official site.
Create a new directory /var/www/automad and change the ownership to janedoe
sudo mkdir /var/www/automadsudo chown -R janedoe:janedoe /var/www/automad
Download and extract the latest version, unzip it and move it to the var/www/automad directory
wget https://bitbucket.org/marcantondahmen/automad/get/default.zip
unzip automad-masterGo into the automad directory
cd /var/www/automadMove all the files to the document root
mv automad-master/* . && mv automad-master/.* .Dont forget to remove the residue files.
sudo rm automad-master.zip sudo rm -rf automad-masterChange the ownership of Automad to nginx for it to function properly
sudo chown -R nginx:nginx /var/www/automadEdit the /etc/php-fpm.d/www.conf and change the user and group from apache to nginx.
sudo nano /etc/php-fpm.d/www.conf#/etc/php-fpm.d/www.conf
# user = nginx
# group = nginxRestart the PHP-FPM service.
sudo systemctl restart php-fpm.serviceReload NGINX for any changes
sudo systemctl reload nginx.serviceThe process is now complete, and you can now navigate to https://yoursite.com/dashboard and set up your CMS. The CMS dashboard provides instructions to follow to get Automad set up ready. You should see something like this.
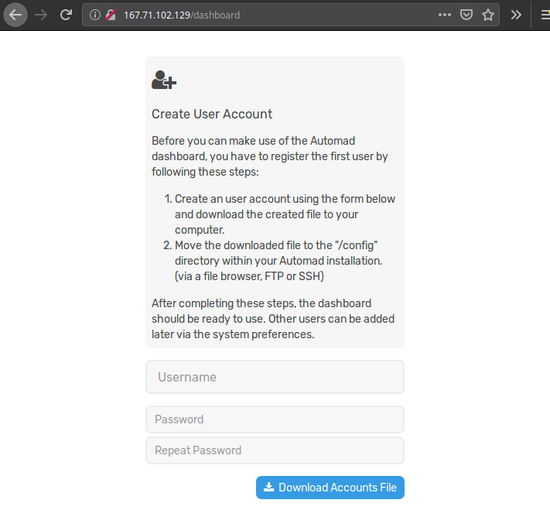
Create a user account and download the file to your local server. Move now the downloaded file (accounts.php) to your “/config” directory.
scp accounts.php <user>@server:/var/www/html/automad/config/The Automad dashboard should be ready to use
You can now logon to the dashboard: